Gingerbread House Tips and Tricks
As soon as Halloween is over, my kids start asking me when we can make a gingerbread house. Making gingerbread houses at Christmas time has become a fun tradition in our family, and I suspect it is for many of you as well. I will admit, however, that I have become a little lazy in my gingerbread house making pursuits. I often resort to buying a gingerbread house kit from Walmart. There is nothing wrong with buying a kit; especially if you are short on time, but making a gingerbread house from scratch can be a lot of fun, and there are several ways to do it. Here are some tips and tricks that will perhaps make your gingerbread house construction more successful this year.
The first step to making a gingerbread house is making the gingerbread! There are two important things to remember when making your gingerbread from scratch. First of all, you want your gingerbread to be firm. Although soft gingerbread may be tastier, it isn’t the greatest for construction. Secondly, you want to make sure your gingerbread is completely cool before you start building. Warm gingerbread won’t hold its form and the glue won’t stick. If you don’t have time to make gingerbread from scratch, you can buy a packaged gingerbread cookie mix. You also build your house out of graham crackers or rice krispy treats.
Once your gingerbread house pieces are cool and ready to go, you will need a strong glue to hold the pieces together. In my opinion, the best glue to use if you really want to make it stay is hot glue. Hot glue guns work wonders on gingerbread houses! Many people like to eat their gingerbread houses though so using edible icing glue is probably a better option. Here is a great recipe for icing glue…
Royal Icing
2 egg whites*
3-4 cups powdered sugar
1 tsp vanilla extract
Directions:
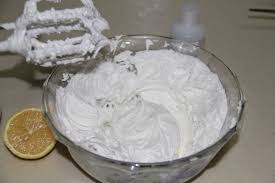
In a large bowl beat the egg whites until frothy.
Gradually add the powdered sugar, half of a cup at a time, making sure to scrap down the sides of the bowl if necessary, until the icing becomes thick.
Add the vanilla extract and beat until soft peaks form.
Place the prepared frosting into an air tight container and leave at room temperature until ready to use. Or place directly in to a frosting bag fitted with a tip and use immediately.
* If you prefer not to use raw egg whites, you can substitute with Meringue powder. Meringue powder can be purchased on Amazon or craft stores that sell cake decorating supplies.
If you do use icing glue, you will need it to stay moist throughout the process. If the icing hardens too quickly, you will have a tough time making anything stick to it. To keep your icing glue moist, consider placing a wet paper towel over your bowl of glue. It will help!
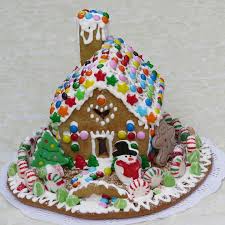
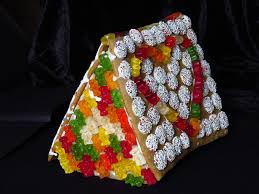
Once your house is constructed, the fun part begins! It is helpful if you have a plan or an idea of how you want your gingerbread house to be decorated. It is also helpful to organize your decorating supplies. Consider using a muffin tin to separate candies into different kinds or colors. Of course, you don’t have to limit yourself to decorating with just candy. Cereal pieces like frosted mini-wheats can make great roof tiles. Save some powdered sugar to “dust” your house with snow at the end. Making trees around your gingerbread house could be as simple as buying sugar cones, turning them upside and covering them with green frosting. Fruit Roll-Ups or Fruit-by-the-Foot make great stain-glass windows.
The most important thing, in my opinion, is that the gingerbread house making process is an enjoyable experience for everyone. Make sure you give yourself plenty of time. It may even take several days to complete one. Be creative, have fun, and Merry Christmas!
- https://jane.com/blog/how-to-build-the-best-gingerbread-house/
- https://www.iwashyoudry.com/2013/12/03/how-to-make-royal-icing/
- https://www.kingarthurflour.com/gingerbread/house.html
- https://www.masslive.com/food/2015/12/tips_and_tricks_to_build_a_bet.html
 Cristina Duke
Monthly Newsletter Contributor since 2014
Email the author! cristina@dvo.com