Solar Ovens
Eeeking out the last part of summer and it seems endless and the last thing we want to do in the heat is to cook. When it gets hot like that our family turns to fresh vegetables, and fruits, and foods that don’t require much heat. Another option is using the slow cooker, or even using outdoor cooking options like a solar oven.
This article will show you how to make your own solar oven. These ovens are great in the summer and though some options get costly, these aren’t too bad. You may even have several of the items hanging around your home.
Solar ovens are great because the heat come naturally from the sun, costs nothing, and keeps your house cooler. Cooking with solar ovens impress the little kids, and some of the big and biggest kids as well.
The first option makes a solar oven out of a pizza box. You probably don’t want to use a super greasy, pizza box that looks like your pizza guy dropped the pie upside down in the truck before you got it for the solar oven. I am not saying you have to buy a box, just use a clean-ish one. These directions include ingredients to test out your oven with s’mores. This project will take 1 to 2 hours.
Here is the complete list of materials you will need:
- Large pizza box
- Pencil and ruler
- Craft knife
- Aluminum foil
- Scissors
- Glue stick
- Black construction paper
- Clear packing tape
- Clear plastic (we used 2 sheet protectors, available at office supply stores)
- Graham crackers, chocolate bars, and marshmallows
- Stick or dowel
How to make it
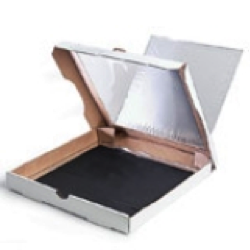
1. On the top of the pizza box, draw a square that is an inch smaller than the lid all the way around. Use the craft knife (adults only) to cut through the cardboard along three sides, as shown, and then fold the cardboard up along the uncut line to form a flap.
2. Glue aluminum foil, shiny side out, to the bottom of the flap, keeping it as wrinkle-free as you can.
Glue another piece of foil to the inside bottom of the box, then tape black construction paper on top of the foil. Tape clear plastic to the underside of the lid to seal the opening created by the flap. For the best results, the seal should be as airtight as possible.
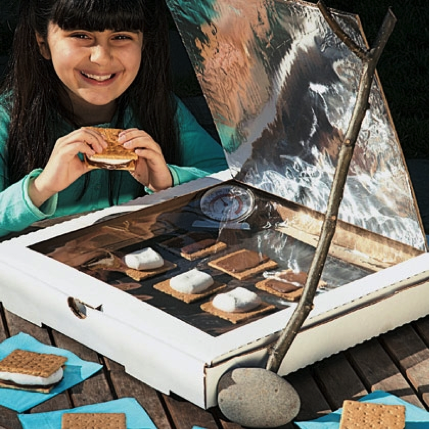
3. Place your oven outdoors in direct sunlight with the flap opened toward the sun. For each s'more, center two graham crackers on the construction paper. Top one with chocolate and the other with a marshmallow. Close the box and then use a stick or dowel to prop the flap open at the angle that reflects the most sunlight into the box (check it periodically to adjust the angle).
4. Within an hour (or sooner if it's a really hot day), the chocolate squares and marshmallows should melt enough to assemble into s'mores.
Here is for the teaching moment:
Why this works? If you've learned about the greenhouse effect, you may have already guessed how the oven works. The foil flap gathers sunlight and reflects it through the plastic and into the oven, doubling the amount of incoming light. The black paper absorbs the light and converts it to heat, and the clear plastic allows the sun to shine in while keeping all that heat from escaping. (In the greenhouse effect, atmospheric gases allow sunlight to pass through to the earth's surface but keep the heat it generates from escaping back into space.) As more light hits the black paper, more heat is created and trapped. After an hour or so on a sunny day, the oven can be as hot as 275 degrees -- hot enough to melt chocolate and marshmallows.
- https://spoonful.com/crafts/solar-smores
 Sharon Ng
Monthly Newsletter Contributor since 2012
Email the author! sharon@dvo.com