
BBQ Battle: Dry Rub vs. Wet Rub Ribs
By Whitney Saupan
Last year around this time, I had the opportunity to go to a BBQ battle in Washington D.C. Up until that point, I hadn't realized that barbequing was such a big deal. Don't get me wrong, I've been to tons of barbeques in my life, but I generally just eat the food, never cook it. So I was amazed by what I saw there. Then the other day my brother and I were talking about what we should make at our next BBQ and he started talking about dry rub ribs and wet rub ribs. I didn't know there was a difference! I was wrong. So because I'm a pretty curious person, I decided to do a little research and see if I could understand the difference between dry rub and wet rub ribs and determine which one is better.
Dry Rub Ribs vs. Wet Rub Ribs:
Obviously a dry rub includes only dry ingredients. Some popular ingredients in a dry rub include garlic salt, celery salt, pepper, cayenne pepper and brown sugar. Paprika is the base for a majority of dry rub recipes. Most rubs have equal amounts of six to 10 herbs and spices. The purpose of a dry rub is to create a crust; it enhances the flavor without adding moisture. It's a good idea to use on ribs or food that is cooked faster and on food that doesn't tenderize easily. It's also a great way to keep the natural flavor of meat but add a little something extra.
How to use dry rubs: massage the rub in by hand before grilling; the more time it has to sit on the meat the more the flavors will sink in. If you want a savory, crispy crust make sure your cooking surface is really hot. Lower the grate as close to the coals as possible. Hardwood charcoal creates a hotter fire, but wood chips can be sprinkled over coals to increase temperature.
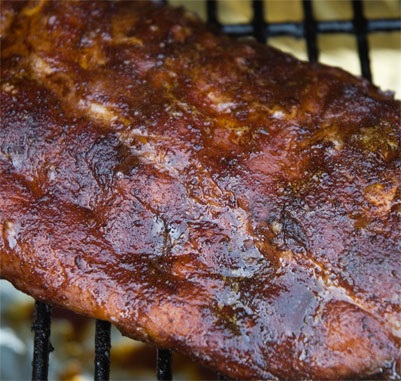
A hot cooking surface will sear the rub into the skin quickly, which sounds like a cross between hissing and heavy rain on asphalt. It will darken quickly and may smell slightly smoldering, so move the ribs to a lower temperature to finish grilling when the outside looks dark enough.
Wet rub ribs contain some of the same seasonings as the dry rub but it has a liquid base like vinegar or oil. Some popular ingredients include olive oil, vinegar, beer, pepper and brown sugar. A good rub should have a paste consistency; this allows the rub to stay on the ribs better.
The wet rub is best when applied generously and cooked slowly; slow cooking is the ideal method for flavoring meat all the way through. The ribs draw moisture in form the rub while charring the outside.
How to use wet rubs: take the rub and smother the meat in it. If time permits, wrap it in plastic and let it sit in the fridge for an hour before grilling. Keep the grill cover down, the vent mostly closed, and slather more on whenever it's time to flip over. A thick paste will absorb the flavor of your grill, and smoking or slow cooking will enable the wet rub to form a firm, dark outer layer while moisture, aroma, and flavor are soaked up. If the rub is high in sugar content, keep the temperature lower so it won't burn but caramelize, browning the meat.
Now that you know a little about the difference between dry and wet rubs, give these amazing recipes a try! I can't wait to try these recipes at my next family BBQ! If you have a favorite rib recipe let us know!
Last Meal Ribs
The Best Barbecue Ribs You've Ever Tasted!
Serving size: 2
Calories per serving: 180
1 slab of fresh ribs 1/2 slab per adult.
3 tablespoons vegetable oil
4 tablespoons Meathead's Memphis Dust or a similar spice rub
1 cup homemade barbecue sauce or a good commercial barbecue sauce
Directions:
If the butcher has not removed the membrane from the back side, do it yourself. It gets leathery and hard to chew, it keeps fat in, and it keeps smoke and sauce out. Insert a butter knife under the membrane, then your fingers, work a section loose, grip it with a paper towel, and peel it off. Finally, trim the excess fat from both sides. If you can't get the skin off, with a sharp knife, cut slashes through it every inch so some of the fat will render out during the cooking.
Coat the meat with a thin layer of vegetable oil because most of the flavorings in the rub are oil soluble, not water soluble. The oil will help the flavor get beyond the surface and help make the bark, the desired crust on the top. A lot of seasoned barbecue cooks use a base of mustard, but I think oil works better. Sprinkle enough Meathead's Memphis Dust to coat all surfaces but not so much that the meat doesn't show through. That is about 2 tablespoons per side depending on the size of the slab. Spread the Memphis Dust on the meat, rub it in, and let it sit in the fridge for about an hour. Some folks insist on putting the rub on the night before, but I don't think this is necessary.
Set up your cooker for 2-Zone or indirect cooking.
Preheat your cooker to about 225°F and try to keep it there throughout the cook. This is crucial: You can absolutely positively noway, nohow rely on bi-metal dial thermometers. Even if you spent a fortune on your grill they mount unreliable thermometers on them. If you are not monitoring your cooker with a good digital oven thermometer, you are setting yourself up for disappointment. Using a dial thermometer is like trying to send email with a typewriter.
On a charcoal grill, adjust the air intake dampers at the bottom to control heat on charcoal grills. Intake dampers are more effective than exhaust dampers for controlling the temp because they reduce the supply of oxygen to the coals. Take your time getting the temp right. Cooking at 225°F will allow the meat to roast low and slow, liquefying the collagen in connective tissues and melting fats without getting the proteins knotted in a bunch. It's a magic temp that creates silky texture, adds moisture, and keeps the meat tender. If you can't hit 225°F, get as close as you can. Don't go under 200°F and try not to go over 250°F. Click here for more about how to calibrate your grill. To learn more about what happens inside the meat when it is cooking read my article on meat science.
Smoke. For charcoal or gas cookers, add 4 ounces of wood at this time. On a gas grill, put the wood as close to the flame as possible. On a charcoal grill, put it right on the hot coals. Resist the temptation to add more wood. Nothing will ruin a meal faster and waste money better than oversmoked meat. You can always add more the next time you cook, but you cannot take it away if you oversmoke.
Put the slabs in the cooker on the indirect side of the grill, meaty side up. Close the lid and wait.
When the smoke dwindles after 20 to 30 minutes, add another 4 ounces of wood. That's it. Stop adding wood. If you have more than one slab on, halfway through the cook you will need to move the ribs closest to the fire away from the heat, and the slabs farthest from the flame in closer. Leave the meat side up. There is no need to flip the slabs. You can peek if you must, but don't leave the lid open for long.
This trick involves wrapping the slab in foil with about 3 ounces of liquid such as apple juice, for up to an hour to speed cooking and tenderize a bit. Almost all competition cooks use the crutch to get an edge. But the improvement is really minimal and I never bother for backyard cooking. If you crutch too long you can turn the meat to mush and any time in foil can soften the bark and remove a lot of rub. I recommend it only for competition when the tiniest improvement can mean thousands of dollars. Skip it and you'll still have killer ribs.
Although I insist that you buy a good digital meat thermometer for grilling, this is one of the few meats on which you cannot use a thermometer because the bones have an impact on the meat temp and because the meat is so thin. Allow 5 to 6 hours for St. Louis Cut ribs and spare ribs, or 3 to 4 hours for baby back ribs. The exact time will depend on how thick the slabs are and how steady you have kept the temp. If you use rib holders so they are crammed close to each other, add another hour. Then check to see if they are ready. I use the bend test (a.k.a. the bounce test). Pick up the slab with tongs and bounce it gently. If the surface cracks, it is ready.
Now paint both sides with your favorite home made barbecue sauce or store-bought sauce and put it directly over the hottest part of the grill in order to caramelize and crisp the sauce. On a charcoal grill, just move the slab over the coals. On a gas grill, remove the water pan and crank up all the burners. On a water smoker, remove the water pan and move the meat close to the coals. On an offset smoker, put a grate over the coals in the firebox and put the meat there. With the lid open so you don't roast the meat from above, sizzle the sauce on one side and then the other. Stand by your grill and watch because sweet sauce can go from caramelized to carbonized in less than a minute! One coat of a thick sauce should be enough, but if you need two, go ahead, but no more! Don't hide all the fabulous flavors under too much sauce. If you think you'll want more sauce, put some in a bowl on the table.
If you've done all this right, you will notice that there is a thin pink layer beneath the surface of the meat. This does not mean it is undercooked! It is the highly prized smoke ring caused by the combustion gases and the smoke. It is a sign of Amazing Ribs. Now be ready to take a bow when the applause swells from the audience.
Recipe formatted with the Cook'n Recipe Software from DVO Enterprises.

BBQ (Barbecue) Wet Rub
Author: Dave Dallas Total Time: 1 hrs 10 mins
Cook time:
Yield: Serves: 2-4
Serving size: 3
Calories per serving: 294
1/2 cup raw sugar (raw, not brown sugar)
1 teaspoon onion powder
1 teaspoon garlic powder
1 teaspoon cumin
1 teaspoon chili powder
1 teaspoon paprika
1 teaspoon coriander powder
1 teaspoon cracked black pepper
1 teaspoon sea salt
1/4 cup extra virgin olive oil
1/4 cup sour mash whiskey
hickory wood chunks, soaked in water
Directions:
Stir in 1/4 cup of extra virgin olive oil and 1/4 cup sour mash whiskey (I use "Jack Daniel's").
Rub mixture into meat, cover and marinate overnight.
Grill meat over low/medium coals until done to taste.
Note: a great rub for any thick cut of beef, pork or chicken! I grill/smoke on the upper rack (unlit side) of my dual burner gas grill, only lighting the burner on the far side which has a small pan filled with hickory chunks nestled in the midst of the briquettes.
*raw sugar differs from brown sugar despite the cosmetic similarities; raw sugar (unrefined) does not burn and/or caramelize as traditional brown sugar. Even the grocers in our small town carry this product.
Recipe formatted with the Cook'n Recipe Software from DVO Enterprises.
- https://www.primermagazine.com/2010/learn/the-rub-on-grills-an-intro-to-dry-rubs-and-wet-rubs
- https://www.examiner.com/article/what-is-the-difference-between-a-dry-bbq-rub-and-a-wet-bbq-rub
- https://www.food.com/recipe/bbq-barbecue-wet-rub-321498
- https://www.amazingribs.com/recipes/porknography/best_BBQ_ribs_ever.html

Whitney Saupan
Weekly Newsletter Contributer since 2013
