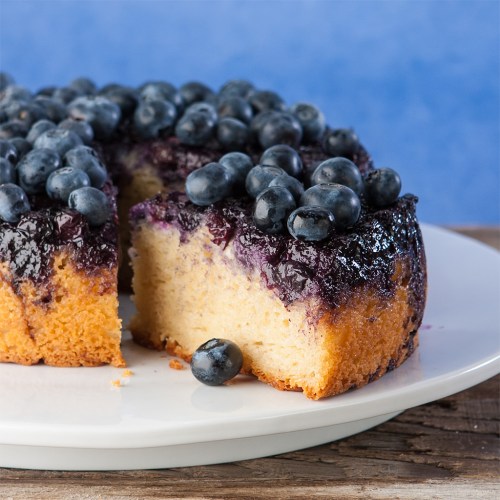
Secrets To Making an Upside Down Cake Using ANY Fruit!
A few weeks ago I wrote about the health benefits of kiwi and shared a recipe for using it in an upside down cake. We received lots of good feedback on that idea. So that caused me to wonder if you could use other fruits as well (besides pineapple, I mean).
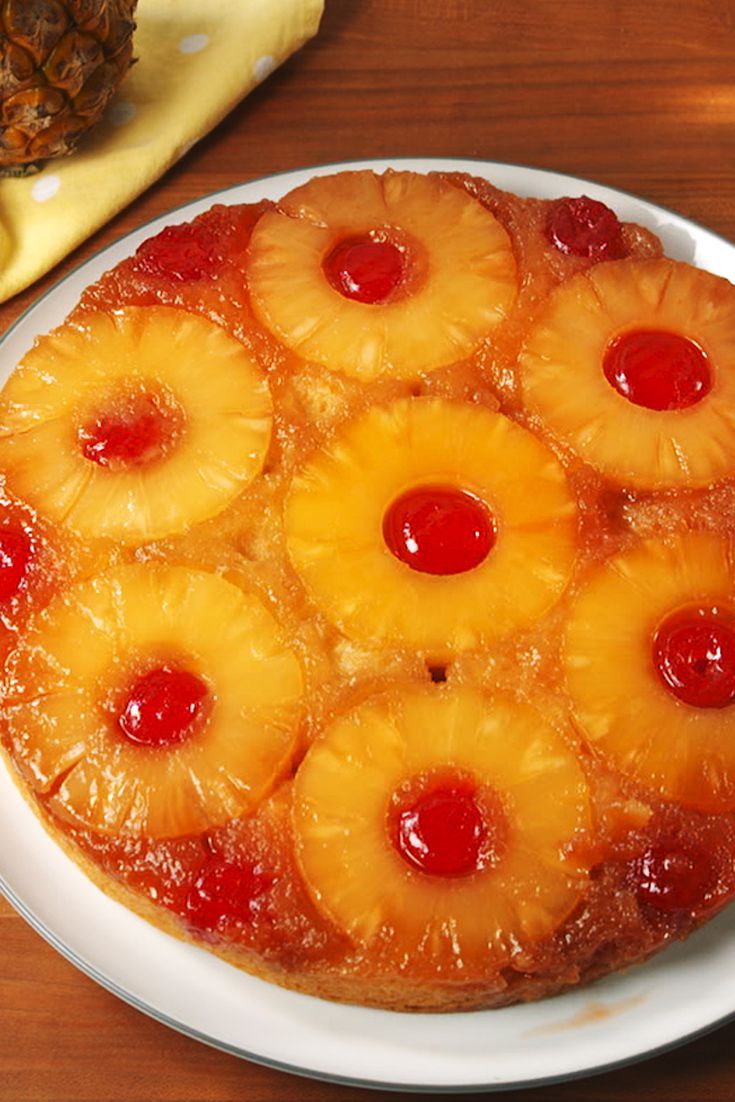
The pineapple theme was developed sometime around the turn of the last century, when canned pineapple was invented. The pineapple upside-down cake is a classic American cake that has probably passed the peak of its popularity (according to folks who track food trends). It's just a fact that tastes have changed over the last 100 years and things like canned pineapple and maraschino cherries aren't considered as classy as they once were. That said, though, the upside-down cake, with its buttery brown sugar glaze balanced by the simple white cake underneath it all, still holds some fascination.
But back to question regarding the possibility of using other fruit, food researcher and cookbook author, Dana Velden, answered my wondering on a favorite site, Food 52 (www.food52.com). In a nutshell, she said, “What many people don't know is that nearly any fruit can be subbed in for the proverbial pineapple-cherry combo with fresh, delicious results.”
She says that because she really likes the pineapple version, only she omits the day-glo maraschino cherries and uses fresh pineapple instead of canned. After many experiments with alternative fruits, though, she’s found spectacular success using fresh or frozen seasonal fruit and some chopped fresh herbs.
And her secret is a master recipe for a basic upside-down cake foundation that works well with fresh fruits all year long!
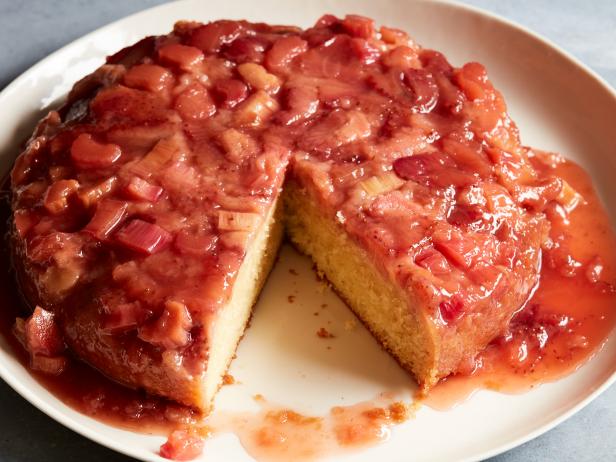
This cake lends itself towards any fruit that cooks up well, which is any fruit you'd make a pie with. One of her favorite combinations that she’s used over and over is strawberries and rhubarb: “Every test group that’s tried this has raved about it!” she says.
But you can also use peaches, nectarines, fresh cherries, berries, apples, pears, bananas, mangos, apricots, or figs. Or get creative and combine any of these. Dana has also found that plums work well if they’re not too ripe and juicy. I’m wondering if you could even use citrus such as oranges, grapefruit, and lemons? Anyone ever tried this? I think I will, and I’ll report back.
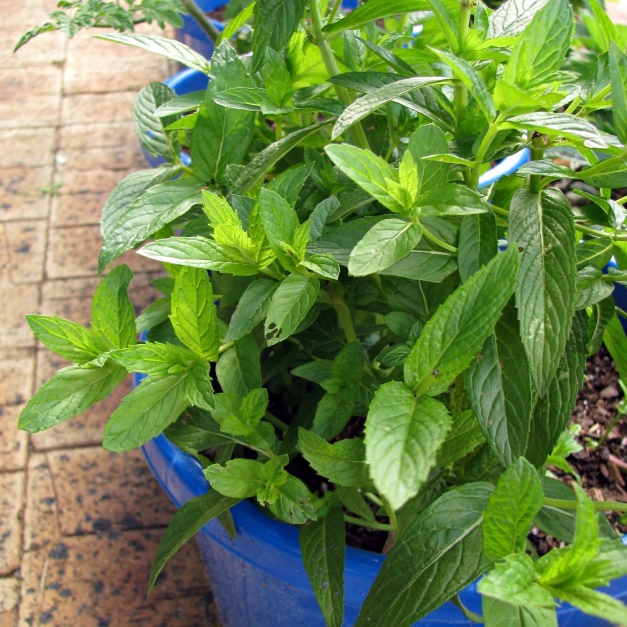
And those finely chopped herbs she likes to use? She’s talking about basil or lemon thyme. Peaches and nectarines are great with basil and lemon thyme is delicious with just about anything. She’s also tested mint, which works with almost any fruit as well. And she found that rosemary is delightful with figs. And of course, spices such as cinnamon make a perfect fall versions of this cake when combined with fresh apples, persimmons, or pears.
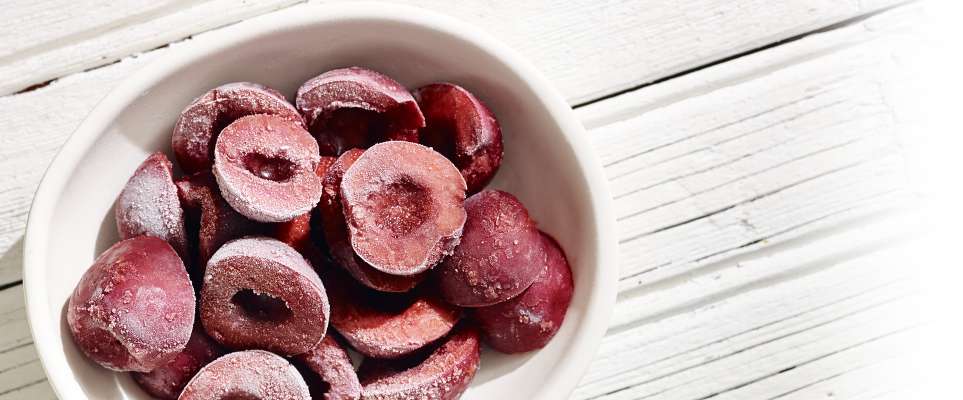
If you decide to use frozen rather than fresh fruit, just be careful not to use fruit that has been stored in juice or syrup. You want unsweetened, individual pieces — and be sure that they are still frozen when adding them to the topping before baking, as they are easier to handle that way.
One last thing before I share her master upside down cake recipe: It uses less sugar than the classic recipe, which can have up to one cup of brown sugar and a whole stick of butter for the topping alone. Through her testing, Dana found that using less butter and sugar really allows the taste of the fruit to come through. But fear not, she says; you’ll still have that yummy and sticky decadent topping!
ANY FRUIT UPSIDE DOWN CAKE
TOPPING:
3 tablespoons unsalted butter
1/2 cup sugar
2 to 3 cups sliced or chopped fruit
3 to 4 tablespoons chopped fresh herbs (optional)
CAKE:
1 1/2 cups all-purpose flour
1 teaspoon baking powder
1/2 teaspoon salt
1/2 cup unsalted butter, room temperature
1 cup sugar
2 large eggs
1/2 cup whole milk
EQUIPMENT:
9-inch round cake pan or oven-safe skillet
Knife and cutting board for prepping fruit if necessary
Measuring cups and spoons
Stand mixer
Medium bowl and whisk
Spatula
Cake plate
Prep the fruit and preheat oven. Preheat your oven to 350°F. If you are using fresh fruit, be sure it is washed and dried. Slice it into wedges or dice it into large 1" chunks. Most berries can be left whole and smaller stone fruit such as cherries and apricots can be halved. If using frozen fruit, do not defrost.
Make the sugar glaze. Place your baking pan or skillet on a burner over low heat and add the butter. Once the butter has melted, add the sugar and stir it gently.
Arrange the fruit. Add the chopped fruit to the pan and arrange in a single layer on top of the butter and sugar mixture.
Whisk together the dry cake ingredients. In a medium mixing bowl, whisk together the flour , baking powder and salt.
Add the fruit to the pan. Arrange the fruit in a single layer in the baking pan, being sure to crowd the pan as much as possible. The fruit will shrink a little when cooked. If using herbs, sprinkle them on top of the fruit.
Cream the butter and sugar together with a hand mixer. Add the eggs. Combine the butter and sugar in a large mixing bowl. Using a hand mixer, cream the butter and sugar together until lightened and creamy, about 5 minutes. Add the eggs and mix until smooth, an additional minute of mixing.
Add the flour mixture and milk in alternating batches. With the hand mixer on low speed, add the flour mixture in three batches, alternating with the milk, like this: Add ⅓ of the flour mixture and mix until incorporated about 30 seconds. Add half of the milk, mixing until smooth, about 30 seconds. Add another third of the flour, mixing again for about 30 seconds, followed by the remaining pineapple juice and 30 seconds of mixing. Finally add the last third of the flour and mix until completely smooth, about 1 minute total.
Top with the cake batter. Dollop the fruit with the cake batter, being sure it is evenly distributed. Smooth with a spatula.
Bake for 40 to 45 minutes. Place the cake in the oven. You might want to put it on a baking sheet to catch any overflow (sometimes the fruit bubbles up). Bake for 40 to 45 minutes, or until the top of the cake is golden brown and a thin knife or toothpick inserted in the center comes out clean.
Transfer to a cake plate. Remove the cake from the baking sheet and place it on a cooling rack. Let the cake settle for a minute, until any fruit that has leaked up the sides has stopped bubbling. Do not let the cake cool or you will not get it out of the pan! Run a knife around the edges of the cake. Place your cake plate over the cake and, using hot pads, carefully flip the cake over. Gently remove the cake pan. Be careful, as the fruit and glaze is still quite hot and will burn!
Re-arrange the fruit and let the cake cool. If any pieces of fruit are stuck to the cake pan, gently scrape them up with a knife and replace them on the cake. Let the cake cool.
Serve. Serve the cake at room temperature or slightly warm. Optional: top with barely sweetened whipped cream. To store, wrap carefully in plastic wrap or store in an airtight container. Will keep for several days.
RECIPE NOTE:
Storage: To store, wrap carefully in plastic wrap or store in an airtight container and keep for several days at room temperature.
- www.delish.com
- www.snack-girl.com
- www.foodnetwork.com
- www.pinterest.com
- www.foodingredients.treetop.com
- www.glutenfreecanteen.com
 Alice Osborne
Weekly Newsletter Contributor since 2006
Email the author! alice@dvo.com