Naked Cakes 101
I just had the best time spending time with my family this last week because my youngest brother got married. He is the last one of eight children to get married so it was very exciting! One of my favorite parts of the wedding was their beautiful wedding cake that my sister made for them. And I’ll tell ya, part of the reason I loved it so much was because it was stunningly beautiful but looked like something that I could possibly make myself.
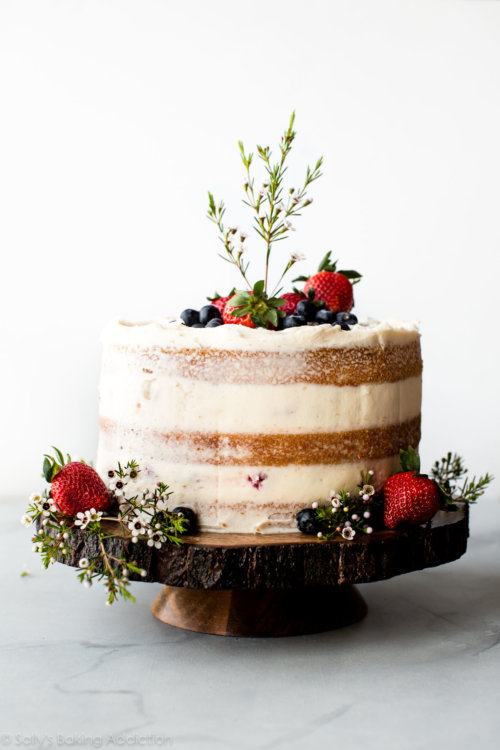
She made a beautiful, simple cake called a naked cake. Well, technically it was a semi-naked cake. Have you heard of them? They have become quite popular the last few years, especially because they fit in perfectly with a shabby, chic wedding theme that so many people are loving. They are perfect for weddings, baby showers, bridal showers and other parties.
There are 2 types of naked cakes. The cake in the photo above is called a “semi-naked” or “half dressed” cake. There’s a minimal amount of frosting swiped around the sides. So in other words, a semi-naked cake is a crumb-coated cake.
Or you can simplify the design even further with a true naked cake. This means the sides of the cake are bare. Both styles are simple, approachable, and beautiful.
I was so take taken aback by this simple cake that I wanted to look into it and find some tips and tricks for us amateurs to be able to make a beautiful naked cake ourselves. Here are some wonderful tips from Sally from sallysbakingaddiction.com:
5 TIPS FOR HOMEMADE NAKED CAKES
Make a plan. Think about how much frosting you want. Do you want a naked cake or a semi-naked cake? What about decor? There are plenty of suggestions below.
Prep the cake pans appropriately. Use quality cake pans and grease them well. I always use nonstick spray. Use an equal amount of batter per pan. Easiest and most accurate way to do this is to whip out your kitchen scale. Place your cake pan on top and begin pouring. Make sure each pan weighs the same.
Level your cakes. Level off the top of your cakes so each side is flat. Flat and even layers add stability to your finished cake. You can use a cake leveler or large serrated knife. I always use my serrated knife.
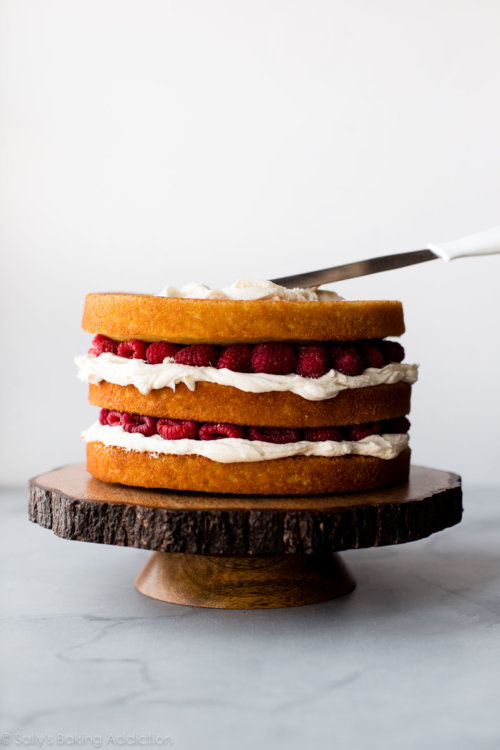
Just keep it simple. Make it easier on yourself. I’ve seen many naked cakes calling for a soak in simple syrup to prevent it from drying out. You can absolutely take this route, especially if you’re making a true naked cake, but I don’t find the need if you’re starting out with an already moist cake. Lots of naked cake tutorials I’ve seen online call for piping frosting between layers, but I skip this too. I use an icing spatula to spread the frosting. The frosting recipe below yields about 4.5 cups. I used 1.5 cups between each layer and another 1.5 cups on the top and around the sides.
The fridge is your best friend. Always chill your naked cake in the refrigerator for a few hours before slicing and serving. This stabilizes all your hard work! It helps the frosting adhere to the sides of the cake and in between the cake layers, as well as ensuring a neater slice. Then you can set the cake out at room temperature for your party or celebration.
Here are some decor ideas.
Sally likes to keep it simple with florals and berries, but you can go wild. She recommends starting simple, then building on what you have.
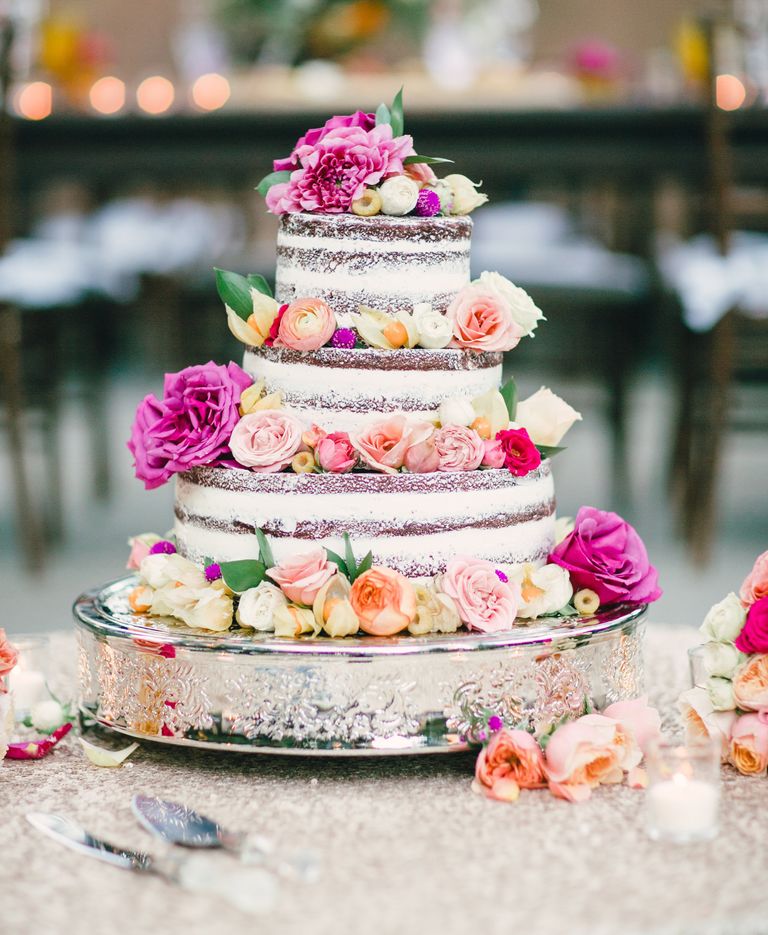
Fresh flowers. Use flowers that haven’t been sprayed with pesticides. Avoid strong-smelling flowers as the smell may linger on the cake. And if you can find edible flowers, that’s even better.
Fresh berries or any fruit. You can add some fresh raspberries in between the layers too. They provide a lovely texture variation. If you decide to do this as well, be warned that the raspberries will leak some juice around the edges after a day or so. She recommends to leave the berries out if you’re making this cake in advance for a party or celebration.
Smaller sweet treats like candies, cookies, meringues, and chocolates
Candied citrus
Nuts or seeds
Fresh herbs
Cinnamon sticks
Sprinkles
Cake Stands
They are really beautiful when you can use something special for the base such as:
Wood slice cake stand
Marble cake stand
Galvanized cake stand
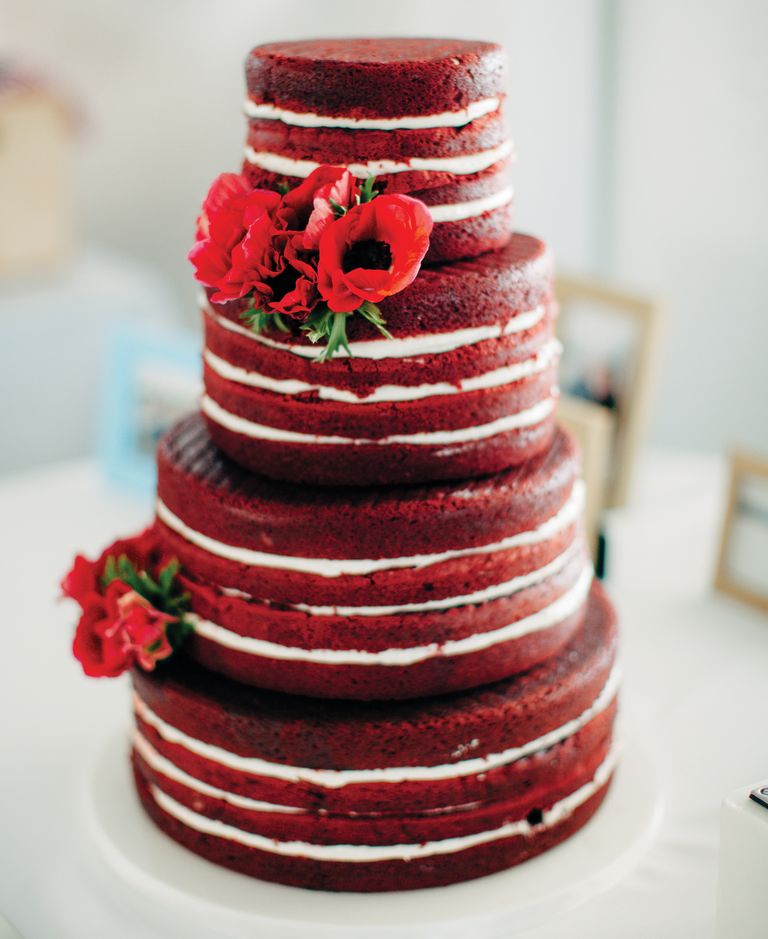
You can use any flavors of layer cake or frosting. Take this red velvet cake for example. The possibilities are endless!
And here is a recipe for a basic vanilla naked cake.
Vanilla Naked Cake
Yield: 12 servings
Prep Time: 45 minutes
Cook Time: 25 minutes
Total Time: 6 hours (includes cooling)
Ingredients:
3 and 3/4 cups (431g) sifted all-purpose flour*
1 teaspoon baking powder
3/4 teaspoon baking soda
1 teaspoon salt
1 and 1/2 cups (3 sticks; 345g) unsalted butter, softened to room temperature
2 cups (400g) granulated sugar
5 large eggs, at room temperature
1 Tablespoon pure vanilla extract (yes, Tbsp!)
1 and 3/4 cups (420ml) buttermilk, at room temperature*
optional: 1-2 cups fresh raspberries (or other berry, see note)
Vanilla Buttercream
1 and 1/2 cups (3 sticks; 345g) unsalted butter, softened to room temperature
5-6 cups (600-720g) confectioners' sugar
5-6 Tablespoons (75-90ml) heavy cream
1 teaspoon pure vanilla extract
1/4 teaspoon salt
finishing decorations (see post above for inspiration!)
Directions:
Preheat oven to 350°F (177°C). Grease and lightly flour three 9-inch cake pans.
Make the cake: Whisk the flour, baking powder, baking soda, and salt together in a large bowl. Set aside. Using a handheld or stand mixer fitted with a paddle or whisk attachment, beat the butter and sugar together on high speed until smooth and creamy, about 3 minutes. Scrape down the sides and up the bottom of the bowl with a rubber spatula as needed. On medium-high speed, add 1 egg at a time, beating well after each addition. Beat in the vanilla extract. Scrape down the sides and up the bottom of the bowl with a rubber spatula as needed. Scrape down the sides and up the bottom of the bowl with a rubber spatula as needed.
With the mixer on low speed, add the dry ingredients in three additions alternating with the buttermilk, beginning and ending with the dry ingredients, and mixing each addition just until incorporated. Do not overmix this batter. The batter will be smooth, velvety, and slightly thick.
There is about 8 cups of batter total, so each layer will be 2 and 2/3 cups. Pour/spread batter evenly into prepared cake pans. If you're worried about uneven cake layers, you can use a kitchen scale and weigh the cake pans for accuracy. (The weight of just the batter in my cake pans was about 1 lb 6 ounces.)
Bake for around 25-26 minutes or until the cakes are baked through. To test for doneness, insert a toothpick into the center of the cake. If it comes out clean, it is done. Allow cakes to cool completely in the pans set on a wire rack. The cakes must be completely cool before frosting and assembling.
Make the frosting: In a large bowl using a hand-held mixer or stand mixer fitted with a whisk or paddle attachment, beat the butter on medium speed until creamy - about 2 minutes. Add 5 and 1/2 cups confectioners' sugar, 5 Tablespoons heavy cream, the vanilla extract, and salt with the mixer running on low. Increase to high speed and beat for 3 full minutes. Add 1/2 cup more confectioners' sugar if frosting is too thin, 1 more Tablespoon cream if frosting is too thick, or a pinch more of salt if frosting is way too sweet. Yields about 4.5 cups of frosting.
Assemble and decorate the cake: Watch the video above for a tutorial on assembling and decorating this naked cake. First, using a large serrated knife, slice a thin layer off the tops of the cakes to create a flat surface. Discard (or crumble over ice cream!). Place 1 cake layer on your cake stand, cake turntable, or serving plate. Spread 1 and 1/2 cups of frosting evenly on top. If using, dot half of the raspberries around the rim. Flatten them down into the frosting as best you can so the cake layer on top is sturdy. Top with 2nd cake layer and evenly cover the top with another 1 and 1/2 cups of frosting and more (flattened!) raspberries around the rim. You can sprinkle a few leftover raspberries in the center, too. (Like I did in the video.) Top with the third cake layer. Spread the remaining frosting on top and all around the sides using an icing spatula. Use a bench scraper to smooth out the frosting on the sides of the cake. If you're making a full naked cake, just spread the remaining frosting on top of the cake. If you have leftover frosting, you can freeze it for up to 3 months and thaw in the refrigerator for next time.
Decorate the cake with garnishes.
Refrigerate the cake for 2-3 hours or up to 1 day before slicing and serving. If chilling for more than a few hours, loosely cover with plastic wrap after 1 hour of refrigeration. (The frosting will "set" after about 1 hour and the plastic wrap won't really ruin your frosting at that point.) And if you're chilling for more than a few hours, I suggest decorating with garnishes right before serving (so as not to wilt the flowers, etc).
Cover and store leftover cake at room temperature for 1-2 days or in the refrigerator for up to 1 week.
Make ahead tip: The cake layers can be baked, cooled, and covered tightly at room temperature overnight. Likewise, the frosting can be prepared then covered and refrigerated overnight. Assemble and frost the cake the next day when you are ready to serve. The frosted cake can be refrigerated for up to 1 day-- see step 8. The frosted cake can also be frozen up to 2-3 months. Thaw overnight in the refrigerator and bring to room temperature before serving.
Recipe Notes:
*Sift flour before measuring.
*If needed, you can use whole milk mixed with 1 and 1/2 teaspoons of white vinegar or fresh lemon juice instead of buttermilk.
*The raspberries will leak some juice around the edges after a day or so. I would leave the berries out if you're making this cake in advance for a party or celebration.
Why is everything at room temperature? All refrigerated items should be at room temperature so the batter mixes together easily and evenly.
I used this cake recipe for my checkerboard cake. The cake layers are slightly thicker here because this cake is 3 layers instead of 4. If you want to make the naked cake as a 4 layer cake, use 2 cups of batter for each cake layer and bake for 23-24 minutes or until a toothpick comes out clean.
- www.sallysbakingaddiction.com
- www.theknot.com
 Mary Richardson
Weekly Newsletter Contributor since 2014
Email the author! mary@dvo.com