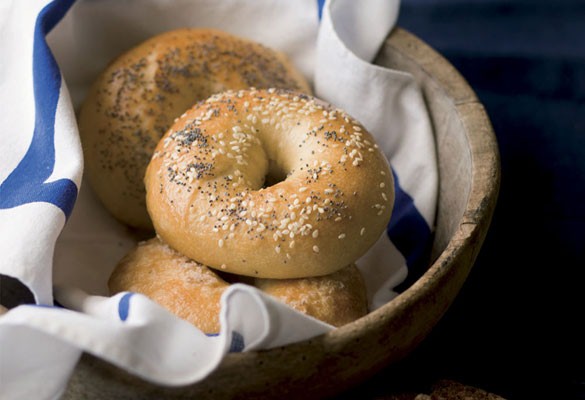
Tips to Making Your Own New York-Style Bagels
We do a Bagel Bar every Thanksgiving morning. It’s a quick and easy breakfast that holds folks over until time for the centerpiece of the day—our Thanksgiving feast.
So let’s talk bagels. Why not make your own? It’s easy, even with the boiling stage (which is the singular difference between bagels and all other breads). They require just a handful of ingredients, most of which are pantry staples, and only the most basic kitchen equipment.
 The bagel recipe I prefer using is for the
classic New York City–style boiled water bagel. There are other methods, but this is the benchmark; once you learn the step-by-step process, you'll find
you can make a great New York–style bagel no matter where you live.
The bagel recipe I prefer using is for the
classic New York City–style boiled water bagel. There are other methods, but this is the benchmark; once you learn the step-by-step process, you'll find
you can make a great New York–style bagel no matter where you live.
Making bagels at home isn't labor-intensive, either, but the process does take two days. Before I started making my own, I researched every foodie site on the Internet. I learned the most from Epicurious. Here's an overview of the basics that I picked up from this great site.
First, you need some basic kitchen supplies:
• Several large baking sheets
• Parchment paper or silicone baking mats (Silpats)
• Electric stand mixer with dough hook, or mixing bowl and large spoon
• Plastic dough scraper and metal pastry blade
• Large pot
• Slotted spoon or skimmer
• Serrated knife
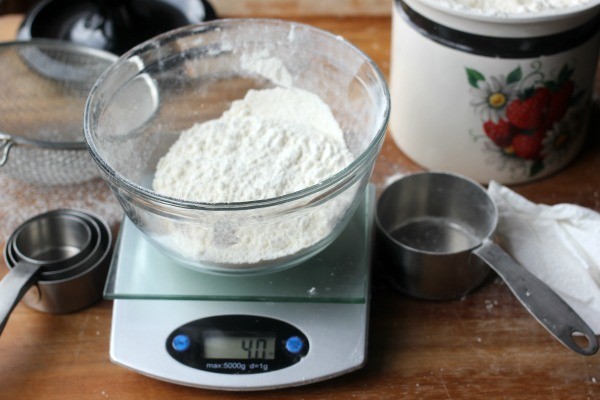 Professional bakers stress accuracy. They weigh ingredients; if you don't have a kitchen scale, stick to volume measurements. For flour, for instance, use
the scoop-and-swipe method: Fill the measuring cup above the desired amount and swipe off the excess with a flat tool.
Professional bakers stress accuracy. They weigh ingredients; if you don't have a kitchen scale, stick to volume measurements. For flour, for instance, use
the scoop-and-swipe method: Fill the measuring cup above the desired amount and swipe off the excess with a flat tool.
As with all bread recipes, you may need to slightly adjust the flour or water during the mixing and kneading process. Every brand of flour has different moisture content and some absorb more or less water than others. Plus you have to allow for the climate you’re in and the humidity in your kitchen on any given day.
Follow the recipe's description prompts to achieve the right texture. As a rule, it's easier to add additional flour to wet dough than it is to add extra water to overly dry dough, so it's better to err on the side of too wet.
The mixing and kneading is all about turning a relatively low-yeast, low-hydration recipe into a stiff dough that can stand up to the rigors of boiling later. Either mix and knead by hand or in a stand mixer fitted with a dough hook attachment.
Mix the ingredients together for about two to three minutes until well blended (the dough should form a stiff ball); let the dough rest for about five minutes, then mix or knead for an additional two to three minutes to smooth out the dough and develop the gluten. The whole process takes about 10 minutes.
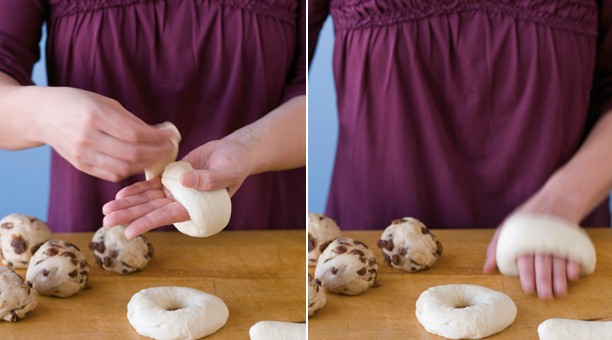 Once the dough is mixed, let it rest, covered, for one hour at room temperature, then shape it. There are two methods for shaping—the "poke a hole" and
"wraparound." Most professionals prefer the wraparound technique.
Once the dough is mixed, let it rest, covered, for one hour at room temperature, then shape it. There are two methods for shaping—the "poke a hole" and
"wraparound." Most professionals prefer the wraparound technique.
Shaped bagels are cold-fermented (or "retarded") overnight in the refrigerator, where they will rise slightly, creating just enough gas to allow the dough to float when dropped into boiling water.
 The natural fermentation process takes at least 8 to 12 hours and then begins to slow down. As long as the shaped dough doesn't over-rise in the
refrigerator, it could remain there for a few days and still make great bagels.
The natural fermentation process takes at least 8 to 12 hours and then begins to slow down. As long as the shaped dough doesn't over-rise in the
refrigerator, it could remain there for a few days and still make great bagels.
On day two, about 1-1½ hours before baking, give the bagels a "float test:" Place one bagel in a small bowl of cold water—if it floats, it's ready; if it sinks, set the bagels on a baking sheet and let them rest, at room temperature, about 30 minutes. During this short rest period, the dough will warm up and the yeast will reactivate so the dough proofs or ferments a bit more. Retest them for readiness.
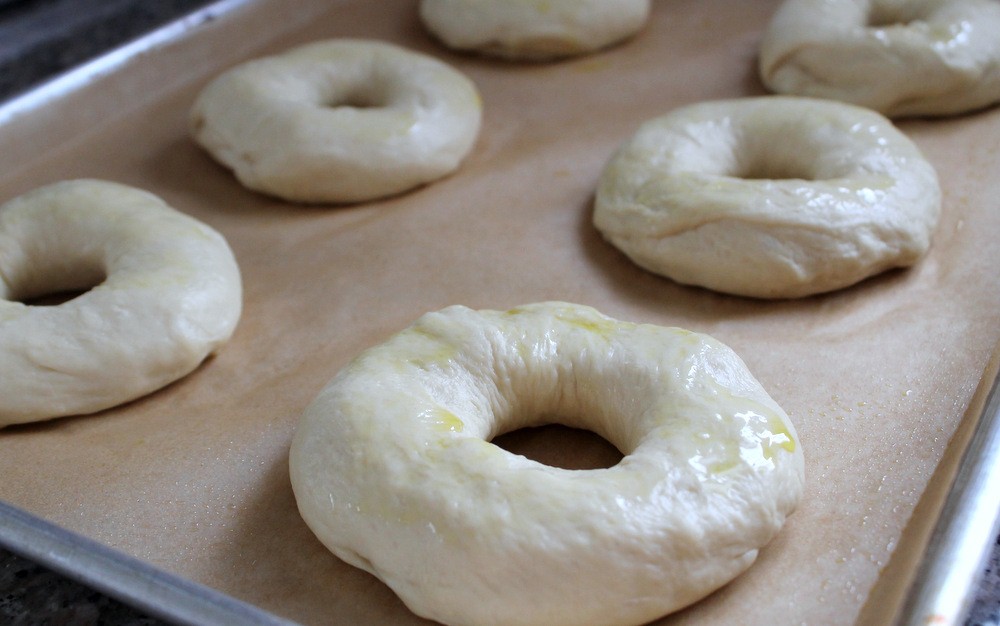
 And here’s where the secret to excellent bagels comes in: As soon as the bagels pass the float test, drop them into simmering water containing
baking soda, salt, and barley malt, honey, or sugar. Boiling them in water mixed with malt syrup or another sweetener helps coat the exterior with starch
and sugar, giving them a good color and sweetness when baked. Poach them on both sides for about 45 to 60 seconds and then transfer to a baking sheet lined
with lightly oiled parchment paper.
And here’s where the secret to excellent bagels comes in: As soon as the bagels pass the float test, drop them into simmering water containing
baking soda, salt, and barley malt, honey, or sugar. Boiling them in water mixed with malt syrup or another sweetener helps coat the exterior with starch
and sugar, giving them a good color and sweetness when baked. Poach them on both sides for about 45 to 60 seconds and then transfer to a baking sheet lined
with lightly oiled parchment paper.
Plain bagels can go straight into the oven for baking; if you're using a topping, apply it immediately following the boiling step—the moisture helps the topping stick to the dough. (The exception is the cinnamon sugar topping, which is added after baking.)
Bagels are baked in a 450°F for about 20 minutes until golden brown. All that's left is to slice, toast if desired, smear with cream cheese or butter, and enjoy!
- www.epicurious.com
- www.bakerbettie.com
- www.blogs.kqed.org
- www.leitesculinaria.com
 Alice Osborne
Weekly Newsletter Contributor since 2006
Email the author! alice@dvo.com