
The WHY's of Unsalted Butter
and Making Our Own!
By Alice Osborne
I LOVE butter—that's the Swede in me. Our family saying (which is probably a Swedish national motto) is "Food tastes better made with butter and love." I always add CREAM to this adage. But speaking of butter, have you ever wondered why some recipes list both unsalted butter and salt in the ingredient list? Me too. It seems it would be so much simpler to just use salted butter. Right?
And, I'd always thought unsalted butter was simply created for those needing to control the sodium content in their diets. But unsalted butter has a larger role than that.
Here's what I learned about the job of unsalted butter from my Cuisine at Home magazine: First, professional chefs and gourmet cooks all say unsalted butter controls the freshness, taste, and salt content in recipes—especially when baking.
Next, salt is added to butter as a preservative, but the amount varies widely from one dairy to the next. Because butter packaging doesn't indicate how much salt has been added, using salted butter makes it impossible to determine the exact amount of salt being added to a recipe. This isn't such a big deal in savory recipes, where you can cut back on the amount of salt added to a dish at the end of cooking. But in baking, where salt assists many chemical reactions, too much salt can have disastrous results.
So having both varieties of butter in your fridge or freezer is a very smart idea and a simple step to better cooking and baking.
My Cuisine at Home article concludes with a reminder that unsalted butter, since it's preservative-free, has a shorter shelf life than salted butter, so it is usually fresher—always a plus. But that factor does mean it needs to be used up quickly, so pay attention to the freshness date on the packaging.
With the confusion cleared up as to the purpose of unsalted butter, how about looking at the idea of making our own butter? I used to do this when my kidlets were little and we were lucky enough to get fresh milk from friends who kept a dairy cow to help feed their large family. And boy did Rick and Pat Reil know how to raise dairy cows. Our milk always had three to four inches of cream on the top of the milk. I'd skim this off and make fresh butter. (I'm salivating even as we speak.)
But why bother making your own butter? First, it can be less expensive than buying butter when you find heavy cream on sale. Next, you can control the amount of salt added—separate your batch and add salt to one part and omit salt in the second part. You've saved some money by making both types of butter. Finally, it's extremely easy to do and lots of fun.
Today I don't have access to fresh, unadulterated cream like we did back in the day. But butter can be made from the heavy creams we find in the grocery store, and the process is still as easy—here's how (as explained on the darling website, The Hungry Mouse—and many thanks to its author and brilliant cook, Jessie Cross):
All you need is an electric mixer, a sturdy blender, or a food processor, and the best heavy cream you can find. Basically, the better your cream tastes, the higher quality your butter will be. That's it!
Butter is made of a few things: Butterfat, water, and milk proteins. Also, butter made from fermented cream is known as cultured butter, which is more full flavored. You can make it by adding yogurt to the cream and aging it a little before you beat it to bits.
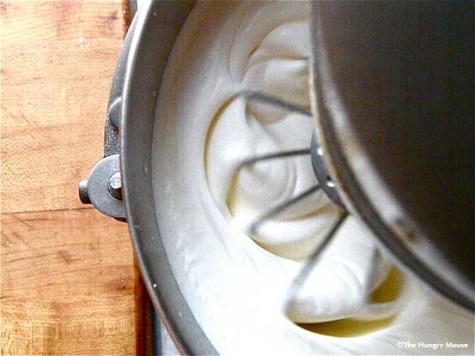
So butter is just cream that's been beaten to the point that the fat, water, and milk proteins separate, and lots of cooks have done this by accident by over-beating their cream.
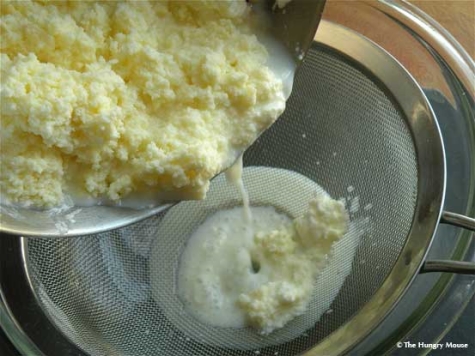
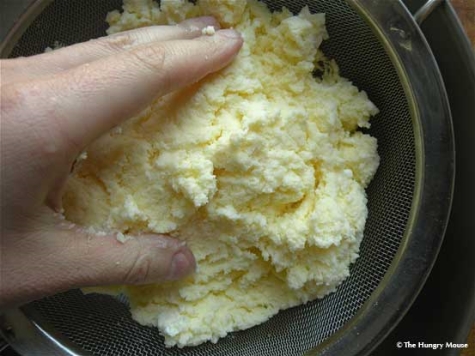
Beat 6 cups of heavy cream and a little salt to taste (very optional) until it separates as shown in Jessie's photo. Once separated, strain out the buttermilk; save this for baking projects.
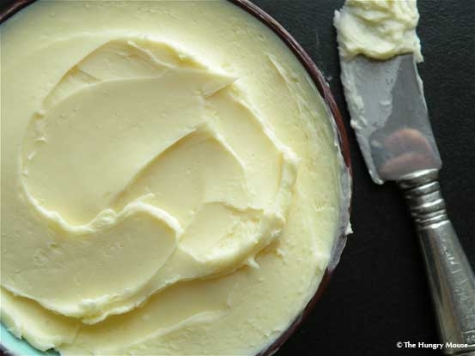
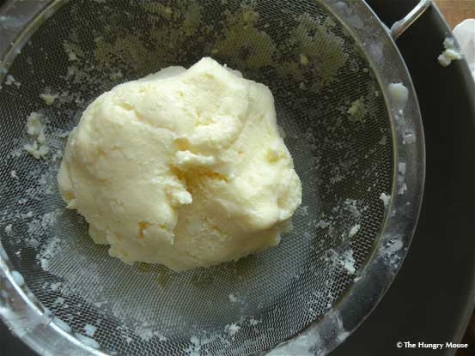
Knead the butter to squeeze out any excess buttermilk. You'll get approximately one pound of butter.
And there's so much you can do with this butter ball: Place it in a butter crock, into butter molds to get lovely shapes, or form it into a square (or rectangle or log) and wrap it tightly in plastic—butter absorbs odors. Butter should be stored in the fridge; it'll store for up to two weeks, but we all know it won't last that long.
I like to blend butter with honey and vanilla or jams. My creative cooking friend, Jeanne Wolfley, blends it with herbs and chopped onions for a savory flavor. The sky is the limit, so have fun with the art of butter-making, because as I said, "Food tastes better made with butter and love (and cream, of course)."
- www.tillamook.com
- www.thehungrymouse.com

Alice Osborne
Weekly Newsletter Contributer since 2006
