Going to Extra Effort Says “You’re Extra Special!”
Interested in a simple way to take your baking to a whole new level and tell those you care about that they’re extra special? Then go to a little extra effort and try marbling.
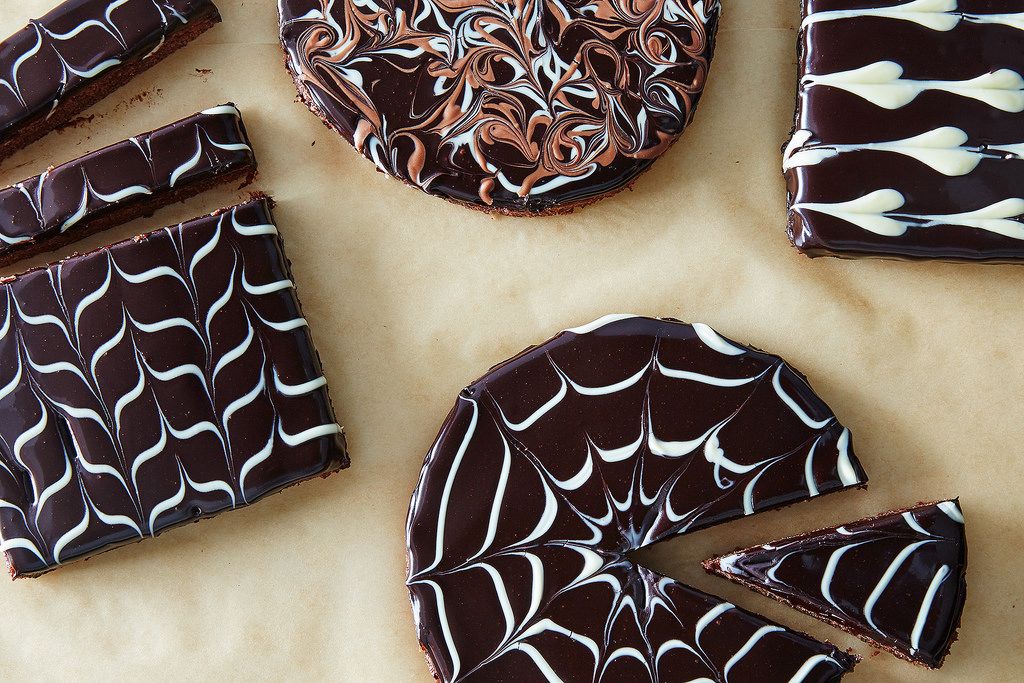
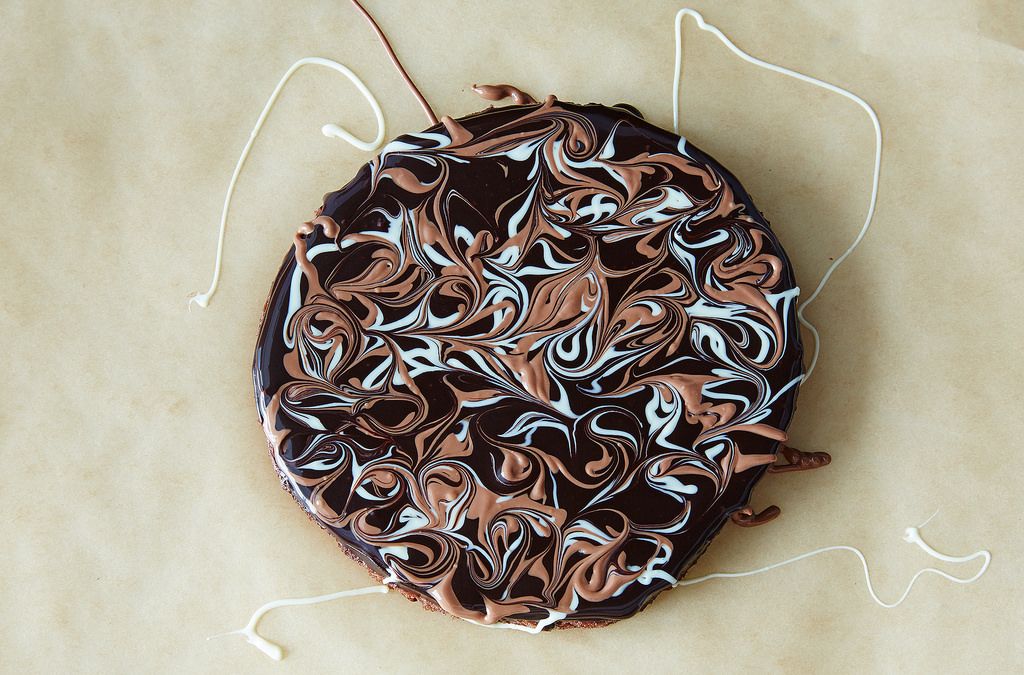
Everyone loves the classic marbled spider web pattern on cakes, or the neat chevron design on Napoleon pastries, or that sweet little string of tiny hearts that some chefs make. These classic patterns—plus gorgeous free-form designs—are enormously impressive, yet so easy to master!
I first learned of this idea on a favorite foodie site, www.food52.com. Their food designer and chef, Alice Medrich, explained: “The idea is to start with a cake or torte freshly coated in chocolate glaze, then immediately apply melted white or, if the glaze is dark chocolate, milk chocolate, and drag a fine artist's brush or bamboo skewer through the glaze to make a beautiful marbled pattern before the glaze begins to set.”
The basic tools needed?
A cake decorating turntable or Lazy Susan is great (you can rotate the cake while piping or dripping the chocolate and again while marbling), but not necessary.
The aforementioned fine artist’s brush or bamboo skewer (or even a toothpick); any of these will make a prettier effect than the classic knife blade.
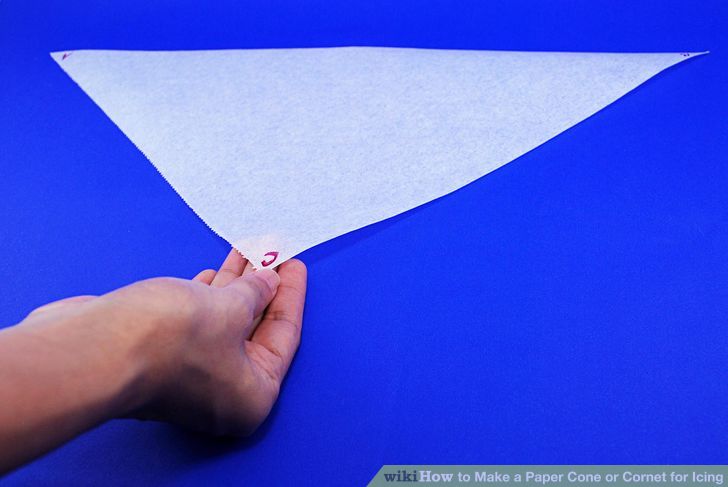
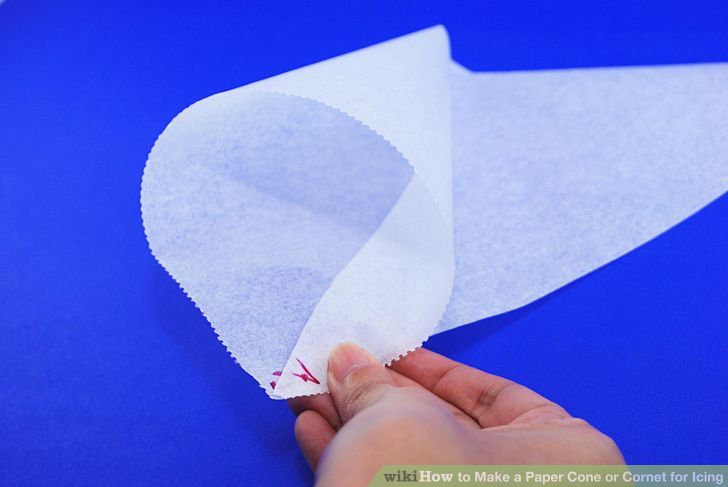
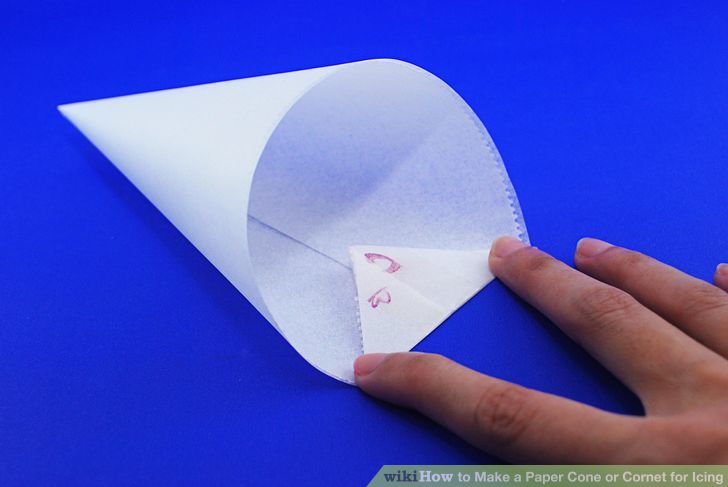
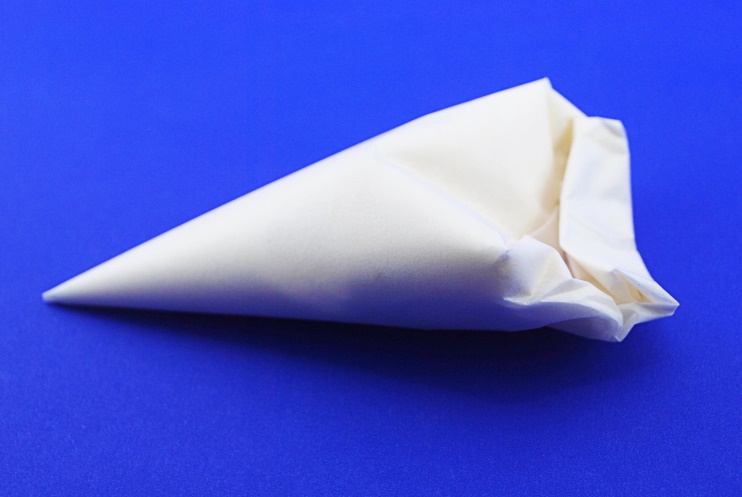
3. Handmade paper cornets are needed for piping chocolate in even, precise stripes, spirals, or curlicues. But then, fabulous results can also be had by dripping or drizzling chocolate imprecisely from a spoon or spatula!
Medrich’s tips for a professional marbled look?
Be sure the cake’s glaze is still be fluid (not yet hard or even beginning to set up); it’s best if a cake is at room temperature rather than cold. For both the base layer and the design on top, a fluid, pourable glaze works better than a thick frosting.
For glazes, melt chocolate from a bar or use professional wafers or discs; don’t use chocolate chips because they are too thick (not fluid enough) when melted, which means they do not pipe or drizzle well. If the chocolate glaze is dark, marble it with white chocolate and or milk chocolate for color contrast. Using both is extra special.
Have tools and melted chocolate for marbling ready and standing by before you glaze the cake; otherwise, the chocolate might start to set too soon. If you are going to pipe (rather than drizzle) the chocolate, fill the cornet and snip the tip just before you start to decorate.
Once the cake is glazed with the base coat, immediately apply the chocolate for marbling: Neat spirals or stripes, random scribbles, uneven drips, blobs or dots, or any kind of marks make for beautiful marble designs.
As soon as you’ve applied all of the chocolate decoration, immediately begin making the strokes for marbling. Draw the brush or skewer through the glaze, using any kind of stroke you like. Take care that the brush or skewer remains on the surface of the glaze: A deep stroke is not as pretty and may stir up crumbs from the cake beneath the glaze. Be sure to use a light touch.
Medrich concludes her tutorial by suggesting some patterns to try. For instance:
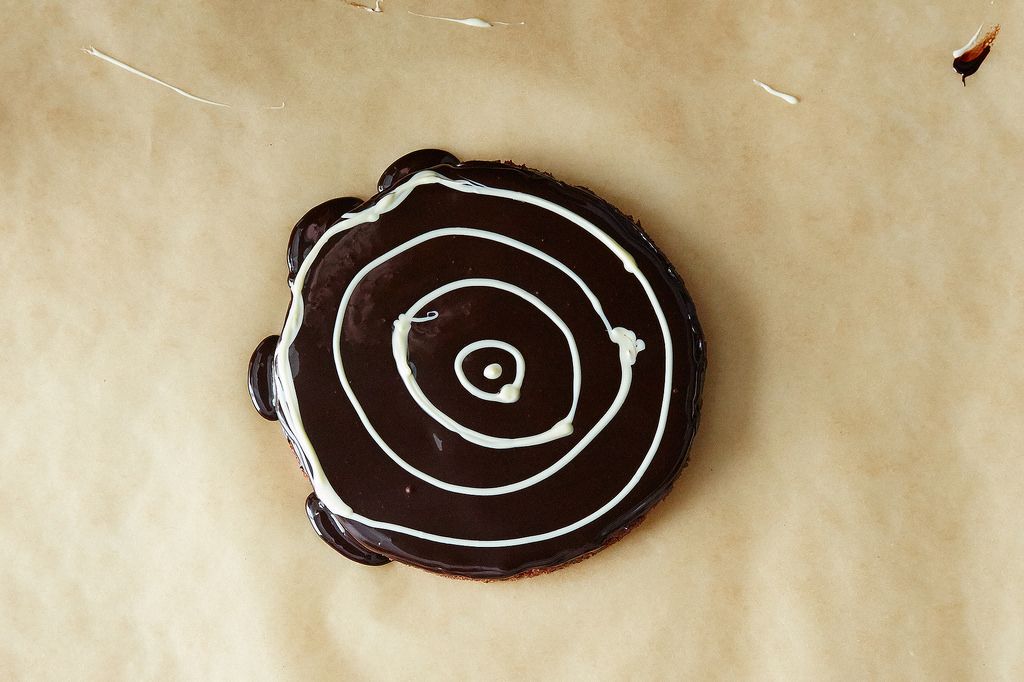
Spider web: Pipe chocolate in concentric circles or a tight spiral from the center of the cake to the edges.
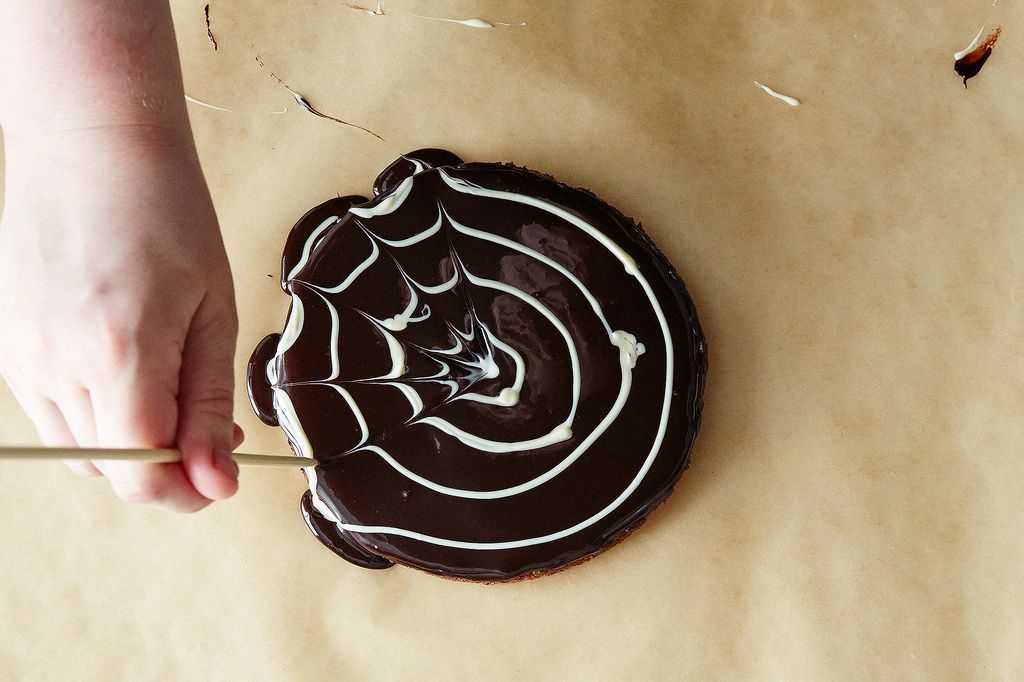
Drag your brush or skewer from the center to the edge of the cake, going all around.
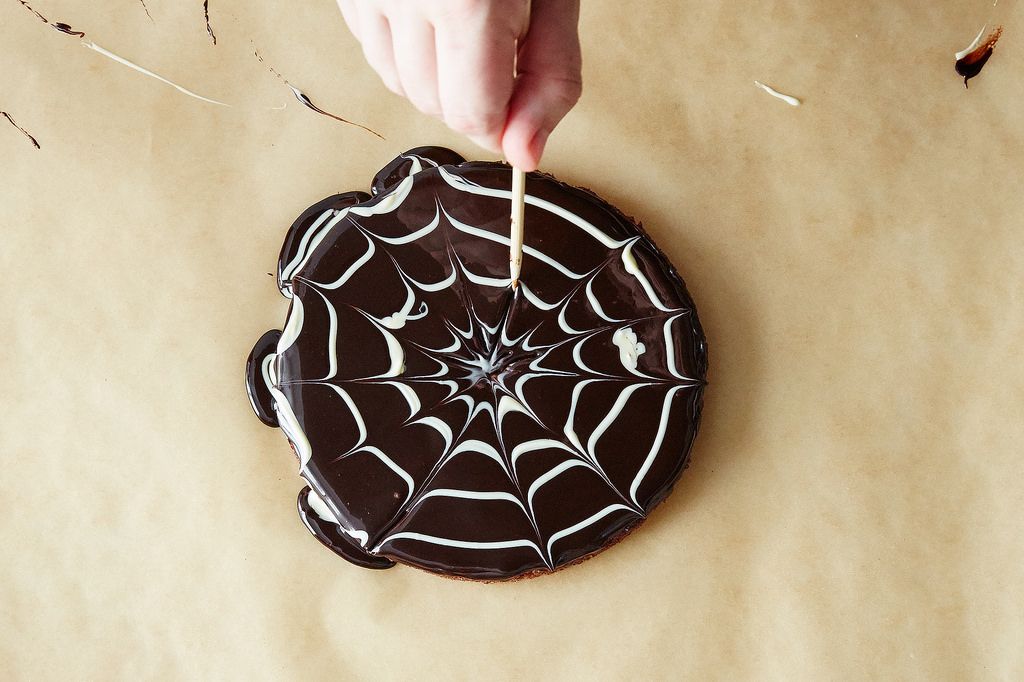
To make it more interesting, add a second set of strokes between the first, this time dragging the brush from the edge of the cake to the center.
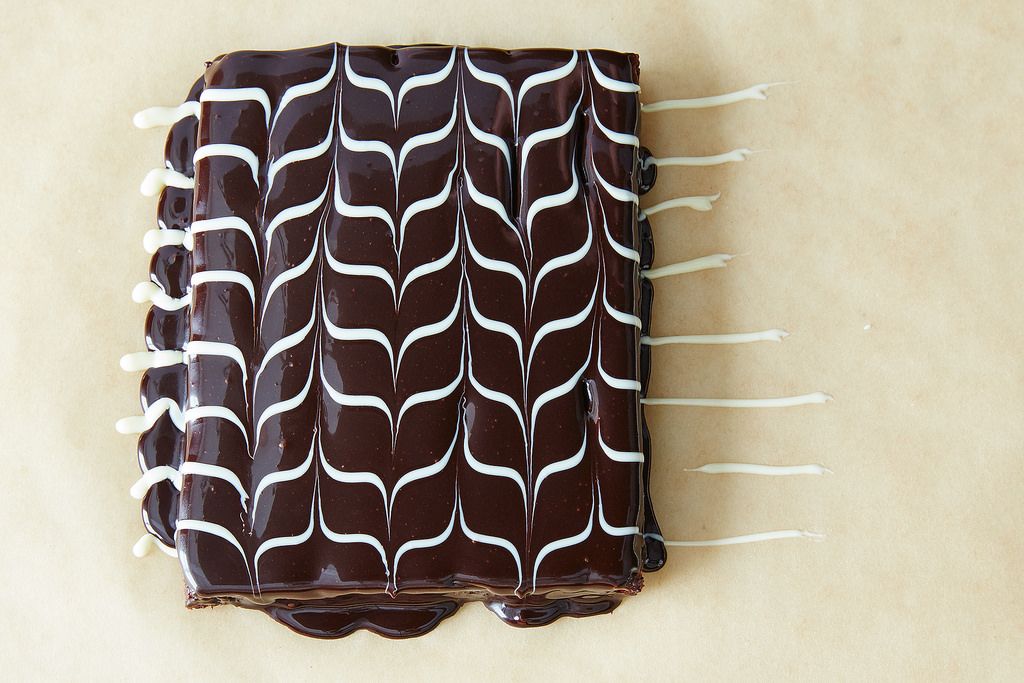
Napoleon/Chevron is a classy decoration for sheet cake or a pan of brownies!
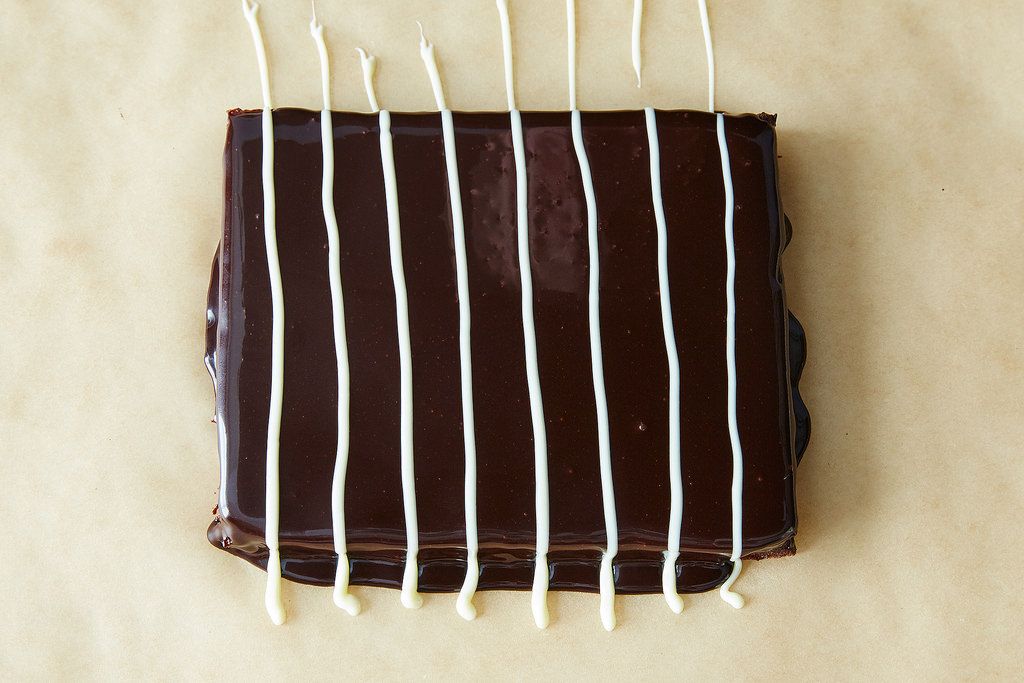
Just pipe parallel lines across the cake or pastry.
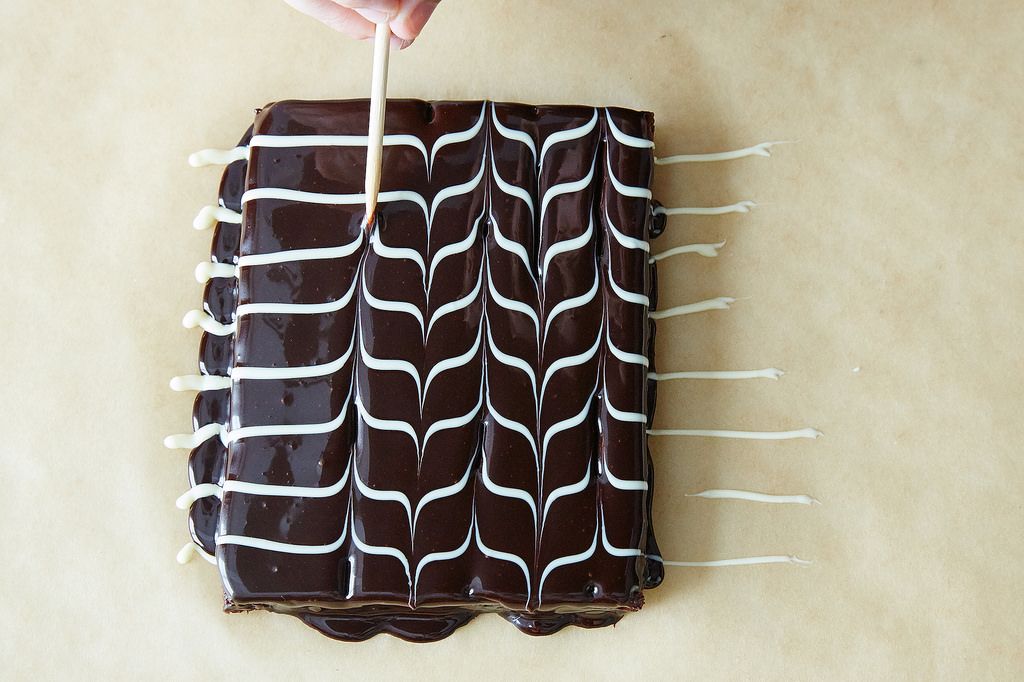
Then rotate the cake a quarter turn and drag the brush or skewer back and forth across the lines.
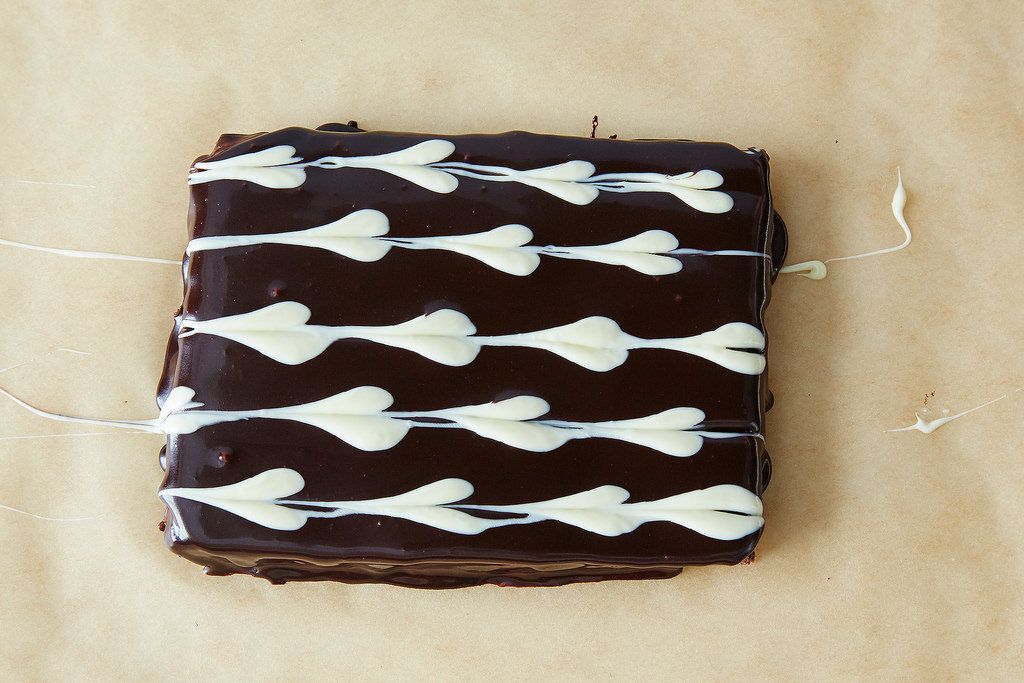
String of hearts is an obvious choice for a Valentine’s treat or perhaps an anniversary dinner dessert.
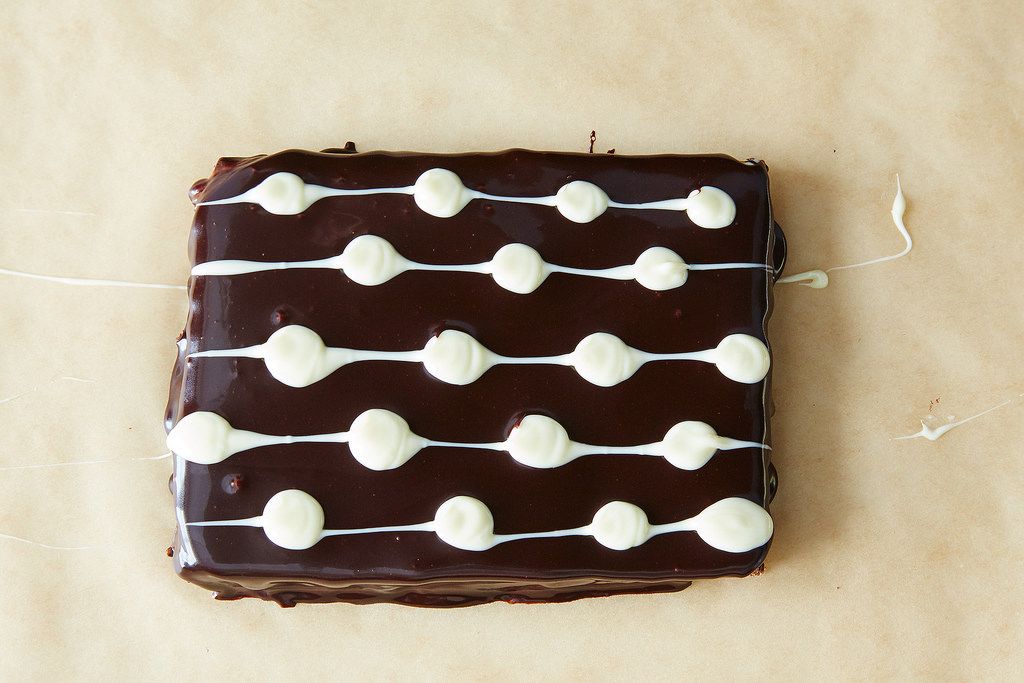
First, pipe dots of any size anywhere on the cake, or in circles or a continuous spiral from the center of the cake going outwards.
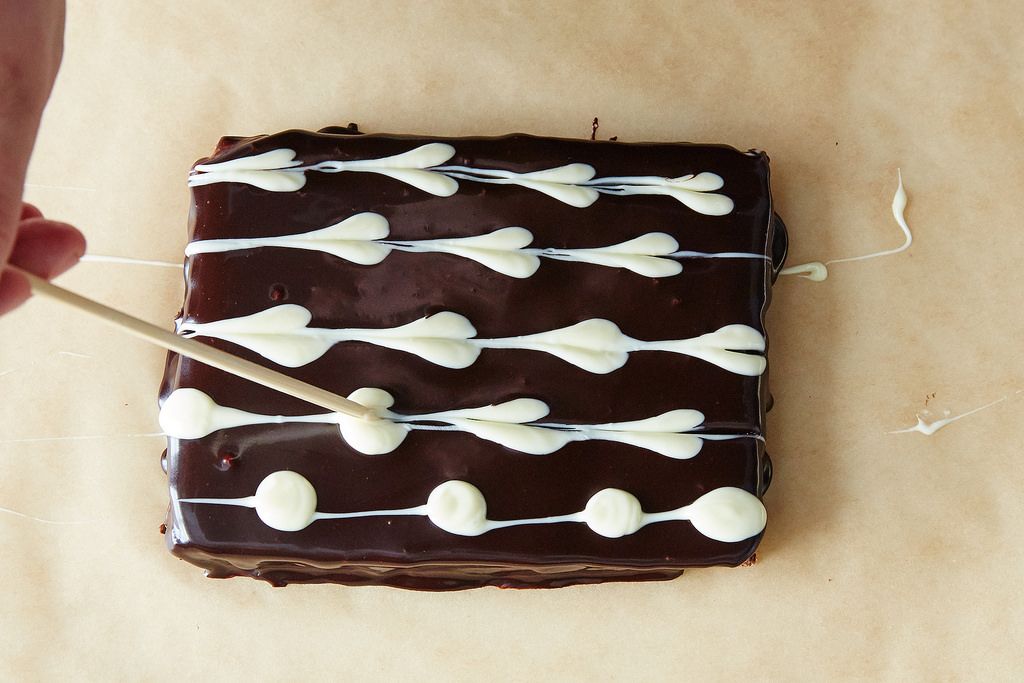
Then, drag the brush or skewer through each dot, transforming the dots into hearts.
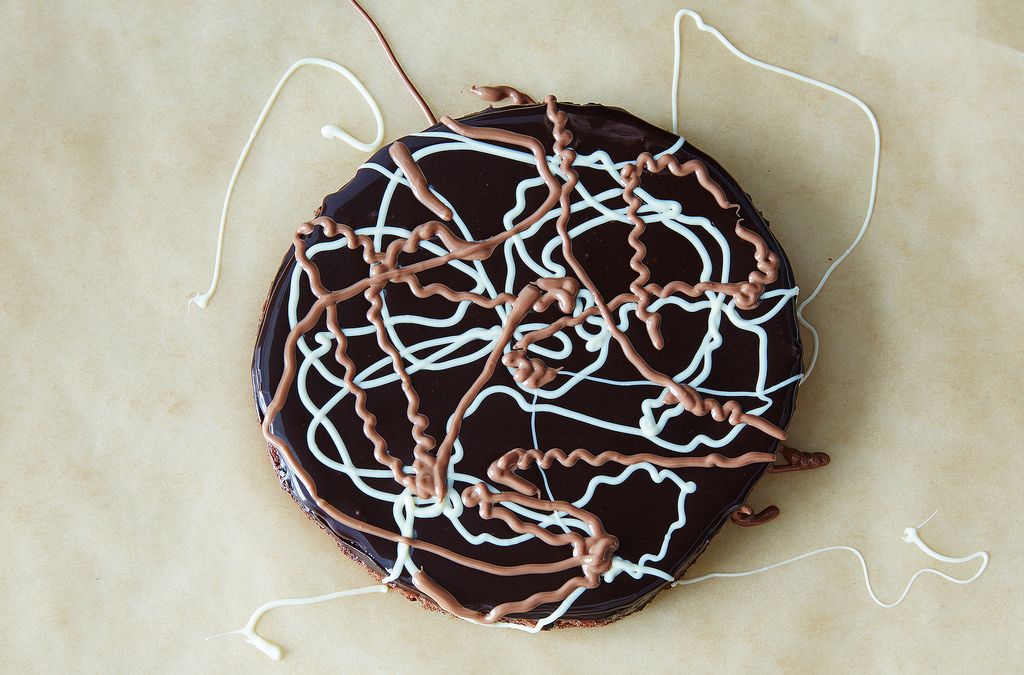
But what if you don’t have a paper cornet (or don’t want to bother making one? You simply let icing drip from the end of a spatula or spoon in random scribbles all over the cake (not worrying about precise patterns or neatness—even little blobs are fine!).
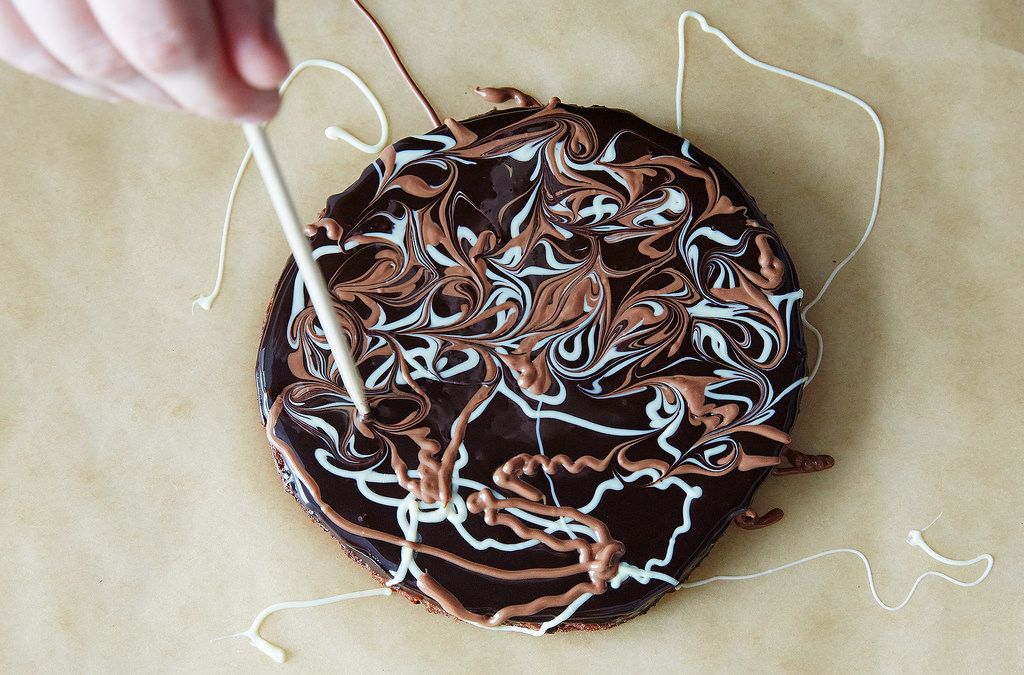
Drag the brush or skewer in looping curlicues, crossing over the scribbles and through the blobs of chocolate until it looks fabulous.
This quick and simple technique turns out a cake that’ll win you a lot of ooohs and aaahhs. Whichever design you choose, though, the final result sends an unspoken message that those you made this for are extra special! It’s fun and it’s worth the extra effort!
- www.food52.com
 Alice Osborne
DVO Newsletter Contributor since 2006
Email the author! alice@dvo.com