Avoiding Soggy Bottom Syndrome!
Who hasn’t turned out a soggy-bottomed pie at least once in their cooking career? Oh, the embarrassment (not to mention the nasty mouth-feel and taste of soggy pie crust). I remember the day well: This was my first pie-baking effort and I brought it to Aunt Annie’s “Welcome Spring” backyard picnic.
Folks took one bite of my first-ever banana cream pie and I could see by the look on their faces that I had a lot to learn about making pie. Aunt Annie took me aside later and asked me to come over soon for a tutorial in “blind baking.”
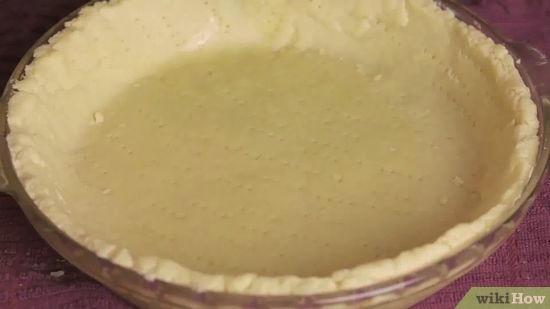
Huh? Blind baking? Never heard of it (obviously; my pie was evidence of this). Aunt Annie said “All we're talking about here is partially, or sometimes completely, baking the pie crust before you add the filling.”
I wondered, though, why you don't just throw the crust in the oven as it is? She said the answer is that as the crust bakes, pockets of steam cause the layers of pastry to puff up — very unhelpful when one's ultimate goal is to fill the pie with something else. The sides of the crust will also start to sag before they start to crisp, leaving you with a not-so-attractive slouching effect.
Aunt Annie explained that blind baking (sometimes called pre-baking) is really necessary when your crust will be filled with a custard or an unbaked filling (such as with pudding or cream pies). With this type of pie you want your crust fully baked because ooey-gooey fillings are notorious for soggy-bottom syndrome.
With a custard pie (pumpkin, for instance), the moisture in the filling can make the crust soggy before it has time to actually bake. Blind baking the crust until it's half-baked helps the crust stay firm. With an unbaked filling, like with a French Silk Pie (or my banana cream pie), blind baking just makes sure the crust is fully baked before you add the filling.
If there are any of you out there that aren’t all that savvy about blind baking, here’s what Aunt Annie taught me:
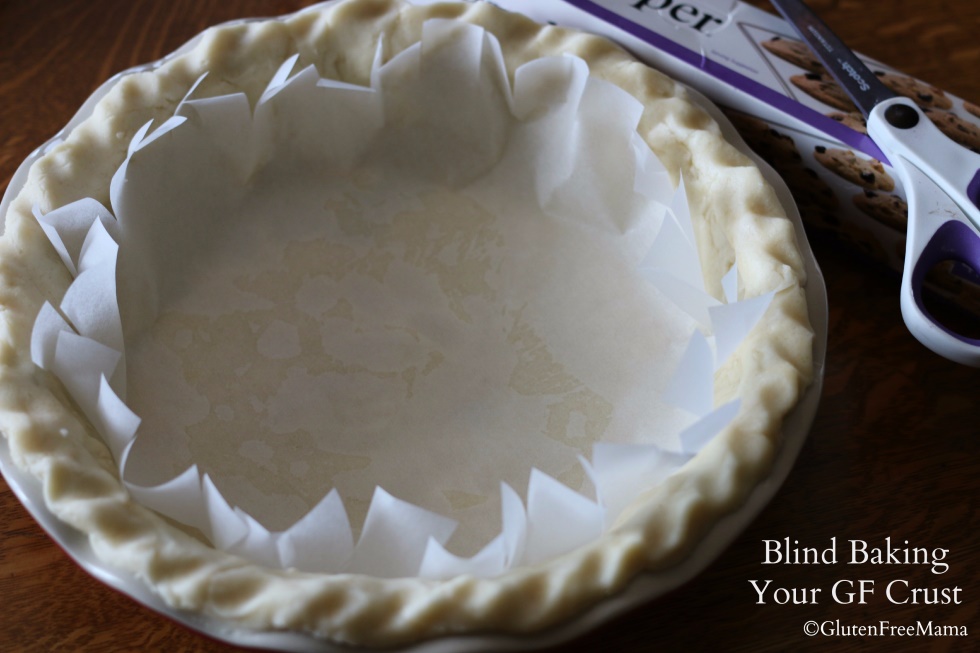
1. Line the unbaked pie crust with parchment or aluminum foil.
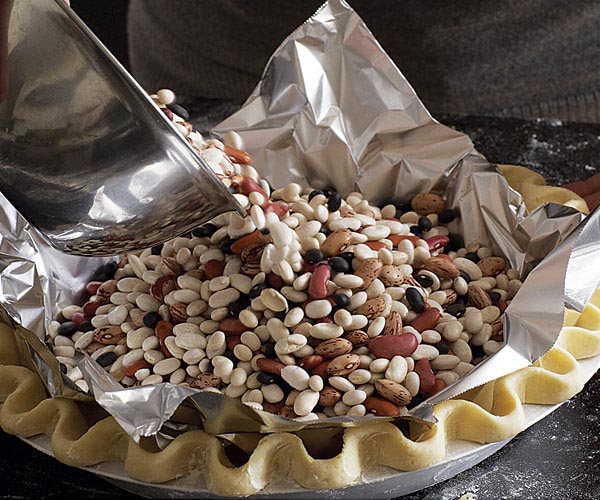
2. Weight it down with something (about 1 ½ pounds of dry beans, pennies, or pie weights, for instance) so that the bottom doesn't puff and the sides don't slouch.
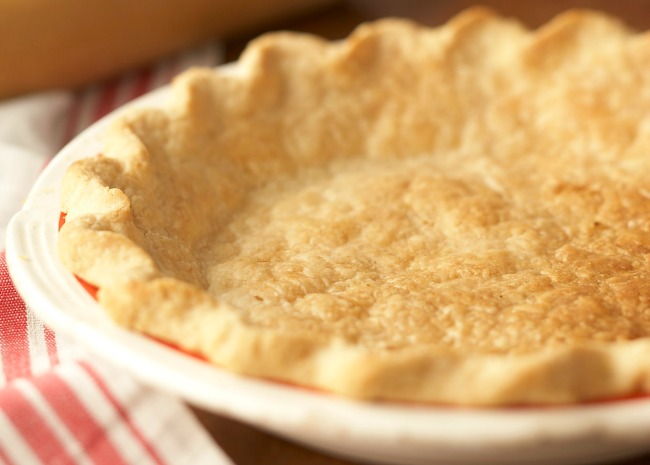
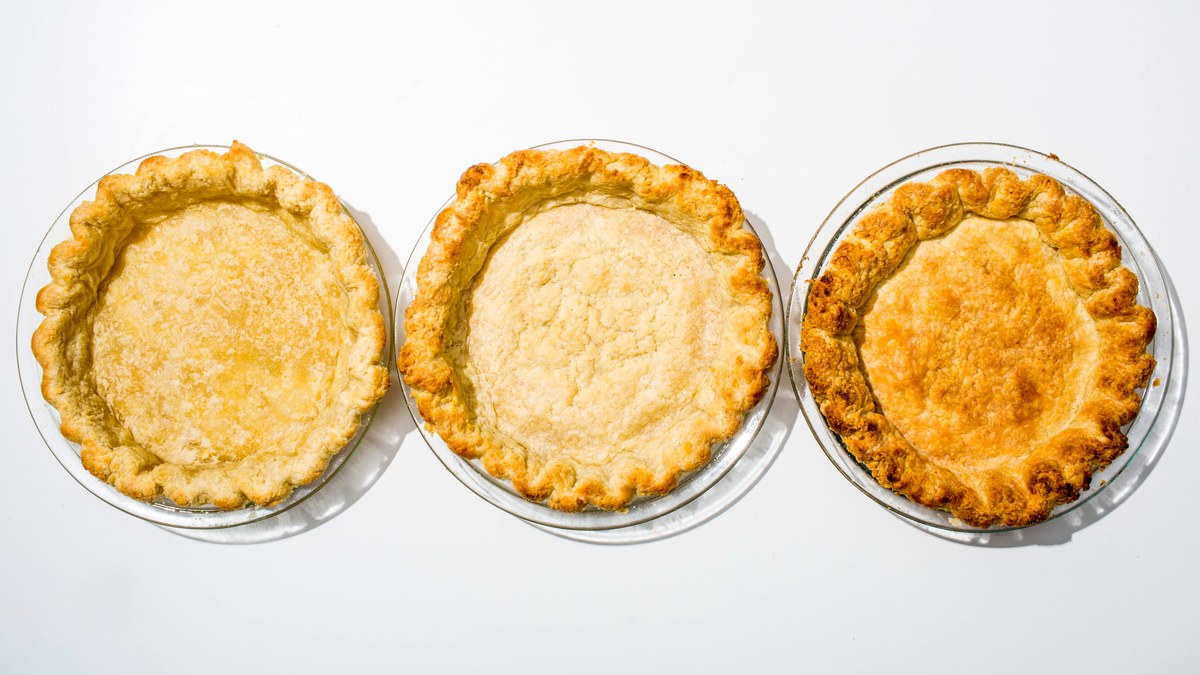
3. Once the crust is set (you'll know this because the edges will turn golden), remove the weights and let the crust cook a little longer on its own. For a partially-baked crust, you want the bottom to look dry and flakey, but still pale. For a fully-baked crust, look for the bottom to turn light golden. The whole process won't take more than 15 or 20 minutes.
With this said, you do want to be aware that there’s a whole blind baking spectrum, and it’s important to learn how far to take it for the pie you plan to make.
For instance, it’s the fruit pies that need a pale base: Once filled, they bake for a looong time. Starting with a light-blond crust means the end product will be bronzed by the time the juices thicken.
For custard pies you’ll use a shorter baking time. You want the blind baked crust to have a golden base layer in order to develop enough color by the time the filling sets.
But for those no-bake pies, you want your blind baked crust to turn out dark. You’re going for a toasty, burnished color, so don’t hesitate to take it all the way.
With blind baking under our belts, how about finishing with a fantastic recipe in honor of upcoming strawberry season? This is a fruit filling pie that Aunt Annie used to teach me about blind baking; it’s a big hit with my family (now that I know well enough to blind bake my crust first, that is—no more soggy bottom syndrome at our house!).
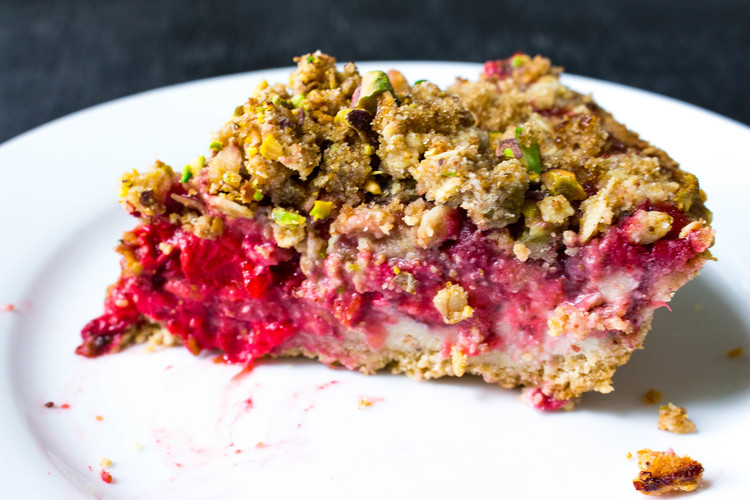
STRAWBERRY-PISTACHIO CRUMBLE PIE
CRUMBLE
1/3 cup pistachios
½ cup all-purpose flour
½ cup old-fashioned oats
¼ cup (packed) light brown sugar
1 ½ teaspoons finely grated lemon zest
1 teaspoon poppy seeds
¼ teaspoon ground cardamom
¼ teaspoon kosher salt
6 tablespoons unsalted butter, chilled, cut into pieces
FILLING and ASSEMBLY
2 pounds strawberries, hulled, halved if large (about 6 cups)
5 tablespoons tapioca starch
¼ cup sugar
1 teaspoon finely grated lemon zest
2 tablespoons fresh lemon juice
¼ teaspoon kosher salt
2 ½ tablespoons cream cheese, room temperature
1 blind-baked pie crust, cooled
3 tablespoons chopped pistachios (either raw or roasted)
CRUMBLE: Preheat oven to 350°F. Toast nuts on a rimmed baking sheet, tossing once, until golden brown, 5-8 minutes. Let cool, then finely grind in a spice mill, or finely chop with a knife.
Mix nuts with flour, oats, brown sugar, lemon zest, poppy seeds, cardamom, and salt in a medium bowl. Using your fingers, work in butter until no dry spots remain and crumble holds together when squeezed. Chill while making pie filling.
FILLING and ASSEMBLY: Toss strawberries, tapioca starch, sugar, lemon zest, lemon juice, and salt in a large bowl to combine.
Using a small offset spatula, spread cream cheese in an even layer over crust bottom. Scrape strawberry mixture into crust, mounding into a dome. Sprinkle crumble evenly over filling.
Place pie dish on a foil-lined rimmed baking sheet (to catcvh any rogue juices) and bake pie, tenting with foil if crumble starts to get too dark before filling is done, until crumble is brown and filling is bubbling around the edges, approximately 1 ½ to 1 ¾ hours. Transfer to a wire rack and let cool before slicing, at least 4 hours.
Garnish pie with chopped pistachios just before serving. NOTE: Pie can be baked 1 day ahead. Store uncovered at room temperature.
- www.wikihow.com
- www.glutenfreemama.com
- www.finecooking.com
- www.dish.allrecipes.com
- www.bonappetit.com
- www.itsallofit.com
 Alice Osborne
Weekly Newsletter Contributor since 2006
Email the author! alice@dvo.com