
Upside Down Tomatoes
By Sydney Hill
Upside-Down Tomatoes?
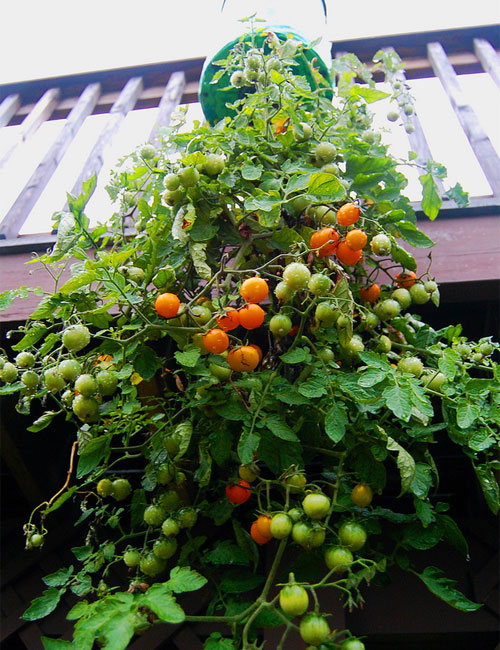 Maybe you've heard of those topsy-turvy tomatoes. You grow them down toward the ground. Holy cow, people get creative.
Before leaping to conclusions- whether you want to jump up and start one right away or do the opposite and wish everyone would just plant them right side up- let me give you the scoop of pros and cons (and then I'll teach you just how to do it).
 Advantages of Topsy-Turvy tomatoes:
1. No need to stake the tomatoes. Gravity isn't going to pull that plant back down to the soil. (well, it is, but...you get the picture)
2. Avoid some pests. Slugs and fungus will have a harder time attacking the tomato because it's already in a separate container.
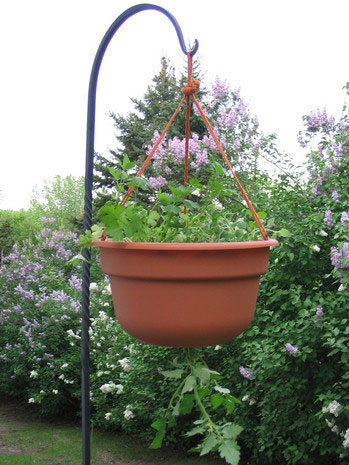
3. Saves space. You hang it. So if you don't have a garden plot, you can grow tomatoes where you want!
4. They're attractive.
5. It's something fun and new to try.
Disadvantages of Topsy-Turvy tomatoes:
1. They're heavy, you have to make sure everything is sturdy enough to hold up to 50 pounds.
2. Tomato plants like to grow up. At the beginning they'll curve back toward the pot, but should eventually grow down.
3. It's harder for the plant to get sun, especially when it's just a wee little thing. The container is pretty big.
4. A big enough breeze might take out the plant. Do your research on that.
5. You might be more limited to smaller varieties of tomatoes.
Okay, so, if you've read the above lists there are two things you can do from this point:
First option: Say, "Hey, you know, I just don't think this is for me. I think I'll stick to the way I've always done it. It's always worked for me." And you know what? That's totally fine.
Second Option: Say, "Hey, I want to give this a try." If this is you, keep reading.
How to do it:
There were a few different ways that I saw. But here's the basic gist,
You'll need:
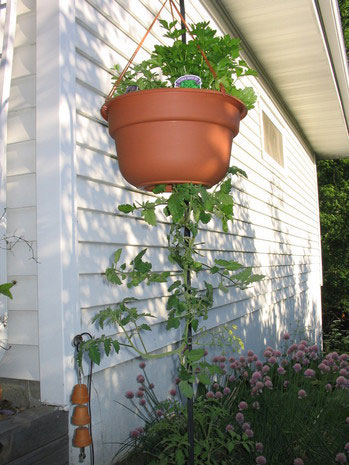
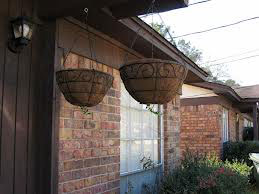
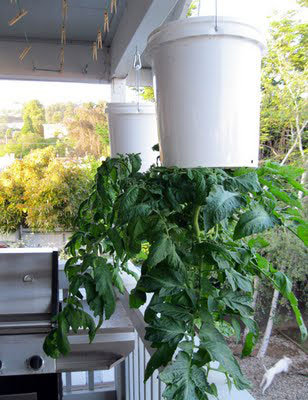
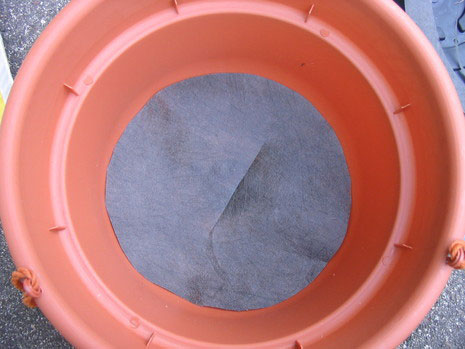
a container (they sell upside down tomato plant containers, but you could really make your own pretty simply). A coco basket with a hole in the bottom of it's frame, a 5 gallon bucket, or a planter's pot
newspaper, landscaping fabric, or some other material that will let water, not soil, through. (not applicable to coco baskets)
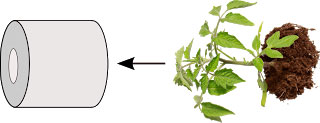
A small tomato plant
A drill that will cut a 2 inch hole (not applicable to coco baskets)
Herbs or some other small plants (Optional)
Directions:
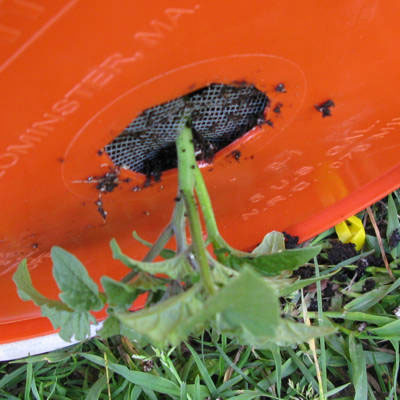
1. Drill a hole in the bottom of your container and place newspaper (you might need a few sheets) or fabric over the hole in your container (with a small "x" to allow the plant to slip through). If you choose to use a coco basket, all you need to do is place an "x" in the bottom of it, no need to drill holes or add fabric.
2.Grab your tomato plant. Gently massage it's roots. So so so carefully weave that little plant through the hole so the leaves are on the outside and the root ball is on the inside.
3. At this point, I would use two people. Have someone gently hold the plant in place while the other starts to fill it with good soil.
4. Hang it from a sturdy place. Some sites were saying that a cheap shepherd's hook probably won't cut it. Fill the rest of the container with dirt and slightly pack.
5. Optional: Plant herbs or lettuce at the top. This will help lots of moisture from evaporating and will use the space even better! Or, if you use a container with a lid, cover the soil (when not watering it) to keep that moisture locked in.
Sources:
instructables.com
containergardening.about.com
curbly.com
gardenbeautiful.wordpress.com
i-cdn.apartmenttherapy.com
4.bp.blogspot.com
3.bp.blogspot.com
0.tqn.com

Contribute to the Cook'n Club!
DVO would love to publish your article, prose, photography and art as well as your cooking, kitchen and nutrition tips, tricks and secrets. Visit the Newsletter Submission / Win Win for All section in our Forum for more information and details.