The Persnickety Macaron
It appears to me that the French macaron is one of the newest food trends. I'm not talking about the coconut macaroon but the "French macaron!" The French macaron is delicate, petite, and airy and does not have coconut as one of its main ingredients, as does the macaroon. But, because you can make the French macaron (spelled with only one "o") any color and flavor you want, coconut is definitely an option. It's difficult to pick a flavor to try, like Jelly Bellies. The color and flavor ideas are endless. If you are like me, you would want to try one of each flavor and then zero in on your favorites.
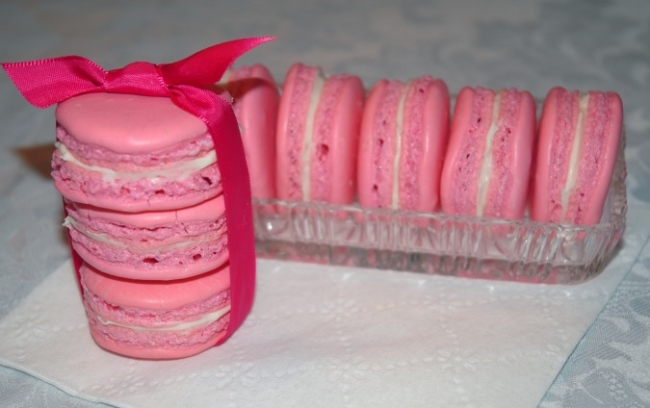
I have seen these delectable dainty treats on Pinterest and Facebook, served on trays at parties and boxed as gifts. I think the consensus would be that they are just darn cute! I am assuming by the amount of attention they are getting that many people are mastering the art of making French macaroons. So I thought, why not me? I'm always up to a challenge.
Specialty bakeries make these finicky little treats and sell them for as much as $65.00 for a box of 48. As you can see, macarons are quite expensive to buy despite the fact that they have very few ingredients. You, no doubt, are mostly paying for the time and technique that are involved in making them. Like any new skill, once you figure out the technique ... it becomes a lot of fun!
My first try at making these charming little treats was a disaster. I then took the time to read all the tips I could find on the how to make the perfect macaron. Here is what I learned.
Tips
- The Almond Meal must be finely ground.
- Egg whites are best used at room temperature
- When beating egg whites make sure they are stiff and form a peak that stays. This is also the perfect time to add the food coloring. Gel food coloring works best. Always, mix the food coloring with the wet ingredients.
- When folding in the dry ingredients, it is important to not over mix the mixture. Follow the technique that is described in the instructions or for more clarification watch a YouTube video.
- When piping the macaron dough onto the mat or parchment paper, try to make them all the same size so they will sandwich together nicely.
- Check the oven temperature (it matters). You can buy an oven thermometer for $5.
The recipe below is from Yum Sugar.
- https://www.yumsugar.com/Basic-French-Macaron-Recipe-21651110
 Jeanne Wolfley
Monthly Newsletter Contributor since 2008
Email the author! jeanne@dvo.com
Recipe
Basic French Macarons
Serving size: 10
Calories per serving: 345
2/3 cup almond meal or ground almonds
5 1/2 cups powdered sugar
3 large egg whites, room temperature and preferably aged up to 3 days
5 tablespoons granulated sugar
1 teaspoon vanilla extract
Directions:
1. Preheat the oven to 280ºF, and position 2 racks in the lower section of the oven. Line 2 rimmed baking sheets with parchment paper. If you have time, draw 1-inch circles on the back of each sheet, spacing the circles at least 1/2-inch apart.
2. If your almond meal is very coarse, grind it with the powdered sugar in a food processor until fine. Sift the almond meal-powdered sugar mixture twice through a mesh sieve.
3. Place egg whites in the bowl of a stand mixer (or use a hand mixer), and begin to beat on medium-high. When the eggs are frothy, gradually add granulated sugar 1 tablespoon at a time until fully incorporated. Continue to beat the egg white mixture until glossy and stiff peaks form when you lift the beaters. Gently stir in the vanilla extract. Be careful to not overbeat the meringue (e.g., the meringue takes on a clumpy texture).
4. Add half of the sifted almond mixture, and gently fold it into the meringue using a flexible silicone spatula. Lift from the bottom, up around the sides, and toward the middle, being careful to not over agitate the meringue and lose too much air. Once the almond mixture is predominantly incorporated, add the second half and repeat the folding motion.
5. When the almond mixture is just incorporated, you will need to transform the batter into the appropriate texture. Using the flat of the spatula, "punch" down into the center of the batter, then scrape more batter from the sides to the center, and punch again. You will need to repeat this 10-15 times (or more, depending on your arm strength and the beginning texture of your batter) until the batter slowly and continuously drips back into the bowl when you scoop it up with the spatula. Think of the consistency of molten lava. For the best results, punch the batter a few times, check the consistency, then punch a few more times, etc. Do not make the batter too runny or the macarons won't rise as they should, and you could end up with oil stains on the surface.
6. Pour batter into a pastry bag fitted with a 0.4-inch tip. In a pinch, you can also use a gallon-size Ziploc bag: just snip a teeny bit from one of the bottom corners. Twist and clip the top of the bag to avoid overflow. On your prepared baking sheets, pipe out 1-inch rounds in the circles you drew (remember to draw the circles on the back side of your parchment to avoid ink or pencil stains on your macarons!).
7. Holding the baking sheet in both hands, rap each baking sheet firmly on the counter two or three times. This smooths out the tops and helps form the "pied" or frilly foot on the bottoms of the macarons. Allow the piped macarons to dry, uncovered, for at least 15 minutes. The macarons should form a very thin, smooth crust where, if you tap it lightly with your finger, the batter will not stick to your finger. If after 15 minutes, the batter is still sticky, let it dry longer. This may take up to an hour on humid days.
8. Place both baking sheets in the oven and bake for 15-18 minutes. After the first 2 minutes, open the oven to allow any excess humidity to escape. Halfway through, swap oven racks and rotate the sheets for even baking. The macarons are done when they are baked all the way through and the shells are just hard. Take care to not under bake (insides will still be mushy) or over bake (tops will begin to brown). Remove them from the oven, and cool on baking sheet placed on a wire rack.
9. When fully cooled, assemble the macarons with your choice of filling. The assembled macarons can be stored in an airtight container in the refrigerator for up to one week.
Recipe formatted with the Cook'n Recipe Software from DVO Enterprises.