

Grain and Herb Breads Done Easy
By Jeanne Wolfley
 When I was first married, I could not make bread to save my life. My mom and my mother-in-law were great bread makers, but I was not patient and I didn’t understand some of the basic rules of bread making. In fact, I made bread so poorly that my husband would say “Jeanne, why don’t we just buy bread at the thrift store.” After all, it was cheap and tasted good enough. Even though I knew my bread was not wonderful like my moms, I had a passion to be able to bake bread that I could feel proud of.
The process of making bread is very satisfying and serves as a form of therapy for me. I have always appreciated the love that goes into a loaf of first class bread. The smell of fresh bread certainly speaks for itself. I was determined to learn the art of bread making.
For those of you who have no desire to bake bread... I would say “learn how to make bread, so if the need arises you will know how.” Of course, you still may not find the same satisfaction for bread making that some of us feel and that’s alright. There are some excellent frozen bread dough out on the market place with recipes to spice them up. These breads will still WOW your family and the taste and smell of homemade bread will still permeate your home. It would be a worthy cause to have a couple of first rate, easy recipes at your disposal in your Cookin’ recipe file.
After several failures, I decided I needed to study the science part of bread making. I found a basic white bread recipe that I knew was excellent; it was an old family recipe. I studied the recipe several times, going over the processes in my mind. Determined that if the bread didn’t turn out right, I was not going to give up! The making of bread became easier and more enjoyable to make with every try.
The first thing I learned to do was to proof my yeast! This is done by adding a little of the warm water, yeast and sugar together and letting it set for a few minutes to see if the yeast bubbles up. This let me know that the yeast was good and the water was the right temperature.
I then followed the recipe like a surgeon performing a surgery for the first time. Step by step I added the ingredients, making sure I didn’t put the salt in until I was almost done adding all the flour. This I also did to make sure I was not killing the yeast. I found that adding the flour little by little and only adding enough to make the dough pull away from the sides of the bowl made the dough a nice consistency. It didn’t take too many tries before I had the look and consistency down to a fine skill. What once seemed like a chore was becoming a task that I looked forward to.
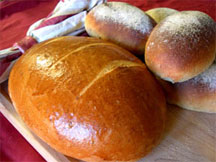
There are so many wonderful breads recipes to try. I love flavored breads, light breads, hearty breads and herb breads. I adore bread! I hope you enjoy some of my favorite bread recipes.
Hearty Seeded Bread
This recipe makes two loaves of bread and is so easy, nutritious and delicious. I love this bread toasted.2 1/4 cups whole wheat flour
3 cups white bread flour
1 1/2 Teaspoons poppy seeds
2 Tablespoons sunflower seeds
2 Tablespoons flaxseeds
2 Tablespoons pumpkin seeds
2 Tablespoon sesame seeds
1 Tablespoon fine sea salt
2 cups water (room temperature)
2 Tablespoon yeast
2 Teaspoons olive oil
Measure water (room temp); add yeast and sugar, set aside to proof yeast. Mix dry ingredients and seeds in a bowl and mix well. Gradually add the dry ingredients to the liquid. The dough should be soft but not sticky. If the dough is to stiff add a little more water. Turn onto a floured surface and knead for 10 minutes or 5 minutes if you are using a mixer that can handle bread dough. Place dough in a large bowl and cover with a damp cloth, let rise until double in size, about 2 hours.
Punch the bread dough down using your hands and divide the dough in half, making two loaves. Using a small amount of flour; shape the dough to fit the bread pan. Cover with a towel and let rise until double in size, about 1 hour. Brush with milk and add extra seeds if desired.
Pre-heat oven to 350 degrees and bake for 35 to 40 minutes. The loaves should be golden brown and sound hollow when thumped with your finger.

Brown Oatmeal Bread
This bread has a light texture and I love to serve it with stews or thick soups.1 1/2 cups boiling water
1 cup old-fashion oats
1 package dry active yeast
3/4 cup room temperature water
2 Tablespoons shortening
1/4 cup brown sugar
2 Teaspoons salt
1 Teaspoon sugar
1/4 cup molasses
5 cups white all purpose flour
In a medium size bowl, combine boiling water, oats and shortening. Let cool to room temperature. In a small bowl combine the yeast and 3/4 cup water and sugar. The yeast will bubble up and you will know your yeast is active.
In a large bowl; add the oat mixture, brown sugar, molasses and 3 cups of flour; mix well. Add enough remaining flour to make soft dough. Turn onto a floured surface and knead until smooth, about 10 minutes. This can also be done in a mixer that will handle bread dough, shortening the kneading time to 5 minutes. Make sure the bread pulls away from the side of the mixing bowl. Add a little more flour if needed.
Place in a greased bowl, cover with either a damp cloth or plastic wrap sprayed with cooking spray and let rise until double, about 1 hour. Punch dough down with your hands. Divide in half and shape into two loaves. Place in greased bread pans. Cover and let rise until doubled, about 35 to 40 minutes. Bake in preheated 375 degree oven for 30 minutes. The bread should sound hollow when you thump it with your finger. Cool on racks and brush bread on top with a little melted butter.
Boccaccio Bread
1/2 Teaspoon ground black pepper
1 cup warm water
3 Tablespoons olive oil
3/4 Tablespoon dried rosemary
2 1/2 cups bread flour
1 1/2 Teaspoons active dry yeast
2 Teaspoon sugar
1 1/2 Teaspoons salt
1/4 Teaspoon Italian seasoning
Add yeast to the warm water, and sugar (yeast will bubble and you will know your yeast is active). Add flour, salt, and oil; knead for 10 minutes in a mixer or by hand; add the herbs & pepper and knead for an additional 3 minutes. Let rise 1 hour in an oiled, covered bowl; set in a warm place until doubled in size. Punch down with hands; let rise for 1 more hour.
Brush with olive oil and sprinkle with a course kosher salt and rosemary. Bake at 400 degrees for 25 to 30 minutes on a ceramic stone, cookie sheet or cast iron skillet.
TIP: If you don’t want to spend much money on a ceramic clay stone, go to a hardware store and buy a single tile for less than a couple of dollars.
Crusty Boule (gluten free)
This recipe is taken from the book Healthy Breads in 5 Minutes a Day. This book has many super bread recipes, including some gluten free. Makes enough dough for at least four 1-pound loaves2 cups Brown Rice Flour
1 1/2 cups Sorghum Flour
3 cups Tapioca Flour (also called tapioca starch)
2 tablespoons yeast
2 tablespoons honey or sugar
2 Tablespoons Xanthan Gum
2 2/3 cups lukewarm water
4 large eggs, whisked together
1/3 cup neutral-flavored oil or olive oil
1 tablespoon kosher salt (increase or decrease to taste)
Mixing and storing the dough: Whisk together the flours, yeast, salt and xanthan gum in a 5-quart lidded plastic container. Combine the oil, honey and water, set aside.
Dump the eggs into the dry ingredients and then stir while you pour in about 1/3 of the oil and water. Unlike our wheat dough’s we do not add all of the liquid at once and stir. If you do that it will result in a lumpy dough. Continue to stir while you pour in another 1/3 of the liquid.
The dough will start to come together in thick dough. Add the final 1/3 of liquid and stir until the dough is nice and smooth. Cover with the lid, but do not snap it shut. Allow it to rest on the counter for about 2 hours. Place the dough in the refrigerator and store for up to 7 days.
On baking day take the bucket from the refrigerator. The dough will be quite fluffy still and you want to try not to handle the dough too much. Just like our other dough’s the trick is to keep as much of the air bubbles intact as possible.
Use wet hands to remove 1-pound (grapefruit-size) piece of dough from the bucket. The dough will be quite scraggly when you take it out, just place it on a piece of parchment paper. Use wet hands to smooth out the surface of the dough. This may take dipping your hands in the water a few times…to get a nice shape.
Cover loosely with plastic wrap and allow resting on the counter for about 90 minutes. If your kitchen is very warm you may only need about 75 minutes.
30 minutes before baking time preheat the oven with a 5 1/2 quart Dutch oven in it to 500 degrees. Be sure it is fitted with a metal Replacement Knob; the original plastic knobs can only be heated to about 400 degrees.
The dough will not have grown much while resting, but it will seem a little bit puffier. Use a serrated knife to cut slashes in the dough. Remove the pot from the oven and take off the lid.
Lift the bread on the parchment and VERY CAREFULLY lower the parchment and bread into the pot, replace the lid onto the pot. Return to the oven and bake for 20 minutes. After the 20 minutes remove the lid, turn the heat down to 450 and bake for an additional 15 minutes. Once the bread is done baking remove it from the pot using a spatula.
Allow the bread to cool completely before eating or the center may seem gummy. The loaf is also wonderful toasted and served with butter and marmalade. Enjoy!