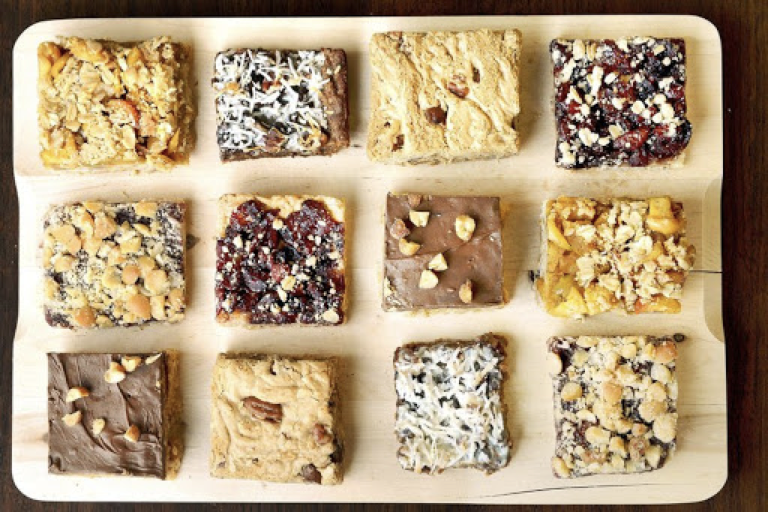
Good-to-Know Tips for the BEST Bar Cookies!
As I prepared this article, I wondered if you even need this information. But because I’ve had some dismal bar cookie results in my day, I thought I’d pass it on. If you have too, then you’ll appreciate these tips from top pastry chefs. When I read some of these, I admit I thought to myself, “Sheesh, where have I been?”
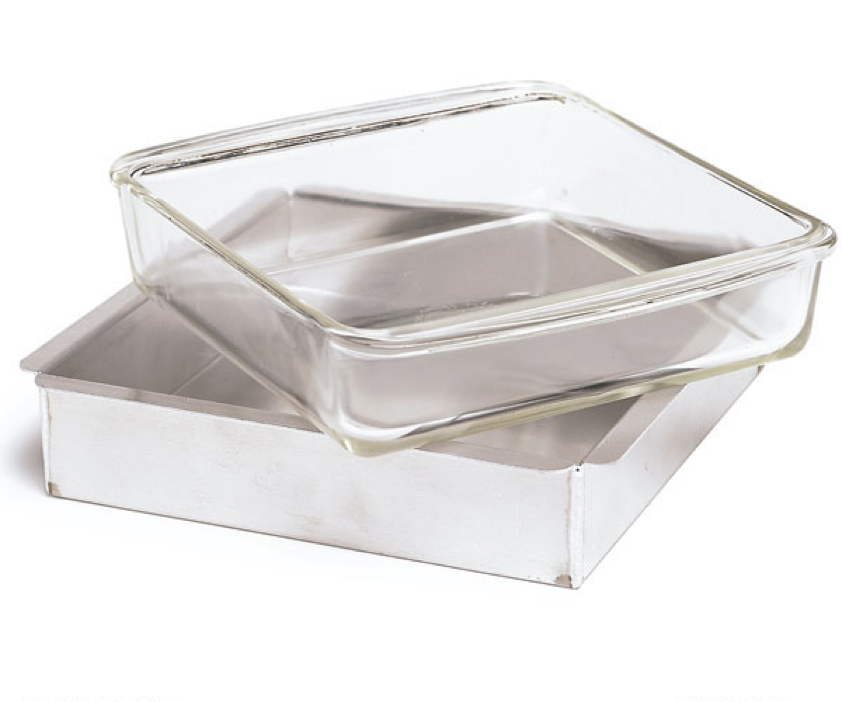
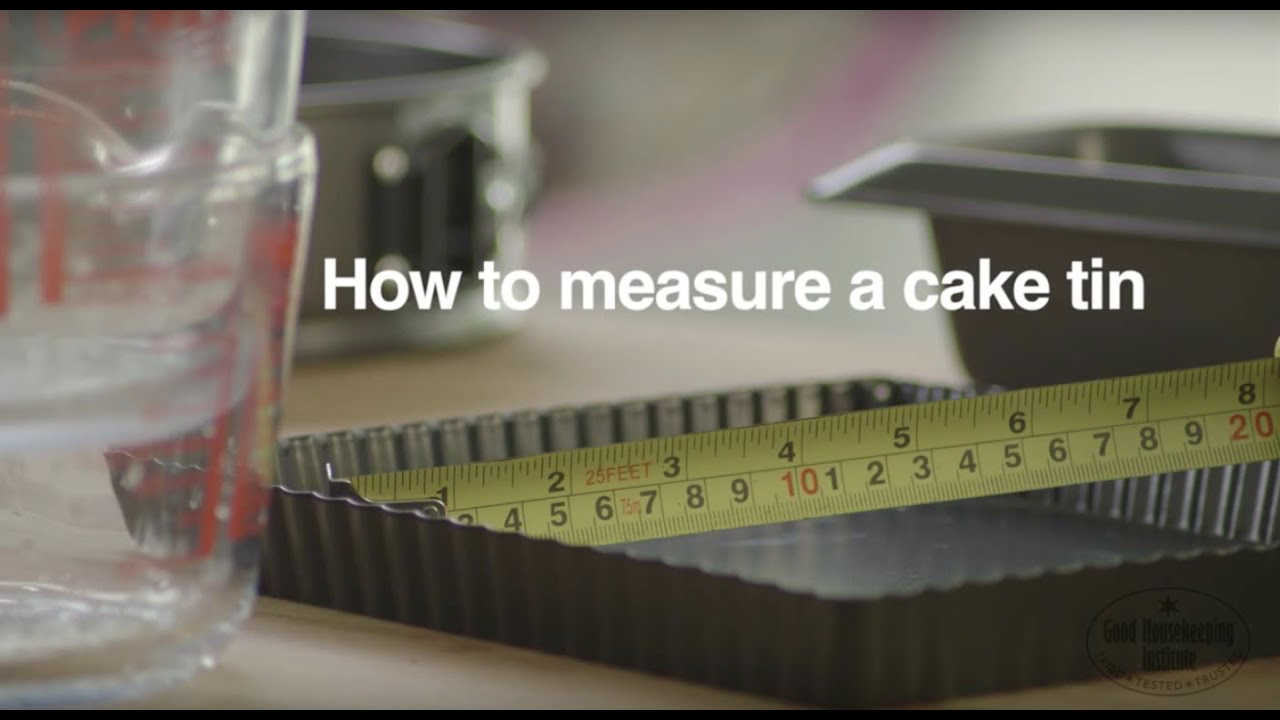
First things first: Make sure you use the size of pan that the recipe calls for. This is a BIG deal. If the pan is too big for the amount of batter you’re using, dry bars will be the result. And if the pan is too small for the amount of batter your recipe produces, your bars will end up under-baked—gooey in the middle. Recipes are carefully calculated as to yield, and changing the pan size also alters the baking temperature and time.
Then comes prepping the pan. Instead of “greasing and flouring” it, “grease and sugar” it. The bars will be easy to remove from the pan plus they’ll come with a tasty sugary crust that adds a delicious and unexpected taste and texture.
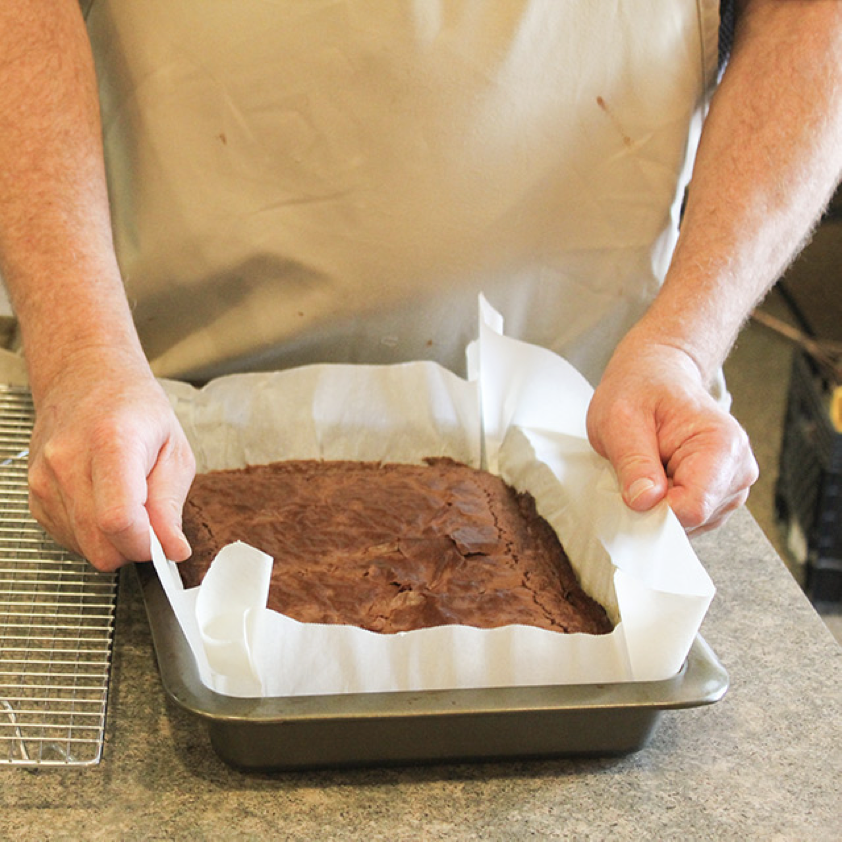
Another pan-prepping idea is to line pans with aluminum foil or parchment paper for super easy removal of bars. Grease and sugar it well, and leave an overhang at two opposite ends so you'll be able to lift out the baked bars easily. This technique saves having to wash the pan and allows for quicker cooling of the bars.
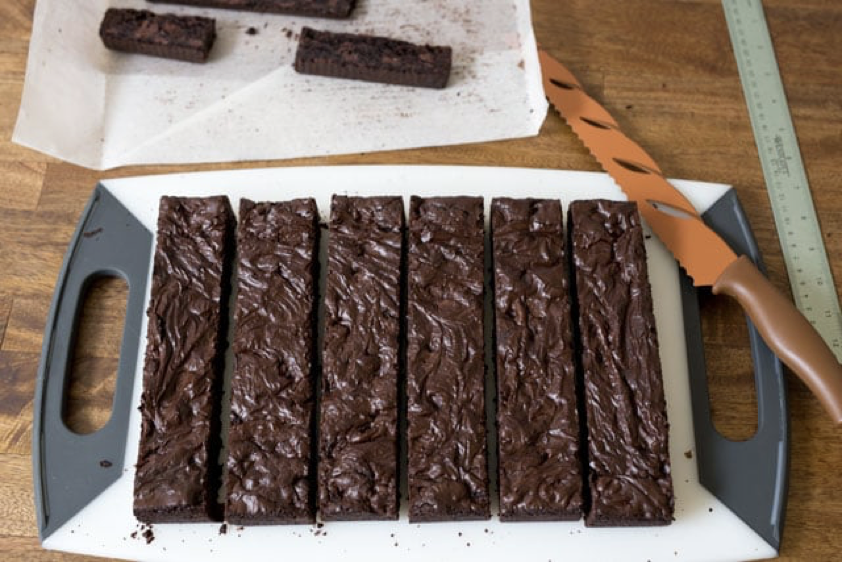
Once baked, it’s cutting time. To get a clean edge and consistent bar size, cut them the way the pros do. They score the bars with a knife as soon as they come out of the oven, using a ruler as a guide. Then they let them completely cool.
Once the bars are cool, they dip a sharp knife or pizza cutter in hot water and wipe with a dry kitchen towel before making each cut. Then they the knife or pizza cutter across the pan in an up and down sawing motion from one end to the other until cuts are complete.
Finally, you want to store them properly (assuming they won’t all be eaten in one sitting). To store bar cookies, wrap them in the pan they’re baked in, using plastic wrap or aluminum foil. If storing for prolonged periods, wrap each square in aluminum foil after they have cooled. They’ll retain their flavor and texture longer if you refrigerate or freeze them.
One last CRUCIAL TIP: If your recipe calls for nuts, be sure to smell them before adding them to any recipe. They turn rancid easily and that will ruin every recipe they sit in. Store nuts in the freezer or refrigerator when not using to keep them fresher longer.
First things first: Make sure you use the size of pan that the recipe calls for. This is a BIG deal. If the pan is too big for the amount of batter you’re using, dry bars will be the result. And if the pan is too small for the amount of batter your recipe produces, your bars will end up under-baked—gooey in the middle. Recipes are carefully calculated as to yield, and changing the pan size also alters the baking temperature and time.
- Larger, shallower pans need increased heat; smaller, deeper pans need decreased heat.
- The size of a baking pan or dish is measured across the top of the container from the INSIDE edge to INSIDE edge. The depth also is measured on the inside of the pan or dish from the bottom to the top of the rim.
- Prepare the pan carefully according to the recipe. Place pans as near the center of the oven as possible. Do not place pans directly over another and do not crowd the oven (this makes for uneven baking).
Then comes prepping the pan. Instead of “greasing and flouring” it, “grease and sugar” it. The bars will be easy to remove from the pan plus they’ll come with a tasty sugary crust that adds a delicious and unexpected taste and texture.
Another pan-prepping idea is to line pans with aluminum foil or parchment paper for super easy removal of bars. Grease and sugar it well, and leave an overhang at two opposite ends so you'll be able to lift out the baked bars easily. This technique saves having to wash the pan and allows for quicker cooling of the bars.
Once baked, it’s cutting time. To get a clean edge and consistent bar size, cut them the way the pros do. They score the bars with a knife as soon as they come out of the oven, using a ruler as a guide. Then they let them completely cool.
Once the bars are cool, they dip a sharp knife or pizza cutter in hot water and wipe with a dry kitchen towel before making each cut. Then they the knife or pizza cutter across the pan in an up and down sawing motion from one end to the other until cuts are complete.
Finally, you want to store them properly (assuming they won’t all be eaten in one sitting). To store bar cookies, wrap them in the pan they’re baked in, using plastic wrap or aluminum foil. If storing for prolonged periods, wrap each square in aluminum foil after they have cooled. They’ll retain their flavor and texture longer if you refrigerate or freeze them.
One last CRUCIAL TIP: If your recipe calls for nuts, be sure to smell them before adding them to any recipe. They turn rancid easily and that will ruin every recipe they sit in. Store nuts in the freezer or refrigerator when not using to keep them fresher longer.
Sources:
- www.cookie-elf.com
- www.youtube.com
- www.finecooking.com
- www.preparedpantry.com
- www.barbarabakes.com
 Alice Osborne
Weekly Newsletter Contributor since 2006
Email the author! alice@dvo.com