A Banneton and Artisan Bread…A Match Made in Heaven!
A banneton. Do you know what this is? Hint: If you’re an avid bread-maker, you might want to seriously consider getting one. The “proof” of this statement will “rise” before your eyes.
OK, enough teasing. An at-home bread maker's dream, the banneton serves the purpose of holding the shape of dough as it proofs and rises. The word banneton originates from the Latin ‘banne’ meaning wicker carriage. The best ones are made from cane rattan and come round or rectangular.
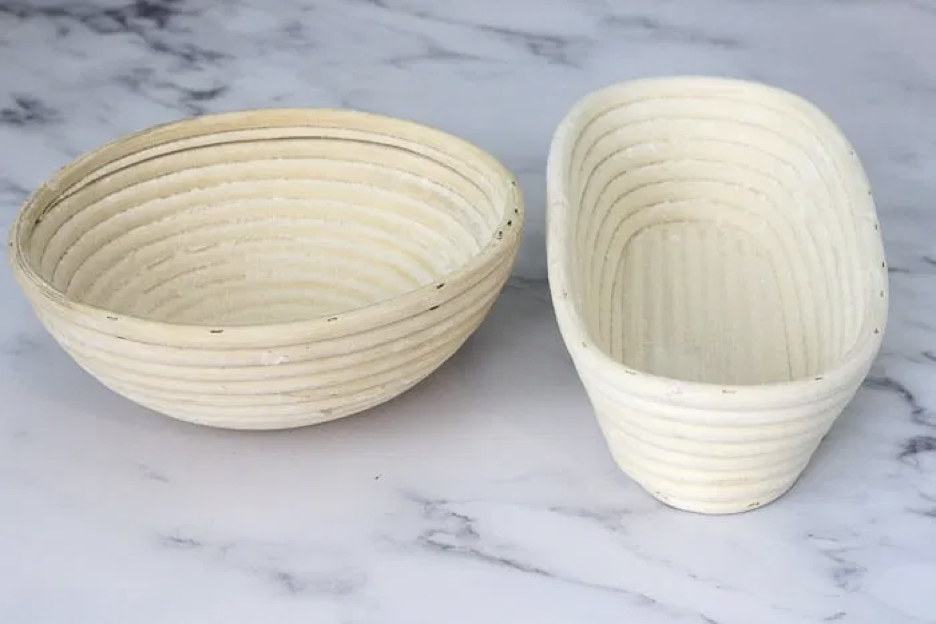
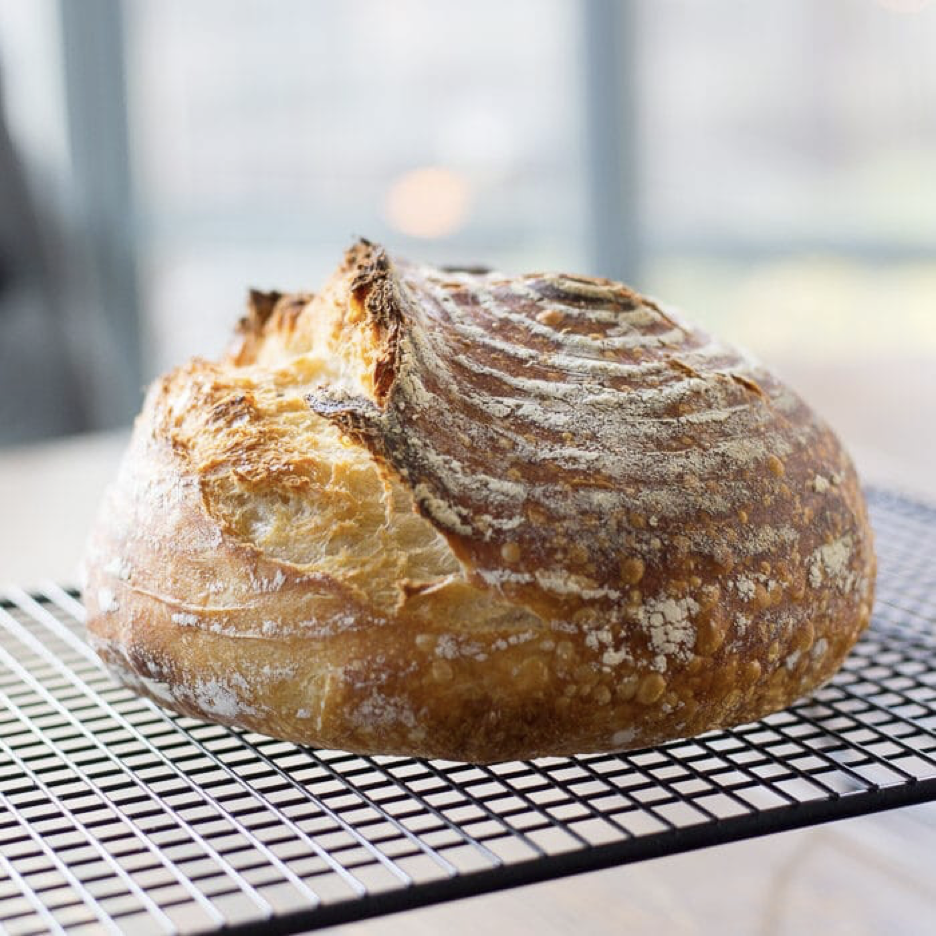
Besides protecting a loaf’s shape, the design of a cane banneton also imprints beautiful rustic spiral and line shapes on the crust. The use of this basket makes it possible to transport fully-proofed, shaped, and imprinted dough directly from the basket into the oven, without any loss of shape or design. Or you can transfer your proofed and shaped loaf into a prepared Dutch oven. Either approach works.
Simply put, the use of a banneton turns out an artisan bread with a chewy crust and a beautifully designed loaf.
Some bannetons typically come with a cloth liner that you can put into the basket if you don’t want the spiral pattern. A lot of bread bakers use this if they will be scoring intricate patterns in their loaves. And as artisan dough tends to be a little sticky, some companies will even include a dough or bench scraper.
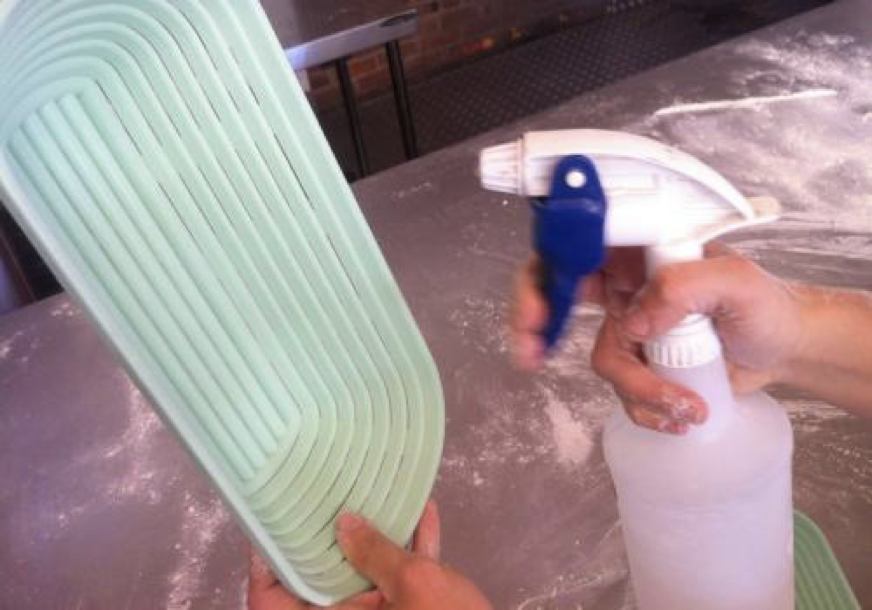
Speaking of sticky dough, a new banneton basket needs prepping so it can handle that stickiness. Here’s the best way, according to a source I really like, Banneton Man:
Step 1: Spray the Banneton with Water. Evenly spray its insides with water. It doesn’t have to be soaking wet, but you don’t want to leave any dry spots behind. If you don't have spray bottle in hand, you can also put the banneton under running tap water.
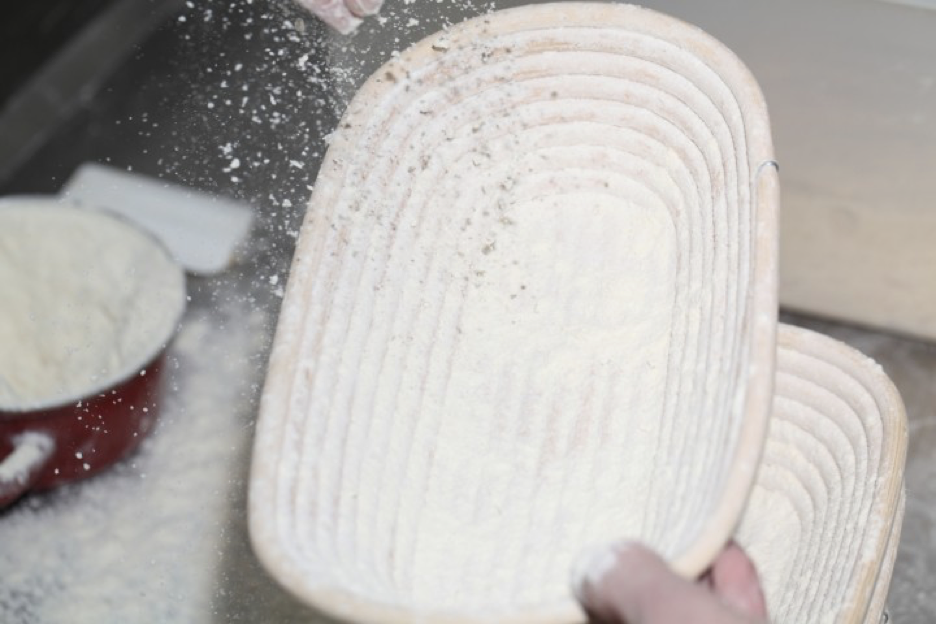
Step 2: Coat the Inside with Flour. Next, you want to spread an even layer of flour along the inside of the banneton. If you didn’t watch the video link above, you can dump a small cup of flour into the banneton, then angle it and turn it around so that flour falls into the crevices and along the sides. Dump out any excess flour, then allow it to completely dry.
For your first sourdough bake and every subsequent bake, all you have to do is coat the inside of the banneton with flour. This prevents the dough from sticking and locks in the moisture to keep your dough from drying out.
Step 3: Use the Right Flour(s). Rye flour is a popular choice if you like your bread to have a toothy crust; it absorbs moisture better than normal white flour. Rice flour mixed with white flour is also recommended by bakers because rice flour is gluten-free so the dough won't stick to the basket. The mixture of rice and white flour also makes it much easier to get the bread out of the basket and still keep its shape. 1:1 is a good mixture proportion, but don’t be afraid to try different combinations to find out what works for you.
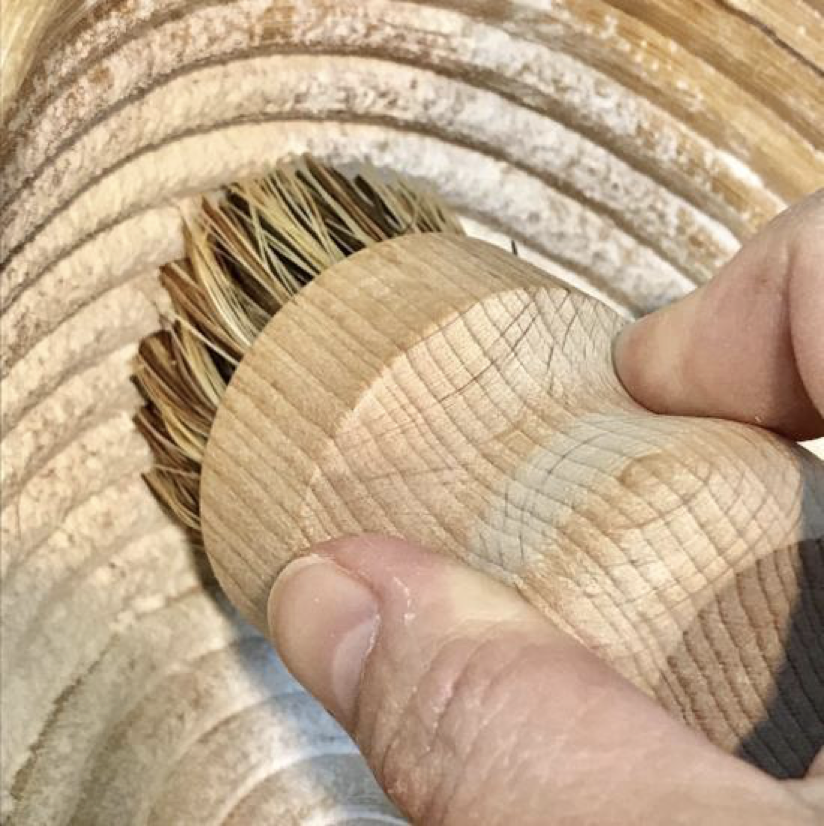
Step 4: Clean and Store Your Banneton. Your banneton doesn’t need a deep clean every time you use it. But you will want to make sure it’s completely dry before you store it to prevent mold and bacteria growth. Once a month, use a dry brush to brush out any excess flour. You may need to do this more often if you’re using your banneton frequently. There’s actually a specific brush you can get for this chore (see photo below; brush from www.bakingwarehouse.com), but any clean and stiff-bristled brush will work.
And one final point: CAN YOU PUT A BANNETON IN THE OVEN? Nope. You absolutely do not want to put your banneton basket in the oven. It’s only used for proofing your dough, never ever for baking in it.
You experience Cook’n bakers know it’s absolutely possible to bake lovely artisan breads without a banneton. So, I’m not suggesting this tool is a necessity. But, I do suggest it if you want to take your bread to the next level—it’s a match made in heaven!
OK, enough teasing. An at-home bread maker's dream, the banneton serves the purpose of holding the shape of dough as it proofs and rises. The word banneton originates from the Latin ‘banne’ meaning wicker carriage. The best ones are made from cane rattan and come round or rectangular.
Besides protecting a loaf’s shape, the design of a cane banneton also imprints beautiful rustic spiral and line shapes on the crust. The use of this basket makes it possible to transport fully-proofed, shaped, and imprinted dough directly from the basket into the oven, without any loss of shape or design. Or you can transfer your proofed and shaped loaf into a prepared Dutch oven. Either approach works.
Simply put, the use of a banneton turns out an artisan bread with a chewy crust and a beautifully designed loaf.
Some bannetons typically come with a cloth liner that you can put into the basket if you don’t want the spiral pattern. A lot of bread bakers use this if they will be scoring intricate patterns in their loaves. And as artisan dough tends to be a little sticky, some companies will even include a dough or bench scraper.
Speaking of sticky dough, a new banneton basket needs prepping so it can handle that stickiness. Here’s the best way, according to a source I really like, Banneton Man:
Step 1: Spray the Banneton with Water. Evenly spray its insides with water. It doesn’t have to be soaking wet, but you don’t want to leave any dry spots behind. If you don't have spray bottle in hand, you can also put the banneton under running tap water.
Step 2: Coat the Inside with Flour. Next, you want to spread an even layer of flour along the inside of the banneton. If you didn’t watch the video link above, you can dump a small cup of flour into the banneton, then angle it and turn it around so that flour falls into the crevices and along the sides. Dump out any excess flour, then allow it to completely dry.
For your first sourdough bake and every subsequent bake, all you have to do is coat the inside of the banneton with flour. This prevents the dough from sticking and locks in the moisture to keep your dough from drying out.
Step 3: Use the Right Flour(s). Rye flour is a popular choice if you like your bread to have a toothy crust; it absorbs moisture better than normal white flour. Rice flour mixed with white flour is also recommended by bakers because rice flour is gluten-free so the dough won't stick to the basket. The mixture of rice and white flour also makes it much easier to get the bread out of the basket and still keep its shape. 1:1 is a good mixture proportion, but don’t be afraid to try different combinations to find out what works for you.
Step 4: Clean and Store Your Banneton. Your banneton doesn’t need a deep clean every time you use it. But you will want to make sure it’s completely dry before you store it to prevent mold and bacteria growth. Once a month, use a dry brush to brush out any excess flour. You may need to do this more often if you’re using your banneton frequently. There’s actually a specific brush you can get for this chore (see photo below; brush from www.bakingwarehouse.com), but any clean and stiff-bristled brush will work.
And one final point: CAN YOU PUT A BANNETON IN THE OVEN? Nope. You absolutely do not want to put your banneton basket in the oven. It’s only used for proofing your dough, never ever for baking in it.
You experience Cook’n bakers know it’s absolutely possible to bake lovely artisan breads without a banneton. So, I’m not suggesting this tool is a necessity. But, I do suggest it if you want to take your bread to the next level—it’s a match made in heaven!
Sources:
www.bakerbettie.com
www.sourdough.com
www.weekendbakery.com
www.bakingwarehouse.com
 Alice Osborne
Weekly Newsletter Contributor since 2006
Email the author! alice@dvo.com