Brilliant, Easy Take on Caramel Apples You Have to Make This Season!
One of the very best fall treats I can think of is caramel apples. Not only are they absolutely delicious, they are really gorgeous as well. Especially when you see a variety of them all together—it is one cool looking dessert. But I tell you what—it is one of those treats I hadn’t ever really dreamed of making myself. I know they are quite hard to make—and it certainly does look hard and complex so I had left it as one of those treats for the professionals to make and I just buy them.
It is a treat that just screams fall and I always seem to have at least one every fall season. After finding a really great, brilliant recipe on Pinterest for some caramel apple slices—I knew this was my chance to have my cake (ahem….caramel apples) and eat them too! Take a look at these gorgeous babies….

I mean….
Another thing I love about these is if we’re being honest—what is our favorite part of caramel apples? Sure I love a good apple every now and again but we came for the chocolate and the caramel and the other toppings, am I right?? So this way—I get a much greater toppings-to-apple ratio and I am all about that!
Thankfully, the creator of this recipe tried all sorts of different ways to make these to get them just right and keep the apples from weeping and the caramel from sliding off so you can take the guesswork out of this recipe. They will turn out just right for you every time! That’s what I’m talking about!
Here are the basic tips to keep in mind when you are making these to ensure they turn out just right and so that nobody—you or the apples—are weeping for any reason.
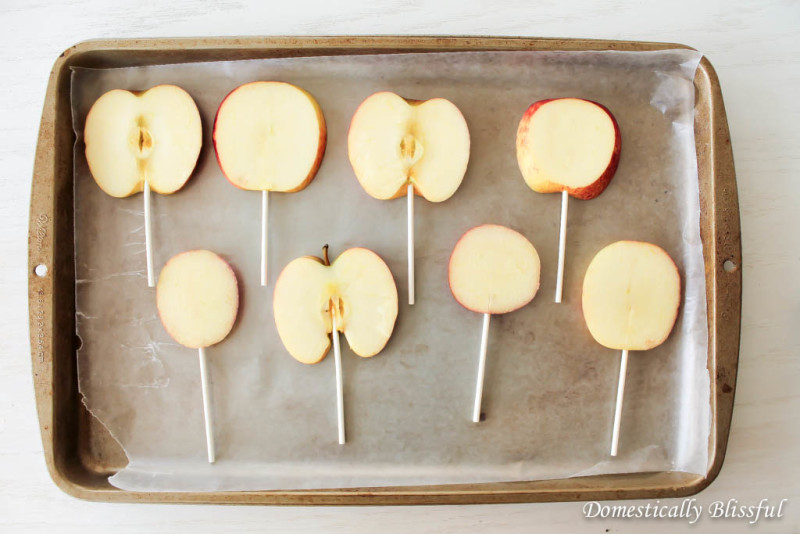
1. Cut thick apple slices so the stick stays secure. Approximately 1/2 - 3/4 inch thick works great.
2. Make sure to pat down the apples to soak up any extra apple juice.
3. Allow some of the chocolate to drip onto the stick, this will act as a sort of edible glue that holds the stick & apple together.
4. Use slightly cooled caramel so the chocolate doesn't melt off.
5. I also recommend that you make them & eat them in the same day. The longer they sit the greater chance for a weeping caramel apple slice, which will cause the yummy coating to break or slide off in some areas.
Caramel Apple Slices
Ingredients:
Apples
White or Wooden Lollipop Sticks
Melting Chocolate
Caramel
Toppings - optional
Instructions:
1. First wash & slice your apples, remove the seeds, insert the stick at the bottom, & pat the apple slices dry.
2. Cover each apple slice in melted chocolate & place on a piece of wax paper to dry. Continue this process until all of your apples are covered in chocolate & have hardened.
3. Then drizzle the caramel & other toppings on top of your apple slices.
4. Let harden & enjoy!
Notes:
*1. You could alternatively use butterscotch on your thicker slices of apples, but you should be aware that butterscotch does not harden as well as the chocolate & could result in weeping apples & the butterscotch falling off.
*2. These Sliced Caramel Apples can be made the day before & left in your fridge on wax paper until you need them the next day. Just don't forget to note the 5 tips mentioned in my recipe post.
More Tips:
1. Cut thick apple slices so the stick stays secure. Approximately 1/2 - 3/4 inch thick works great.
2. Make sure to pat down the apples to soak up any extra apple juice.
3. Allow some of the chocolate to drip onto the stick, this will act as a sort of edible glue that holds the stick & apple together.
4. Use slightly cooled caramel so the chocolate doesn't melt off.
5. I also recommend that you make them & eat them in the same day. The longer they sit the greater chance for a weeping caramel apple slice, which will cause the yummy coating to break or slide off in some areas.
- www.domesticallyblissful.com
 Mary Richardson
Weekly Newsletter Contributor since 2014
Email the author! mary@dvo.com