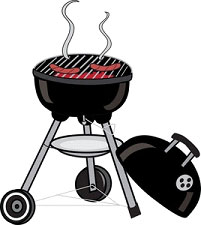
Using your Grill, a Starter Guide
By Sharon Ng
 Using your grill the first few times can be a little intimidating, so lets talk about a few of those scary parts so that you feel comfortable firing that baby up!
Choices, choices! Charcoal grills are cheaper, but they must be preheated ahead of time, typically warm up time is about 20 minutes. I preheat my gas grill for about 10 minutes. Gas grills are easier to clean, but a charcoal grill is easier to transport. Gas grills require propane, and charcoal grills require briquettes, a match and a chimney starter to get your coals going. Try not to use "Boy Scout fire starter" (Lighter fluid), as it could leave your grill with a chemical smell and taste. In addition, if you are smoking meats, you can buy flavored wood chips to go into your charcoal grill which can add a tasty hint of flavor to whatever you are cooking. Some gas grills have a smoker box where you can put wood chips also. I like that a gas grill gives me a pretty even and clear temperature read, with little guessing. Indoor Grill pans sit on top of your stove, and can be an easy, all year round solution for grilling, and you can still get those professional looking grill marks that you get at a restaurant.
Your simple starter kit. As you begin a starter kit for your new grilling adventure, keep in mind that some of the things listed in the previous paragraph may be important, depending on which option you go with. Regardless of which type of grill you use, there are some things you are going to need or want, and some safety tips to follow to make this a fun experience.
Essentials:
Long handled metal tongs- great for turning meats and veggies, or even fruit.
An oven mitt- keeping you from burning yourself, your food should be smokin', not your skin.
A meat thermometer- to make sure that cow is no longer mooing.
A chart of safe meat temperatures- to keep food safe, (reminder when cooking for pregnant mommas, no rare steak).
A basting brush- for layering on yummy sauces, do this at the end so it doesn't char.
A wire brush for cleaning your grill because charred leftovers from last week are not so tasty.
Other essentials:Some beginner spices. At our house we are in love with a spice blend that is a steakhouse seasoning grinder. It includes garlic, onion, salt, pepper, parsley, red pepper and paprika. It is delicious on chicken!
Olive Oil for marinades, olive oil keeps meat moist- I have included a very simple recipe for a starter marinade to get you started.
A fire extinguisher, placed within reach of the grill. I have never had a fire when grilling, but just in case!
An apron- this business can get messy at times!
This is a very simple starter guide, but hopefully it will encourage you to try something new. Grilling really isn't too hard, once you understand a bit about it. It can be a great, healthy change for your family, and a good way to mix up that eating routine!
Safe Meat Temperatures
Ground Meat & Meat Mixtures, in Degrees F
Beef, Pork, Veal, Lamb 160
Turkey, Chicken 165
Fresh Beef, Pork, Lamb, Veal Roasts, steaks, and chops 145*
*as measured with a food thermometer before removing meat from the heat source. For safety and quality, allow meat to rest for at least three minutes before carving or consuming. For reasons of personal preference, consumers may choose to cook meat and poultry to higher temperatures.
Poultry Chicken & Turkey, whole 165
Poultry breasts, roast 165
Poultry thighs, wings 165
Duck & Goose 165 Stuffing (cooked alone or in bird) 165
Ham Fresh (raw) 145* Pre-cooked (to reheat) 140
Super Simple Olive Oil Marinade
Defrosted Chicken Breasts
A few Tablespoons to 1/4 c olive oil (depending on amount of chicken)
Steakhouse Seasoning Grinder
A ziplock bag
Poke chicken breasts with a fork a few times each. Place chicken in zipper bag. Add a few tablespoons of olive oil, a little goes a long way, but make sure there is enough that when you zip the bag and squish it, the breasts can freely slide around. Open bag and use your seasoning grinder, a half teaspoon per breast is usually sufficient. This grinder gives a nice taste, if you would like your chicken a bit spicier, add more of the grinder, or a dash of hot sauce. Zip bag, and squish it around for a minute or two, to make sure the oil, spices and chicken have all mixed up. Let the chicken sit for 2 hours. The olive oil helps keep the chicken moist.
To Grill- I use my gas grill for this chicken, but try your charcoal by all means!
Spray grill with Pam. Over preheated grill, medium heat, place chicken on grate at 45 degrees, wait about 4 minutes, then, with tongs, rotate 90 degrees. Keep grill lid closed as possible to keep the heat stable. Wait another four minutes. Flip chicken to other side at 45 degree angle to grill, wait approximately 4 minutes and rotate again. Cook four minutes and make sure your chicken is done by using your meat thermometer. After removing from grill let stand a few minutes to rest before serving. . Don't smash your meat, as the juices are what keep meat moist, if you like a thinner chicken breast, you can pound out your chicken prior to marinating.


