

Oven Processed Soap
By Jeanne Wolfley
 Everyone needs a hobby. It all started with me when I began to discover essential oils and other carrier oils such a sweet almond oil, grape seed, olive oil, etc. I was making potions for my dry skin. Then one day I found that my crafty niece was making her own soap. She let me try what she had made and I have never been satisfied with store bought soap since. I do have sensitive skin and that is another reason for making soap. You are in charge of the ingredients. They also make awesome gifts, anytime of the year.
I asked my niece for help but she lives hundreds of miles away. So she helped me with a recipe and told me to get on line and read up on soap making. And, I did. I thought I might end up spending a lot of money on all these products and not enjoy making it as much as I thought I would. So, I used as much of what I already had in my cupboards and closets, as far as tools and supplies. I used potato chip cans for molds along with whatever else I thought would make a nice size soap mold. I already had a stainless steel pan. The only thing I bought was a digital thermometer.
Oven processing the soap is a relatively new way to make soap. It used to take me several weeks before the soap was cured so that we could use it. Now the soap process can be done in about 1½ hours and ready to be enjoyed within two days. It can actually be used right away but the bar firms up more as it sits.
I found a recipe that has only four ingredients and makes a small batch. The nice thing about few ingredients and small batches is it makes it easier to experiment. This recipe only has two oils, water and Sodium Hydroxide or more commonly as known lye. You can buy lye at most hardware stores. Before you get worried about using lye, look at a few labels and you will see that it is used in many, many products. But, it is the part of the soap making that I want you to be very careful with. Protect your body and eyes.
A 150 years ago, no one bought soap at the store. It was made at home and often it was by trial and error. It was generally made from wood ashes and animal fat. Nowadays we don’t even think much about what is in our soap? We just buy it because the commercial says “it’s the best!”
Oven Processed Soap
Get your supplies ready:
a. Large stainless steel pan
b. Large stainless steel spoon
c. Goggles or glasses
d. Heavy kitchen gloves
e. Measuring bowls
f. Scale (can be small and cheap)
g. Stick blender
h. Soap molds anything that isn’t aluminum
i. Digital thermometer
Recipe:
a. 12 ounces water
b. 4.8 ounces lye
c. 16 ounces olive oil
d. 16 ounces coconut oil
These oils can be bought at Wal-Mart. Buy the cheapest olive and coconut oils. They are perfect for soap making. The coconut oil is often found with the other baking ingredients or in the Hispanic foods isle.
Clear out the children. Make sure you have all your supplies and ingredients. Wear a long sleeve shirt, goggles and rubber gloves. You may even want to wear something to cover your nose and mouth while mixing the lye or open a window. Measure all ingredients by weight not volume.
Preheat oven: 180-190 degrees
Lye usually takes longer to cool than the oils. You can place the bowl of lye in some cool water (not ice cold) and it will help to bring the temperature down a bit faster or start mixing the lye 15 minutes before you melt your oils. Once the lye and oils are between 110 to 125 degrees, they are ready to be mixed together. There should only be 10 degrees difference between the two.
For example: If your lye is at 125 degrees your oils shouldn’t be lower than 115 degrees. They can be closer in temperature or the same, but never more than 10 degrees apart. I use the thermometer about every five minutes until I get the two mixtures in the right range for mixing.
In your stainless steel pan, add the lye mixture to the melted oils and, with your stick blender, slowly pulse ingredients until you hit trace (see below). This process usually takes only a few minutes.
Trace: When you mix ingredients together, they start to look like pudding just before it sets. When it leaves a small trace of where your spoon or blender was a few seconds ago, you have hit trace.
Put your uncovered pan into the pre-heated oven and stir every 15 minutes for 1 hour. The mixture will be yellow in color.
Cover with plastic wrap and place between bath towels for a couple of hours. Then let it set out until you are ready to unmold. Leave it alone till cool (several hours to be sure or even overnight). If it is difficult to unmold, place in the freeze for an hour.
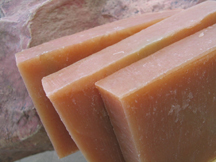
This soap is mild to your skin and is very satisfying to make. Now start looking on the internet for more examples of how to make soap and for recipes. Soon you will be making all kinds of soap. I chose this one because it is easiest for beginners and still magnificent.

Join the Cook'n Club!
An unbeatable value with exclusive benefits for members only.
Get a newsletter like this each week when you join the Cook'n Club.