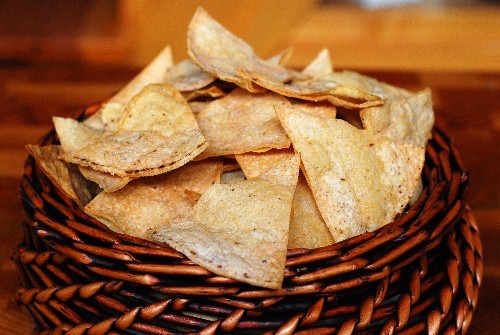
NO-Fail Homemade Tortilla Chips to the Snack-Attack Rescue
Do you have a pantry item you always try to keep on hand? Me too. It's tortilla chips. And when I run out of them, it's just no good. I can try to talk myself into turning to another snack, but myself doesn't buy the sales job. When I want tortilla chips, I want tortilla chips, and there's no way around it.

I remember well the day I figured out how to deal with this snacky panic attack. After going to the pantry 3 different times to make sure there wasn't a bag of these necessities hiding behind something or other, I remembered an unopened packaged of flour tortillas in the fridge.
And talk about heavenly mercy, I'd just finished reading an article on one of my favorite food blogs, www.simplyrecipes.com, that explained in detail how to make your own homemade tortilla chips!
The blog's author, Elise Bauer, saved my day. She said all I needed to make wonderful, fresh, crunchy, and perfectly golden tortilla chips (besides my package or tortillas) was oil and salt. In fact, she added that if you are cooking light, you don't even need oil. So as she said, "There's no excuse not to make them."
Elise says there are three basic ways she makes homemade tortilla chips. The first is the classic way, fried in a little oil. The second is to bake them in the oven. The third is to bake them in the microwave. She admits that fried in oil tastes the best, but if you need to cut calories, baking works well also.
Elise's method takes 10 minutes prep time and 15 minutes to cook up a batch. Her yield is about 72 chips from 1 dozen tortillas. If using oil, Elise suggested canola, grapeseed, or corn oil. I prefer grapeseed, myself. She uses kosher salt as well. Her instructions were built around using corn tortillas, but I tried this with flour, since that's what I had, and they worked great.
She suggests leaving the tortillas out overnight, exposed to air, so that they can dry out and even get a little stale. The purpose behind this is so they'll fry better. If you're in a hurry, though, you can dry them in the oven by laying them out in a single layer on a baking sheet and baking them at 350°F for 5 minutes or at 200°F for 10 minutes. Or you can lay them out in a single layer on a paper towel (working in batches) and microwave them for 20 to 60 seconds, depending on how strong your microwave is, and how many tortillas you're drying. She cautions: You don't want them crisp at this point, just as dry as they would be if you left them out overnight.
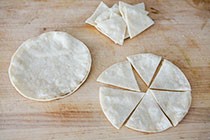
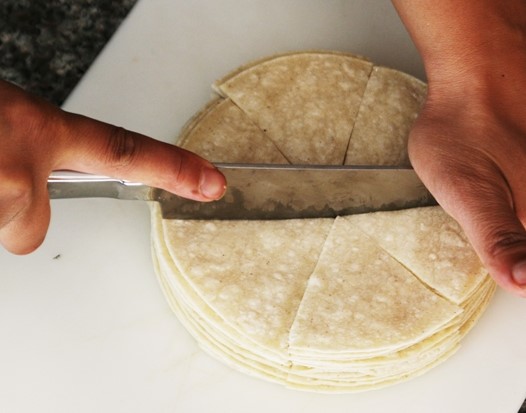
When they're dry, just cut each tortilla in 6 wedge-shaped pieces. Prior to cutting the wedges, heat some oil in a medium skillet-about ¼-inch deep. Use medium high heat (350°F is the goal). Don't let it get so hot it smokes. (If that happens, move the pan off the heat immediately.)
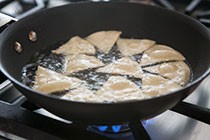
Fry 11 or 12 wedges at a time, turning once. You want each side a light golden brown. When done, remove chips from oil to a paper-towel-lined plate; sprinkle with your kosher or other coarse salt; continue frying and salting until all chips are done.
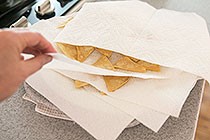
You'll continue to add layers of paper towels to your plate; the end result is a plate with several layers of chips draining on paper towels.
Elise explains that as soon as you put the tortilla triangles into the hot oil, because you are working with such a small volume of oil, the oil temperature will lower. She said she compensates for this by increasing the heat to high. And as soon as the chips begin to color, she reduces the heat to low, so the oil doesn't overheat inbetween batches of chips.
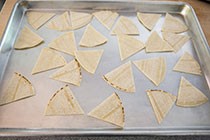
If you'd rather forgo the oil, then bake your wedges, spread out in a single layer on a large baking sheet, in a 350°F oven for about 6 minutes. Using tongs, turn wedges over and sprinkle with a little salt; continue baking for another 6 to 9 minutes, until they are just beginning to color. Remove from the oven and sprinkle with more salt to serve.
Elise concluded her excellent article with microwaving instructions:
1. Line your microwave with a paper towel.
2. Spread tortilla wedges in a single layer on the paper towel, leaving an inch or so between the wedges.
3. Microwave until the chips are crispy, but not burnt. The time will vary depending on the strength of your microwave and how many chips being cooked. Elise suggests starting off at about 30 to 40 seconds and increasing time as needed.
4. Upon removing from microwave, sprinkle with salt to serve.
- www.shopwell.com
- www.savorysweetlife.com
- www.simplyrecipes.com
- www.circle-b-kitchen.squarespace.com
 Alice Osborne
Weekly Newsletter Contributor since 2006
Email the author! alice@dvo.com