
Why Some Homemade Breads Are Soft and Fluffy and Others Turn Out Dense
Hey chefs,
There is bread, and then there is soft bread.
The kind you can pull apart in feathery strands. The kind that stays tender even after it cools. The kind that somehow manages to be rich with butter, eggs, sugar, and chocolate without feeling like you’re chewing through a brick.
If you’ve ever made cinnamon rolls, brioche, milk bread, babka, or fluffy dinner rolls, you’ve worked with what bakers call an enriched dough. And enriched dough behaves very differently from a basic loaf of bread.
A lean bread can be as simple as flour, water, yeast, and salt. Enriched breads bring ingredients like milk, butter, eggs, and sugar into the equation.
Those ingredients make bread delicious.
They also make our job a little more complicated.
Understanding what each ingredient is doing—and how to work around the problems it creates—is one of the easiest ways to get consistently softer, fluffier homemade bread.
First: What Makes Bread Fluffy?
Before adding all the fun stuff, we need a structure capable of holding everything up.
When flour is mixed with liquid, two proteins in wheat flour—glutenin and gliadin—combine to form gluten.
As the dough is kneaded, those gluten strands become increasingly organized and elastic, creating a stretchy network throughout the dough.
Meanwhile, yeast consumes available sugars and produces carbon dioxide. That gas gets caught inside the gluten network like thousands of microscopic balloons.
As those bubbles expand during fermentation and baking, the loaf rises.
So fluffy bread requires two things working together:
Enough gas production and enough structure to hold onto that gas.
This is why simply adding more yeast isn’t the answer to dense bread. If the dough isn’t developed properly, there isn’t enough structure to trap all that gas anyway.
And once we start adding butter, eggs, milk, and sugar, maintaining that structure becomes even more interesting.
Butter Makes Bread Tender—but It Can Also Get in the Way
Butter is one of the reasons enriched breads have such a luxurious texture.
Fat coats flour proteins and physically interferes with some gluten formation. That sounds like a bad thing, but in moderation, it is exactly what makes bread tender instead of tough.
Think about the difference between a crusty baguette and a brioche bun.
Both contain gluten. Brioche simply has significantly more fat working against that gluten network, giving it a softer, finer crumb.
The trick is timing.
If you dump a large amount of butter into flour immediately, that fat can coat the flour before the gluten structure gets much of a chance to form.
For very buttery doughs, it often works better to begin kneading the flour and liquids first.
Once the dough has started developing some strength, softened butter can gradually be kneaded into the existing gluten network.
At first the dough may look like it has completely fallen apart.
Keep kneading.
Eventually it usually transforms into something beautifully smooth, stretchy, and almost satiny.
That’s one of my favorite bread-making transformations.
Sugar Is Delicious. Yeast Is Less Enthusiastic About It.
Sugar does far more in bread than make it sweet.
It contributes to browning, helps retain moisture, tenderizes the crumb, and obviously makes sweet breads taste fantastic.
But yeast and sugar have a slightly complicated relationship.
Yeast can consume simple sugars, but large concentrations of sugar also pull water toward themselves through osmosis. That means there is less readily available water for the yeast.
In other words:
A very sweet dough will often rise more slowly than a basic bread dough.
This is completely normal.
One of the biggest mistakes with enriched bread is assuming something has gone wrong simply because it hasn’t doubled in 45 minutes.
Rich doughs frequently need patience.
Watch the dough instead of the clock.
Eggs Do a Little Bit of Everything
Eggs are tiny overachievers in bread dough.
They contribute:
- fat and richness
- protein and structure
- water
- emulsifiers
- color
- flavor
Egg yolks are especially useful because they contain lecithin, a natural emulsifier that helps fat and water coexist more smoothly.
That’s one reason breads made with eggs and butter can have such an incredibly fine, plush crumb.
The additional protein from eggs also helps strengthen the loaf—a useful counterbalance when we’re simultaneously loading that dough with ingredients that tend to make gluten development more difficult.
Milk Makes Bread Softer
Milk adds fat, protein, lactose, and additional flavor to bread dough.
Compared with water-based doughs, breads made with milk tend to have a softer crumb and richer flavor.
Milk sugars also encourage browning, which is why enriched breads often develop those beautiful deep golden tops.
But there is another technique that can make milk bread dramatically softer.
And this is where things get really fun.
Meet Tangzhong: One of the Best Tricks for Softer Bread
Tangzhong sounds fancy.
It isn’t.
It is simply a small portion of the flour and liquid from a bread recipe cooked together before being added to the dough.
As that mixture heats, the starch granules in the flour absorb liquid and swell in a process called starch gelatinization.
Instead of the flour merely being mixed with water, it becomes capable of holding onto substantially more moisture.
That cooked paste then gets incorporated into the bread dough.
The result?
Bread that can hold more water without becoming an unmanageable puddle.
That additional moisture contributes to an exceptionally soft crumb and also helps the bread stay soft longer after baking.
This technique is especially famous in Japanese and Asian-style milk breads, but it works beautifully in all kinds of enriched breads.
Cinnamon rolls.
Dinner rolls.
Sandwich bread.
Sweet buns.
And, yes, babka.
Why More Flour Isn’t Always the Solution
This is probably one of the most important lessons in bread baking:
Soft dough is supposed to be soft.
When an enriched dough feels sticky, the instinct is often to start pouring flour into it until it stops sticking.
And suddenly that fluffy bread recipe contains an extra cup of flour.
The dough becomes wonderfully easy to handle.
The baked bread becomes wonderfully useful as a doorstop.
Enriched dough should usually feel softer and tackier than something like pasta dough.
There is an important difference between tacky and wet.
A tacky dough may cling slightly to your fingers but still form a cohesive ball and pull away from the bowl.
A truly wet dough behaves more like batter and cannot hold its shape.
If the recipe has been properly formulated, give the dough time to knead before deciding it needs additional flour.
Gluten development itself can transform a sticky dough into a smooth one.
How to Know When Dough Has Been Kneaded Enough
Recipes love telling us to “knead for 8 minutes.”
Unfortunately, bread dough has never owned a stopwatch.
Temperature, flour, mixer speed, humidity, ingredient temperature, and even the size of your batch can change how quickly gluten develops.
So use the time as a guideline and learn what properly kneaded dough looks like.
You’re looking for dough that is:
Smooth.
The rough, shaggy appearance should disappear.
Elastic.
When stretched, it should resist gently instead of immediately ripping.
Slightly tacky rather than gluey.
Able to stretch thinly.
That last test is often called the windowpane test.
Take a small piece of dough and gently stretch it between your fingers. Properly developed dough should stretch into a thin membrane before tearing.
You don’t necessarily need a perfectly transparent bakery-school windowpane every single time, but the dough should demonstrate obvious elasticity.
Temperature Matters More Than Most People Realize
Yeast is alive, which means temperature affects it dramatically.
Too cold and fermentation slows down.
Warm and cozy and it gets to work.
Too hot and you can damage or kill it.
For active dry yeast, warm liquids around 105–110°F are a comfortable target for activation.
But temperature matters later too.
Enriched dough contains butter, and butter changes dramatically depending on temperature.
Very warm enriched dough can become greasy and difficult to shape because the butter begins softening excessively.
Very cold dough becomes stiff.
This is why refrigeration can be such a useful tool.
A short chill firms the butter, relaxes the gluten, and makes sticky enriched dough dramatically easier to roll, fill, cut, braid, and twist.
Cold dough isn’t cheating.
It’s strategy.
Why Filled Breads Are Even Trickier
Now take everything we’ve discussed and add chocolate, cinnamon sugar, jam, nuts, or another filling.
Suddenly your dough has another job.
It has to support itself and a heavy filling.
Too much filling can separate layers and interfere with the bread’s internal structure.
A filling that is too warm can leak everywhere.
A filling that is too stiff can tear the dough.
For swirl breads, you generally want fillings that are cool and spreadable.
Think soft frosting rather than melted sauce.
And after rolling a filled dough into a log, another short trip to the refrigerator can make slicing and shaping dramatically cleaner.
Chocolate smeared across the counter is delicious.
It is not particularly helpful.
Proofing: Stop Waiting for the Dough to Obey the Recipe
Bread recipes often give rise times because we need some kind of guideline.
But fermentation is affected by too many variables for those numbers to be absolute.
A recipe might say:
Rise 60 minutes.
Your bread doesn’t know that.
Instead, learn to recognize properly proofed dough.
During the first rise, you’re generally looking for significant expansion—often roughly doubled in volume.
During the final proof after shaping, enriched breads should look noticeably puffier, softer, and more aerated.
You can also gently press the dough with a fingertip.
If it springs back immediately, it probably needs more time.
If it slowly springs back while leaving a slight indentation, it is usually getting close.
If the dough collapses or the indentation never moves, it may be overproofed.
Why Enriched Bread Can Look Done Before It Actually Is
Rich bread browns quickly.
Sugar, milk, eggs, and butter all encourage color development.
That means you can have a spectacularly golden loaf while the center is still underbaked.
This becomes particularly important with filled breads because chocolate, sugar, and butter create dense internal layers.
If the crust is getting too dark, loosely tent the loaf with foil and continue baking.
For large enriched loaves, an instant-read thermometer is extremely useful.
The bread portions of a finished loaf will generally land around 190–200°F, depending on the specific bread.
Just be careful where you insert the thermometer in a heavily filled bread.
Stick your thermometer into a pocket of molten chocolate and congratulations—you’ve measured the temperature of chocolate.
Aim for the actual bread.
Soft Bread Is Really a Balancing Act
The more I bake bread, the more I think enriched dough is one of the best examples of how cooking becomes easier once you understand the why.
We’re trying to balance competing forces.
We want gluten for structure—but not so much that the bread becomes chewy.
We want butter for tenderness—but we don’t want it preventing the dough from developing.
We want sugar for sweetness and moisture—but it slows fermentation.
We want lots of moisture—but not dough that is impossible to shape.
And techniques like tangzhong, proper kneading, controlled fermentation, and strategic chilling help us get all those things at once.
Which brings me to one particularly ridiculous example of enriched bread done right:
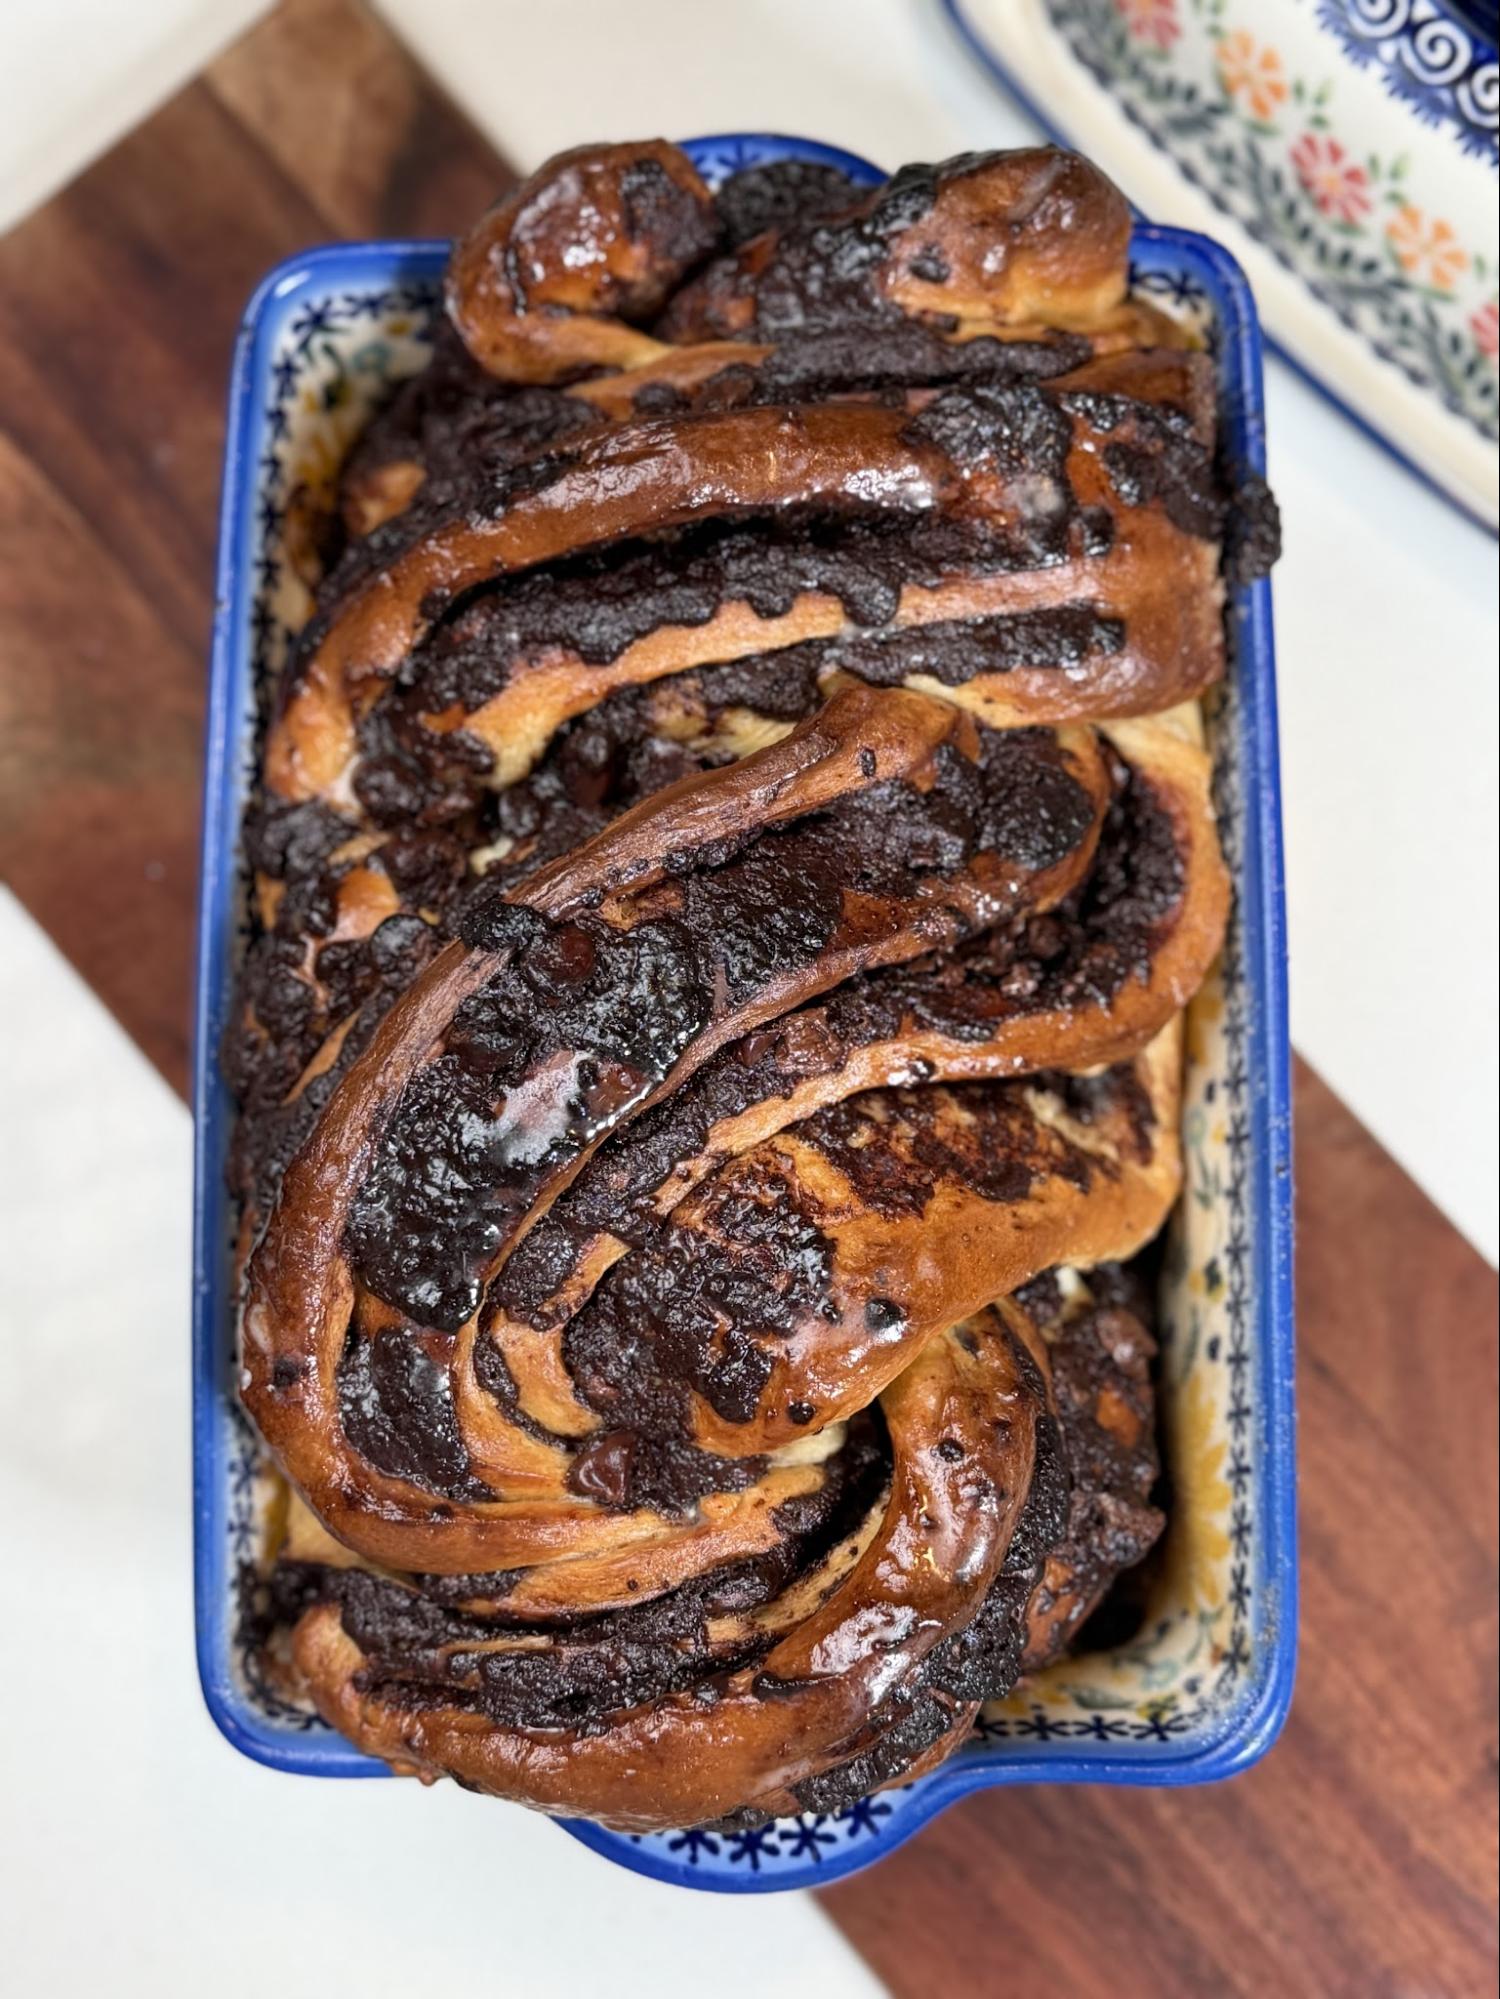
Chocolate Babka.
It uses a tangzhong milk bread dough for an extra-soft crumb, then gets rolled with rich chocolate filling and even more chopped chocolate before being sliced open and twisted into those dramatic babka layers.
Because sometimes learning about bread science should end with an unreasonable amount of chocolate.
Here is that recipe:
Chocolate Milk Bread Babka
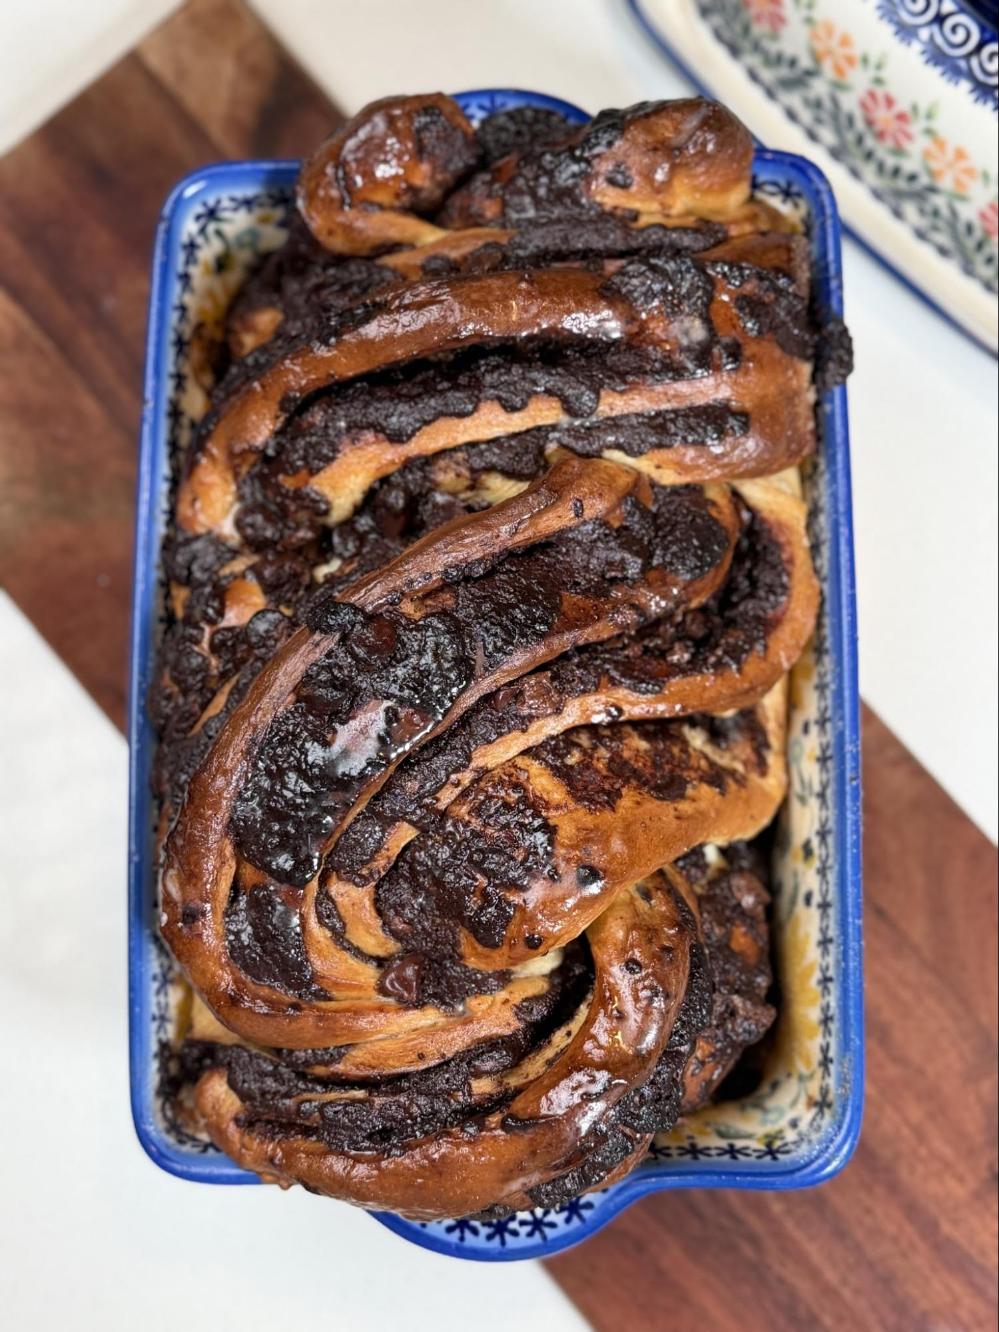
For a standard bread pan A soft, fluffy chocolate babka made with tangzhong dough, rich chocolate filling, and chopped chocolate layered through the swirl. This version is sized for a standard loaf pan. Pan 1 standard loaf pan, either 8.5 × 4.5 inches or 9 × 5 inches For an 8.5 × 4.5-inch pan, the loaf will be taller. For a 9 × 5-inch pan, it will be slightly wider and a little lower.
Serves: 9
Calories per serving: 152
TANGZHONG
20 grams bread flour
100 grams whole milk
DOUGH
320 grams bread flour
50 grams granulated sugar, divided
7 grams active dry yeast
6 grams fine salt
120 grams whole milk
1 large egg, about 50 g without shell
1 large egg yolk, about 18 g
All of the cooled tangzhong
70 grams unsalted butter, very soft
CHOCOLATE FILLING
120 grams dark or semisweet chocolate, finely chopped
75 grams unsalted butter
35 grams brown sugar
25 grams granulated sugar
20 grams Dutch-process cocoa powder
10 grams honey or light corn syrup
1 teaspoon vanilla extract
1/4 teaspoon fine salt
CHOPPED CHOCOLATE LAYER
90 to 110 grams dark or semisweet chocolate, finely chopped
90 grams for a cleaner bake or 110 g for a gooier, more dramatic babka.
FINISH
2 tablespoons melted butter
Optional: flaky salt
Directions:
In a small saucepan, whisk together the 20 g bread flour and 100 g milk until smooth.
Cook over medium-low heat, stirring constantly, until the mixture thickens into a smooth paste and the whisk leaves visible tracks through it.
Transfer to a bowl and let cool until room temperature or just barely warm.
⸻
Activate the Yeast
Warm the 120 g milk to about 105–110°F. It should feel warm, not hot.
Stir in the 7 g active dry yeast and about 1 teaspoon of the measured sugar.
Let sit for 5–10 minutes, until foamy and creamy.
⸻
Make the Dough
In the bowl of a stand mixer, combine the 320 g bread flour, remaining sugar, and salt.
Add the activated yeast mixture, egg, egg yolk, and cooled tangzhong.
Mix with the dough hook on low speed until a shaggy dough forms.
Increase to medium-low and knead for 5–7 minutes, until the dough starts to look smoother and more elastic.
Add the softened butter a little at a time, letting each addition mostly incorporate before adding more.
Continue kneading for 8–12 minutes, until the dough is very smooth, soft, elastic, and slightly tacky. It should pull from the sides of the bowl and stretch thinly without tearing immediately.
Transfer to a lightly greased bowl, cover, and let rise until doubled, about 1 1/2 to 2 1/2 hours.
Gently deflate the dough, cover, and refrigerate for 30–45 minutes. This makes it easier to roll and twist cleanly.
⸻
Make the Chocolate Filling
Melt the 120 g chocolate and 75 g butter together gently in the microwave or over a double boiler.
Stir in the brown sugar, granulated sugar, cocoa powder, honey or corn syrup, vanilla, and salt.
Let the filling cool until thick and spreadable, like soft frosting. It should not be warm or runny when you spread it on the dough.
⸻
Prep the Pan
Butter the loaf pan well.
Line it with parchment, ideally leaving overhang on the long sides to create a sling.
Butter the parchment lightly.
⸻
Shape the Babka
Roll the chilled dough into a rectangle about 10 × 16 inches.
Spread the chocolate filling evenly over the dough, leaving about a 1/2-inch border along one short edge.
Sprinkle the chopped chocolate evenly over the filling and press it in lightly.
Starting from the opposite short edge, roll the dough tightly into a log. Pinch the seam gently to seal.
Place the log on a tray and chill for 15–20 minutes so it cuts more cleanly.
Using a sharp knife, slice the log in half lengthwise to expose the chocolate layers.
Turn both halves cut-side up. Twist them over each other, keeping the exposed chocolate layers facing upward as much as possible.
Tuck the ends under slightly and place the twist into the prepared loaf pan.
⸻
Final Rise
Cover loosely and let rise until puffy, about 45–75 minutes.
The babka should look expanded, soft, and airy, but it should not be dramatically overflowing the pan before baking. A gentle press should spring back slowly and leave a slight dent.
⸻
Bake
Preheat the oven to 350°F.
Place the loaf pan on a sheet pan in case any chocolate bubbles over.
Bake at 350°F for 10 minutes.
Reduce the oven temperature to 325°F and bake for another 35–50 minutes, tenting loosely with foil once the top is deeply golden.
The babka is done when the bready portions register about 195–200°F. Avoid temping directly into a chocolate seam because melted chocolate can give a misleading reading.
⸻
Finish
Brush the hot babka with 2 tablespoons melted butter as soon as it comes out of the oven.
Sprinkle with a tiny pinch of flaky salt, if desired.
Let cool in the pan for 15–20 minutes, then lift out with the parchment and transfer to a rack.
Let cool until warm before slicing.
Recipe formatted with the Cook'n Recipe Software from DVO Enterprises.
 Brennah Van Wagoner
Weekly Newsletter Contributor since 2025
Email the author! brennah.oaks@gmail.com