Happy Traveling and Happy Snacking Don’t Need to Be Mutually Exclusive
Take a look at something that just came to me from the very cool foodie site, Food52 (www.food52.com), regarding travel snacks:
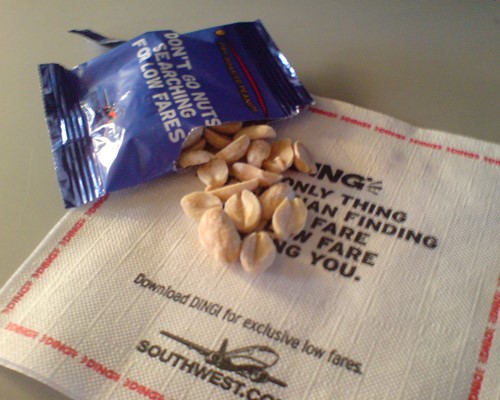
“We all know a miniature bag of peanuts is not enough to get you through that 6-hour flight to your parents' place. Nor should gas station pork rinds have to be your main source of protein as you cross the country in your sedan.”
Yup, I know that, so this got my attention. I could relate to both scenarios. And I was really hoping the article had some practical, doable, but fun-to-eat alternative solutions to the poor choices mentioned above.
I know I’ve talked about traveling and snacking before, and shared my own list of snacking ideas. But here’s the deal: I’ve tried my ideas (maybe you have too) and to be honest, they don’t really fill the bill. Oh sure, celery and carrot sticks, cherry tomatoes, cucumber slices, whole grain crackers, and fresh fruit will fill me up alright, but they don’t really cut the mustard.
What do I mean by something that could cut the mustard? Food that isn’t boring—food that is out of the ordinary—FUN-TO-EAT snacks. Isn’t that what we all really want, after all (especially when we’re traveling)? Must happy traveling and happy snacking be mutually exclusive? I hope not.
Well, this intriguing article, written by Katherine Oakes (not to be confused with our own wonderful Kathy Oaks, awesome wife of amazing Dan Oaks), didn’t disappoint. First it mentioned the obvious—the obvious need to plan ahead. And then author Katherine shared her travel-snacks ideas (much better than mine, I have to admit). See what you think:
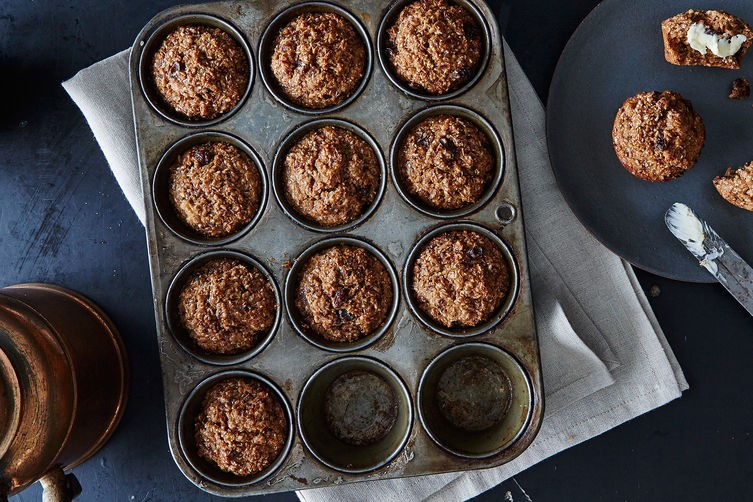
(taken from Food52’s section, Genius Recipes). While a bran muffin doesn’t exactly sound like something FUN-TO-EAT, I include this idea because these are so filling and stinkin’ good!
BEST BRAN MUFFINS (yield: 10 to 12 muffins)
2 cups whole wheat bran
2 cups raisins, divided
1 1/2 cups water, divided
1/2 cup buttermilk
2 teaspoons orange zest, finely chopped (around 1/2 of an orange)
2/3 cup light brown sugar, packed
1/2 cup melted butter
1 extra-large egg
1 extra-large egg white
1/2 cup unbleached all-purpose flour
1/4 cup whole-wheat flour
1 teaspoon baking powder
1 teaspoon baking soda
3/4 teaspoon salt
Lightly coat a muffin tin with 1/2-cup capacity cups with melted butter, and fit a pastry bag with a large tip (if desired). Set aside.
Adjust the oven rack to the middle setting and preheat the oven to 350º F. Spread the bran on the baking sheet and toast for 6 to 8 minutes, stirring halfway through to make sure it doesn't burn.
In a small saucepan, combine 1 cup of the raisins and 1 cup of water and simmer on low heat until the liquid has been absorbed, about 15 minutes. Place raisins in a blender or in a food processor fitted with the steel blade, and process until puréed. Pour the bran into a large bowl, add the buttermilk and remaining 1/2 cup water, and stir to combine. Stir in the raisin purée, orange zest, and brown sugar. Add the oil, the whole egg, and the egg white, mixing well to combine.
Sift the flours, baking powder, baking soda, and salt into the raisin mixture. Add the remaining whole raisins and stir to combine. Spoon the batter into the prepared muffin tins, mounding the batter slightly but taking care not to overfill. Bake for about 25 minutes, until the muffins are well-browned and firm to the touch.
Now before I go on with another super snacking idea, I want to comment on some of the above ingredients (this is for all the novice cooks out there):
1. When a recipe calls for buttermilk and you don’t have any on hand, make your own using vinegar and milk. 1 tablespoon of vinegar added to 1 cup of milk will turn it into buttermilk in about 15 minutes.
2. Orange zest adds sparkle to just about any baked good. So get in the habit of zesting your oranges before you peel and eat them. The zest freezes well and when you have it on hand, you’ll be more inclined to add it to your next batch of whatever it is you’re baking.
3. We’ve all run out of brown sugar, or found the stuff we do have is hard as a rock. Grrr. We don’t have time for that, so start making your own. 2 cups of white sugar turns brown from 1 heaping tablespoon of molasses worked through it. This only takes a few minutes.
4. You’ll have an egg yolk left over when making this recipe, so make a moisturizing facial with it by combining it with oats, honey, and a pinch of alum. Mix and spread over your freshly washed face. Let it dry (takes about 20 minutes) and then rinse off. Your skin will be beautiful!
5. Keep all whole-grain flours in the fridge to keep the nutrients intact and to protect the flours from going rancid.
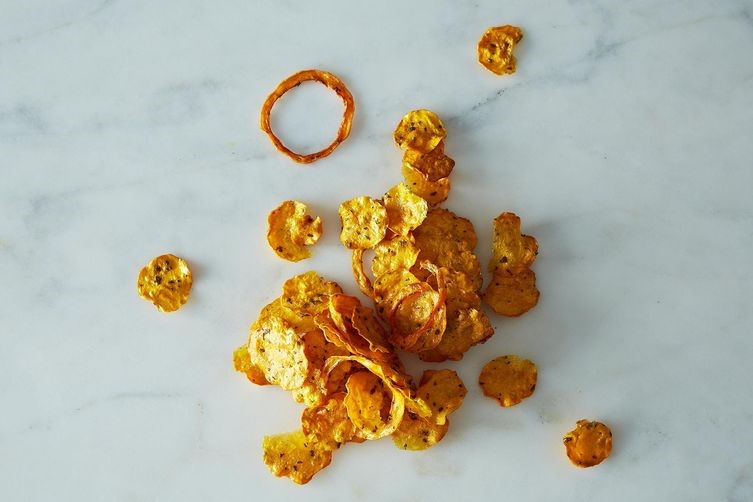
And now another super snacking idea: HERBED BUTTERNUT SQUASH CHIPS. This recipe, created by cook Merrill Stubbs, makes about 2 cups, and this cuts the mustard for sure! Delicious and fun-to-eat.
HERBED BUTTERNUT SQUASH CHIPS
1 small butternut squash, about 1 pound
2 teaspoons chopped mixed fresh herbs (sage, thyme and oregano work well)
4 teaspoons olive oil
1/2 teaspoon salt
Heat the oven to 250 degrees F and put a rack in the middle of the oven. Peel the squash and cut it in two, separating the thin end without seeds from the bulbous end. Scoop out the seeds with a spoon and discard them (or save and roast them if you're feeling energetic).
Slice the squash finely with a mandoline, about an 1/8-inch thick. You'll have nice neat rounds from the seedless end, and pretty rings from the other end.
Toss the squash in a bowl with the herbs, olive oil and salt. Line 2 baking sheets with parchment and spread out the squash slices in a single layer on the parchment. Bake for an hour, then flip the slices using tongs or a spatula. Bake for another hour. Turn the slices again, lower the heat to 200 degrees and bake for another hour. Turn off the oven and let the chips cool in there for several hours, or overnight. Remove from the parchment and serve, or store in an airtight container for up to a week.
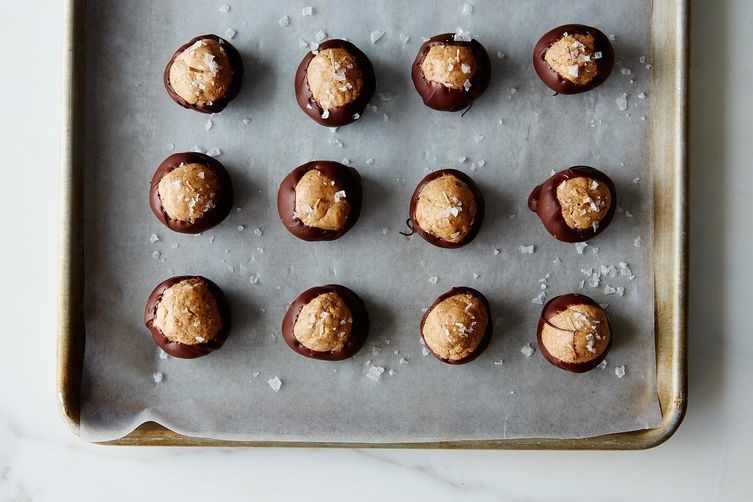
Finally, one last idea created by Sarah Jampel. These ALMOND BUTTER BUCKEYES, easy to make and really good, WOWED us. I hope these recipes wow you, too. So let’s plan ahead with these make-aheads and enjoy happy traveling and happy snacking—they don’t need to be mutually exclusive!
ALMOND BUTTER BUCKEYES (yield: 4 to 5 dozen candies)
1 1/2 cups almond butter (or cashew, peanut, or sunflower butter)
1/2 cup unsalted butter, at room temperature
1/2 teaspoon vanilla extract
3 to 4 cups confectioners' sugar, as needed
1 teaspoon cinnamon
1 1/2 cups semi-sweet chocolate chips
Sea salt, for sprinkling
Using a stand mixer fitted with a paddle attachment or a wooden spoon and a lot of arm power, cream together the almond butter and the butter until light in color and airy in texture. Add the vanilla and stir to combine. Whisk the confectioners' sugar with the cinnamon.
Next, pour in the confectioners' sugar, a little at a time, and beat until the sugar is incorporated and the dough holds together when compacted. If the mixture is still wet -- as might be the case if you're using almond butter with a lot of natural oils -- you'll need to add more confectioners' sugar. Make sure to add the sugar slowly: You can always add more but you won't be able to go back.
Using your hands or a cookie scoop, shape the dough into small balls that are about the size of 2 compacted tablespoons. Place each ball on a parchment-lined baking sheet. Put the baking sheets in the freezer to firm up for 20 to 30 minutes.
When the peanut butter balls are sufficiently chilled, melt the chocolate in the microwave in 20-second intervals until it's smooth and glossy.
Dip each frozen ball into the melted chocolate, coating each as much as you'd like. Once all of the peanut butter balls have their chocolate coats, lay them back to rest on the baking sheets and spear each one with a toothpick for a cleaner eating experience.
Sprinkle the buckeyes with flaky sea salt while the chocolate is still melty -- that'll help the salt to adhere.
Put the sheets back into the freezer for 5 to 10 minutes, until the chocolate has set and the buckeyes are firm. Sneak 1 or 2 for yourself, then wrap them up for your valentine. (And save any extra in the refrigerator for the next couple of weeks. Or keep them in the freezer for whenever you need a spontaneous gift.)
- www.catherinepng.blogspot.com
- www.food52.com
 Alice Osborne
Weekly Newsletter Contributor since 2006
Email the author! alice@dvo.com