PLASTIC WRAP TRICKS YOU NEED TO KNOW
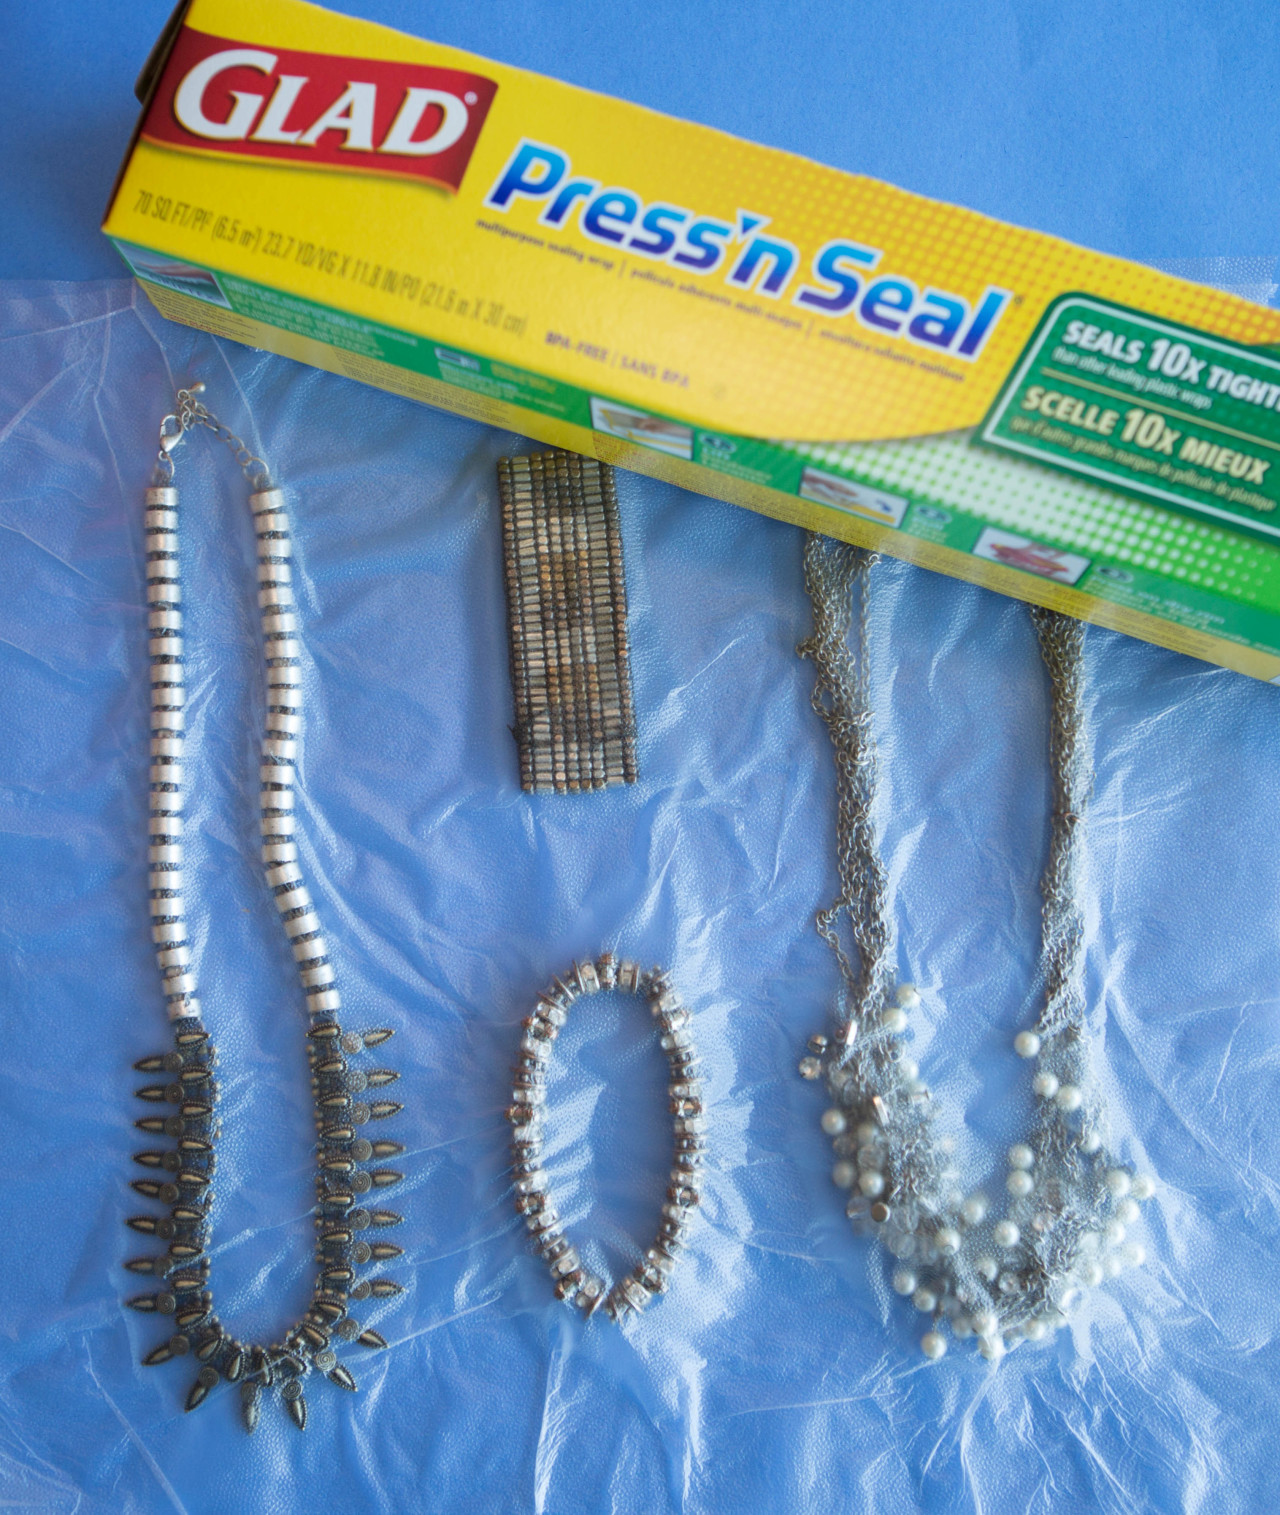
· Save space when traveling by packing your jewelry between two sheets of Press'n Seal wrap. The jewelry will stick to it and it won't budge at all.
· Avoid ice cream freezer burn by placing a layer of plastic wrap over your ice cream before putting the lid back on.
· I don't know about you but I can't stand spills in the fridge. Isn't cleaning the fridge the worst? Keep the shelves clean by covering them with plastic wrap. Remove and replace it whenever a spill occurs.
· Place Glad Press'n Seal plastic wrap over open bins when you're moving to keep the contents contained.

· Turn any cup into a travel cup with Press'n Seal wrap (It has to be the Press'n Seal. Regular cling wrap won't cut it for this). Just insert a straw after you've covered the cup! I do this almost every single day when I send my husband off to work with his protein shake. Works like a charm!
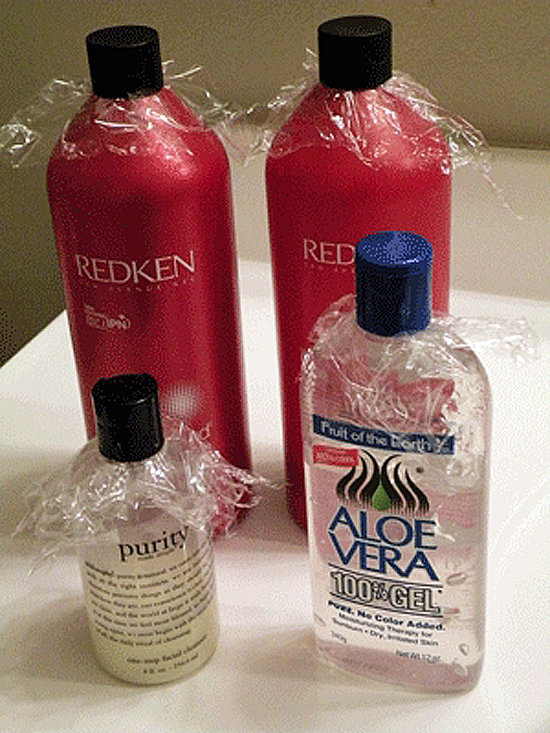
· Speaking of traveling, toiletries can create a big mess when they leak. Protect your clothes by placing plastic wrap under the caps of all your shampoos, conditioners, etc.
· Cover your phone with plastic wrap to protect it from snow or rain when you're going out for a run. No excuses, people!!
· Wrap the ends of your bananas in plastic wrap to slow down the ripening process.
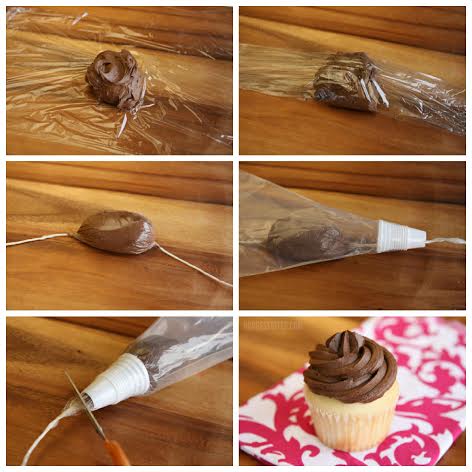
· Keep your piping bag clean when using different colors of frosting by wrapping each flavor (or color) in plastic wrap before inserting it into the bag. This would be especially handy when using different colors of frosting to pipe on the same project.
· If you are not able to finish your whole painting project in your house (it seems like there is always some sort of interruption every time!), wrap your roller in plastic wrap (and put your paint brush in a Ziploc baggie) and throw them in the fridge to keep them from drying out between uses.
· When you are camping or have a picnic, line your dishes with plastic wrap for easy cleanup.
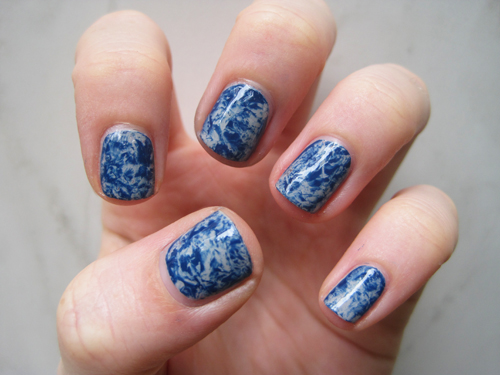
· Get a marbled nail look by dabbing painted nails with plastic wrap dipped in a different color. You will need two different colors. Paint your nails your base coat color and let it dry completely. Working with one nail at a time, apply a coat of the second polish over one nail. Grab a piece of plastic wrap and Immediately blot the top of your nail once or twice with a crumpled piece of plastic wrap while the polish is still wet. When the sticky wrap touches the wet polish, it will pull up a bit of the color, creating a marbled effect with the base color underneath. If you pull up too much of the wet polish, just add a little more color and dab at it with plastic wrap again. Continue until you've completed each nail. If you end up with some polish smudges outside the lines, dip a Q-tip or a small brush in nail polish remover to clean up around the edges. The surface of your nails may be a bit bumpy, so finish your marbled mani with one or two layers of top coat to achieve a smooth and shiny surface.
· Cover seeds that you've started with plastic wrap to keep moisture levels constant.
- https://blog.birchbox.com
- https://www.uglyducklinghouse.com
- https://ourbestbites.com
- https://www.cosmopolitan.com
- https://www.glad.com
- https://www.popsugar.com
 Mary Richardson
Weekly Newsletter Contributor since 2014
Email the author! mary@dvo.com