The Anatomy of a Perfect Cake
Hey chefs,
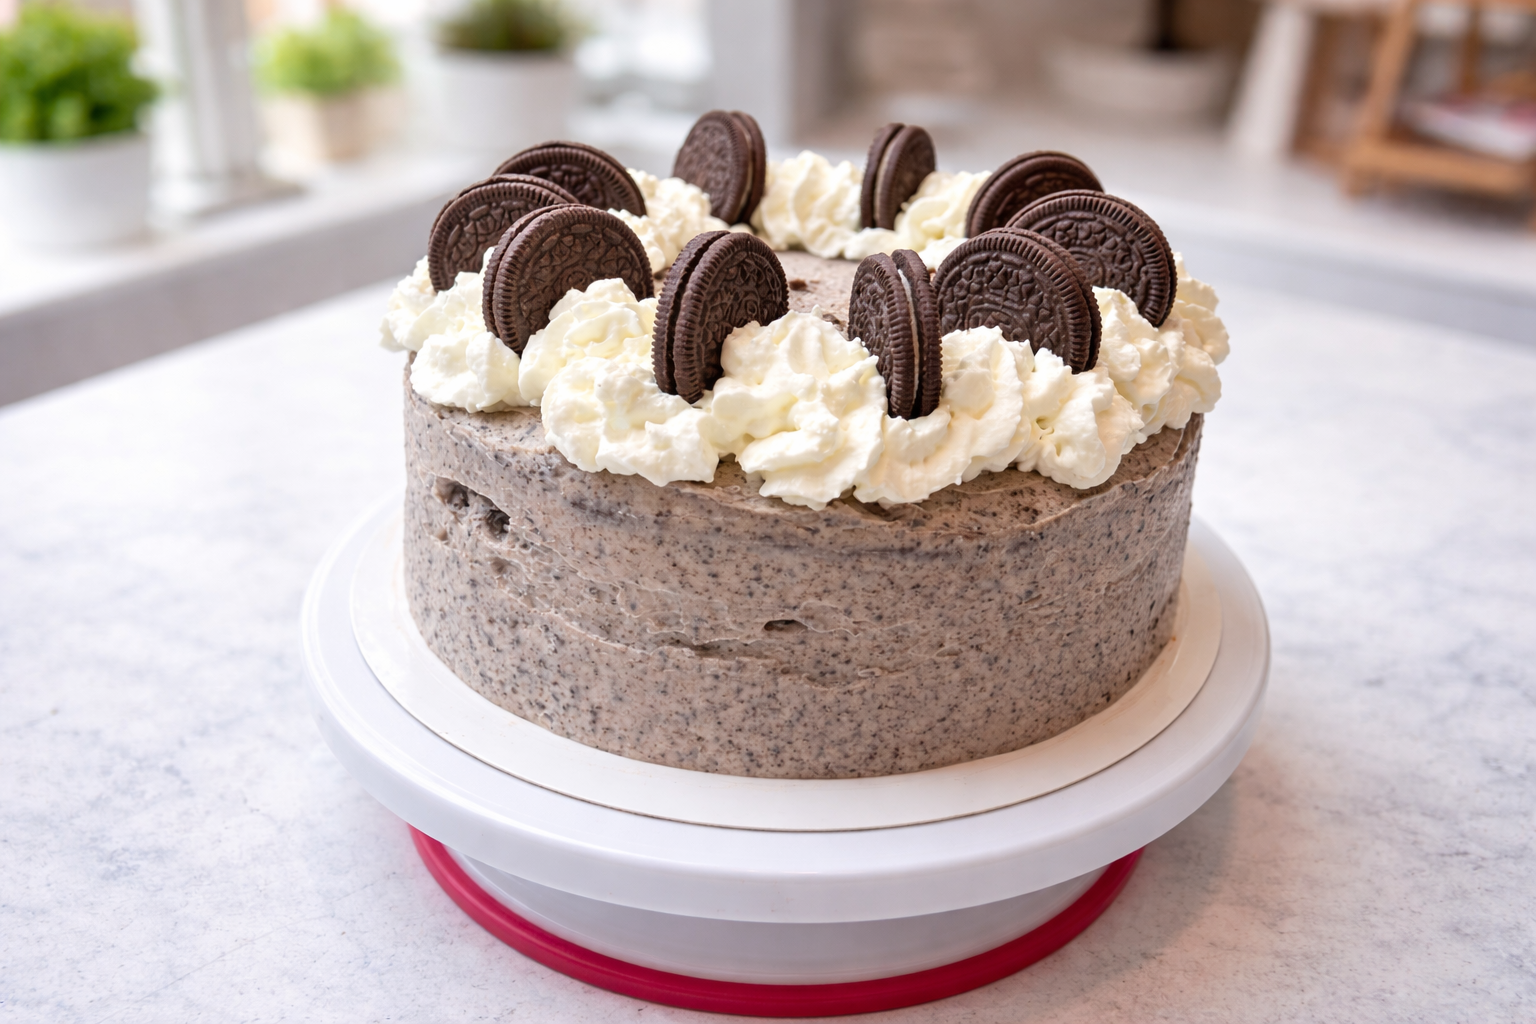
Today we’re going to talk about one of the all-time classic combos: cookies and cream.
We had the missionaries over at our house this week, and it was one of their birthdays. We figured the least we could do for these young men—away from friends, family, and everything familiar—was make sure he had a proper birthday cake.
And what kind of cake did he want?
Cookies and cream.
So I set to work.
But I didn’t want this to be a grocery store cake that just had some Oreos tossed into frosting and called it good. I wanted this to be the ultimate ode to cookies and cream. Layers of real flavor. Thoughtful texture. Balanced sweetness. A cake that actually understands what makes cookies and cream so addictive.
So let’s break down what makes this cake exceptional—and more importantly, what it teaches you as a baker.
What Makes This Cake Next-Level
This cake isn’t just good because of the ingredients—it’s good because of the decisions behind it.
1. Moisture is engineered, not guessed
This cake uses:
- Oil
- Buttermilk
- Hot coffee (or Pero)
That’s not redundancy—that’s control.
- Oil stays liquid at room temp → keeps cake soft even when chilled
- Buttermilk provides acidity → tenderizes gluten + activates leavening
- Hot coffee hydrates cocoa + enhances flavor
Together, they create a cake that is:
- Moist without being greasy
- Soft without being fragile
- Rich without being dense
And yes—the batter is thin. That’s intentional.
A thinner batter means more available water → more steam during baking → a more open, tender crumb.
2. Texture contrast = addiction
Most cakes fail here.
They’re all soft. All sweet. All the same.
This cake gives you:
- Tender cake
- Airy filling
- Silky frosting
- Crunchy Oreo layer
That crunch layer is critical.
Without it, the cake eats flat. With it, every bite has contrast.
Culinary school principle:
Contrast creates interest.
When every bite has soft + creamy + crunchy, your brain stays engaged. That’s what makes people go back for a second slice before they even realize it.
3. Sweetness is controlled (not overwhelming)
Oreos are sweet. Buttercream is sweet. Cake is sweet.
So if you’re not careful… this becomes too much.
Here’s how this cake avoids that:
- Cream cheese in the filling → adds tang
- Salt added in multiple components → enhances flavor, reduces perceived sweetness
- Dutch cocoa → deeper, less acidic chocolate flavor
Rule to remember:
If a dessert tastes flat, it usually needs salt—not more sugar.
Let’s Talk About Blooming Cocoa (Because This Matters A LOT)
This is one of the most important techniques in this entire recipe.
When you add hot coffee (or any hot liquid) to cocoa powder, you’re doing something called blooming.
What’s actually happening?
Cocoa powder is packed with flavor compounds—many of which are fat-soluble and heat-activated.
- In a dry or cool environment → those compounds stay locked up
- In a hot liquid → they dissolve, expand, and become more aromatic
Think of it like steeping tea or blooming spices in oil.
You’re not just mixing—you’re extracting maximum flavor.
Why coffee?
Coffee doesn’t make the cake taste like coffee (or Pero if you don’t drink coffee).
Instead, it:
- Enhances chocolate’s natural bitterness
- Adds depth and complexity
- Rounds out sweetness
If you skip this step or use cold liquid, your cake will still be good—but it won’t have that deep, bakery-style chocolate flavor.
Why You Should Whip American Buttercream Longer (and What Happens If You Don’t)
This is one of the simplest upgrades you can make—and one of the most overlooked.
Most people:
- Cream butter briefly
- Dump in sugar
- Mix until combined
- Call it done
And that’s how you get:
- Dense frosting
- Overly sweet mouthfeel
- Slightly greasy texture
Here’s what happens when you whip it properly:
When you beat butter for 2–3+ minutes on its own:
- You’re incorporating air bubbles
- You’re physically lightening the fat structure
- You’re improving how sugar dissolves into it
Then when you add powdered sugar gradually:
- It integrates more smoothly
- It doesn’t feel gritty
- It doesn’t sit heavy on the palate
The result:
- Lighter texture
- Smoother mouthfeel
- Less perceived sweetness (even though sugar content is the same)
This is key:
You’re not reducing sugar—you’re changing how your tongue experiences it.
Pro move:
After everything is combined, except for the cookie crumbs, let it whip another 1–2 minutes.
You’ll see the color lighten slightly—that’s air being incorporated. That’s what you want.
Advanced Techniques Hidden in This Cake
Stabilized Whipped Filling (a bakery secret)
This filling walks the line between:
- Whipped cream
- Mousse
- Cheesecake
And the secret is structure.
- Cream cheese = stabilizer
- Powdered sugar = adds body
- Whipped cream = lightness
The biggest mistake here is overwhipping.
If you go too far:
- The fat tightens
- The texture becomes dense
- It loses that airy, luxurious feel
You want soft to medium peaks—something that holds shape but still feels cloud-like.
Oreo Distribution (precision matters)
This is one of those details that separates amateur from professional.
You need three different textures of Oreo:
- Super fine crumbs → buttercream
- Fine crumbs → filling
- Rough chunks → crunch layer
Why?
Because each component has a different job:
- Buttercream needs smoothness
- Filling needs even distribution
- Crunch layer needs… crunch
If you don’t control this:
- Frosting gets gritty
- Filling gets heavy
- Crunch disappears
Structural Assembly (this is cake engineering)
Let’s talk about why we build it this way:
Buttercream dam
Prevents the filling from spilling out under pressure.
Filling only in the center
Keeps layers stable and prevents sliding.
Crunch layer inside
Protected from moisture—so it stays crunchy longer.
Crumb coat + chill
Locks everything in place before final frosting.
This is how bakeries get those clean, sharp slices.
Critical Tips for Perfect Results (Do Not Skip These)
These are the things that will make or break your cake:
1. Don’t overbake the cake
Pull it when:
- The center springs back lightly
- Toothpick has moist crumbs, not dry
Slightly underbaked = fudgy, moist perfection
Overbaked = dry, crumbly disappointment
2. Use room temperature ingredients (strategically)
- Eggs + buttermilk → room temp → better emulsification
- Butter → soft, not melty → proper aeration
- Cream → cold → whips properly
Temperature isn’t a suggestion—it’s structure.
3. Stream in hot liquid slowly
If you dump it in:
- You can scramble eggs
- You can break the emulsion
Slow stream = smooth batter.
4. Don’t overmix after adding flour
Overmixing develops gluten:
- Leads to toughness
- Reduces tenderness
Mix until just combined. Then stop.
5. Chill at the right times
- Chill filling briefly → easier to spread
- Chill after crumb coat → stable final layer
- Chill before slicing → clean cuts
Cold cake = clean slices
Warm cake = messy layers
6. Salt strategically
Add a pinch of salt anywhere things taste flat:
- Buttercream
- Filling
- Even the crunch layer
Salt doesn’t make things salty—it makes flavors clearer.
7. Let it sit overnight (if you can)
This is a bakery secret.
Over time:
- Moisture redistributes
- Flavors meld
- Texture improves
Day 2 cake > Day 1 cake. Every time.
Final Thought
This cake isn’t just about cookies and cream.
It’s about:
- Understanding moisture
- Controlling texture
- Balancing flavor
- Building structure
Once you start seeing recipes through that lens, everything changes.
You stop just following recipes…
…and start owning them.
Click here to get the full recipe so you can make it yourself.
And when you do—don’t rush it. Pay attention to the details. That’s where the magic is.
—
Bake boldly, trust the process… and never underestimate the power of a well-placed Oreo.
 Brennah Van Wagoner
Weekly Newsletter Contributor since 2025
Email the author! brennah.oaks@gmail.com