How to Work Corn-on-the-Cob MAGIC!
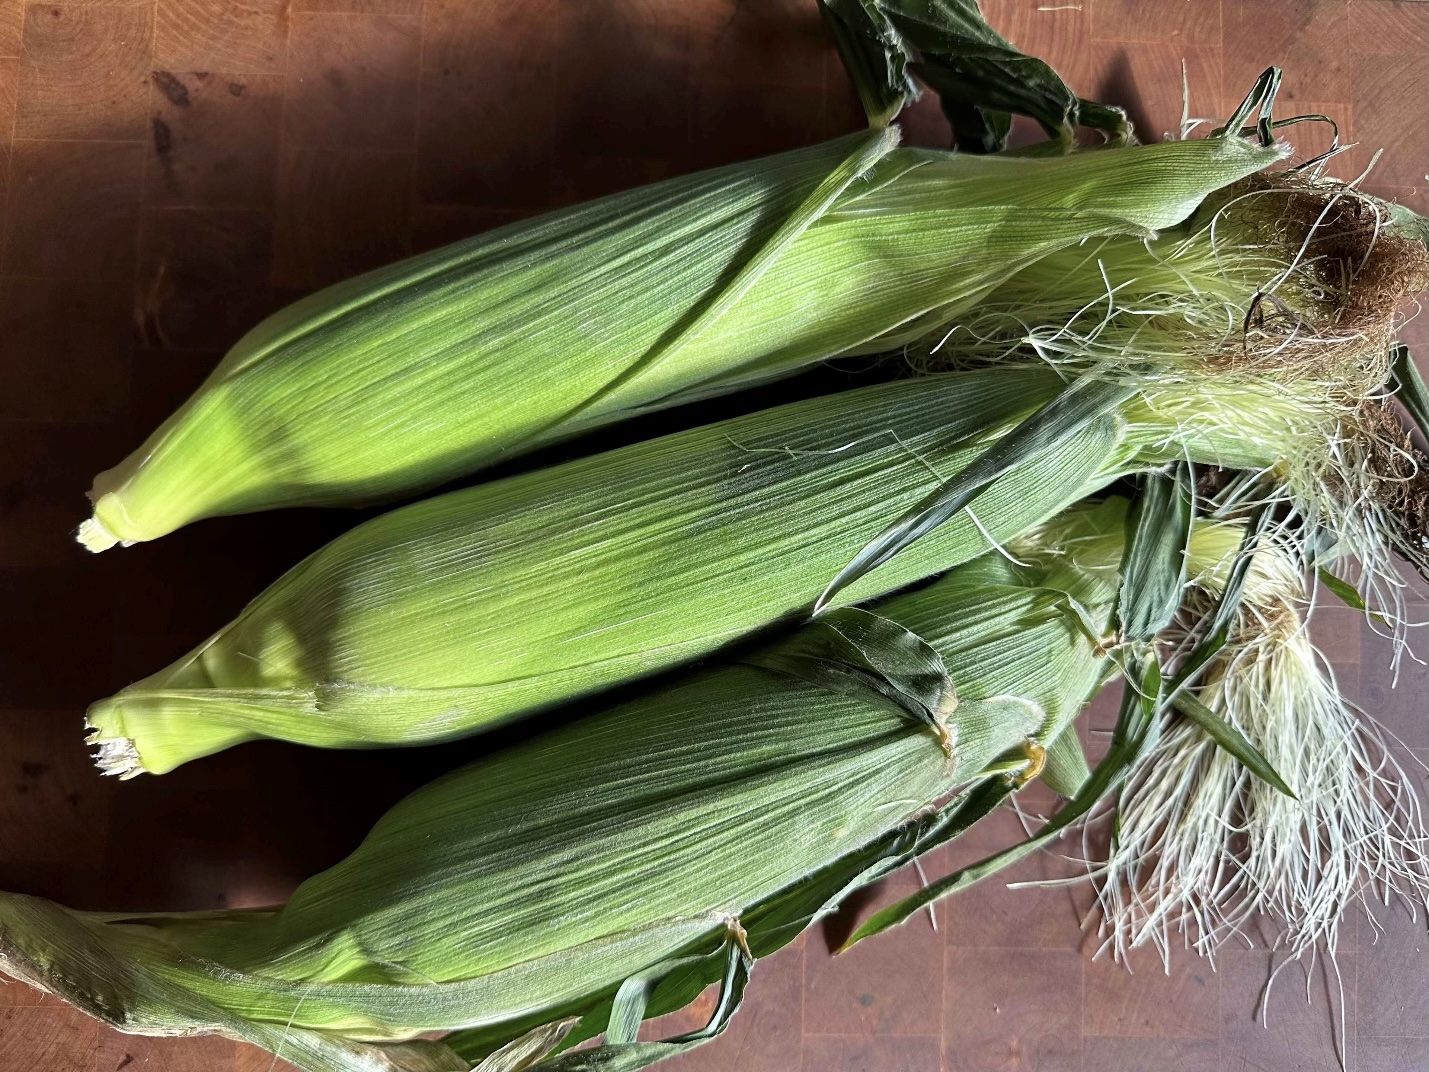
A few weeks ago I learned a wonderful trick from Samira, creator and owner of the wonderful food site, Alpha Foodie (www.alphafoodie.com). It’s all about corn-on-the-cob magic, and I’ve been performing this magic ever since. Since it’s corn season, you’re gonna love this!
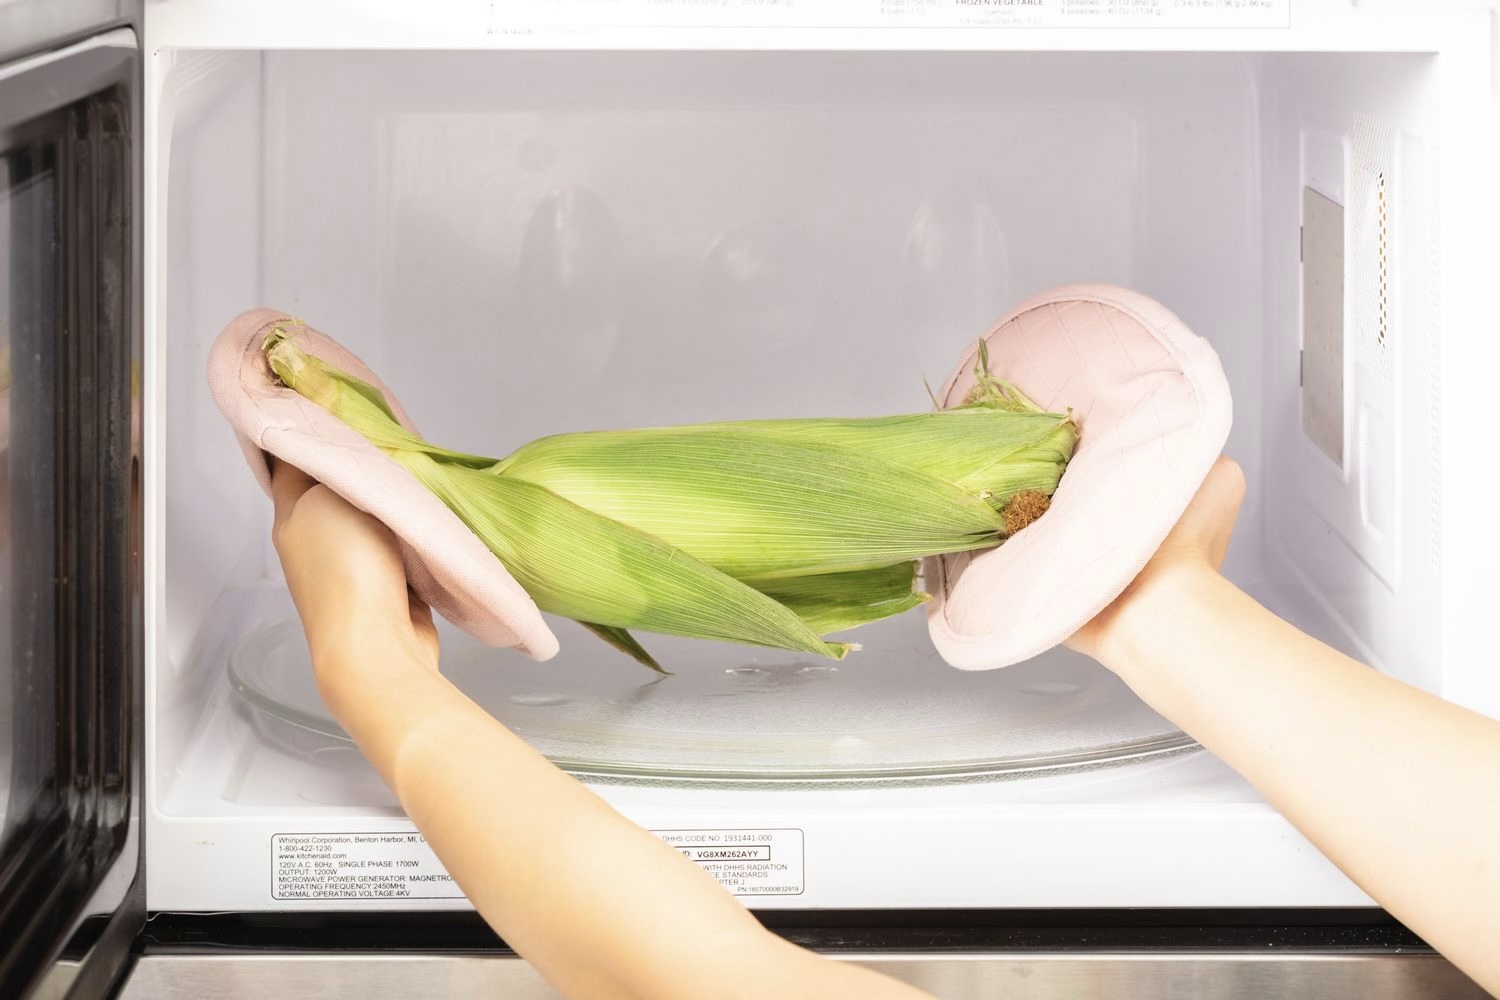
If you need your corn-on-the-cob in a hurry, the microwave is the easiest way to go. You get freshly cooked corn that keeps its taste and texture. Doing it this way eliminates the shucking step, and the best part, there’s no washing up afterwards!
EFFORTLESS: All you need to do is put the husk in the microwave and wait! There’s no prep – all you need is fresh corn.
QUICK: Corn in the husk in the microwave only takes a few minutes – it’s even faster than boiling.
JUICY RESULTS: The microwave and the husk create the perfect environment for corn on the cob – the steam locks in moisture and retains the corn’s natural juiciness.
HEALTHY: We all know steaming veggies is one of the healthiest ways to enjoy them, but steaming the corn in its own husk is even healthier. You keep all the corn’s essential goodness cooking it with this method.
It really is like magic, and the bottom line, you save time and energy while getting an incredibly good result along the way! This said, here’s Samira’s quick and easy trick that works every time:
Place the corn (in its husk, remember) in the microwave, either on a microwave-safe plate or just on the built-in dish. You don’t need to do anything to it at this stage, but you should adjust the timing based on how many ears of corn you’re cooking. For instance:
For 1 cob: Microwave for 3 minutes on full power. If it’s a larger cob, it may take up to 4 minutes.
For 2 cobs: Microwave for 4 to 5 minutes on full power.
For 3 or 4 cobs: The general rule of thumb is to add 1 minutes of cooking time per additional ear of corn, always on full power.
Do keep in mind that the specific cooking time can vary based on the powder level of your microwave (the wattage), the size/thickness/freshness of the corn, and your desired level of softness. It’s best to start with the lower cooking time, check for doneness, and then continue cooking in 30-second increments as needed, especially if you want the corn softer.
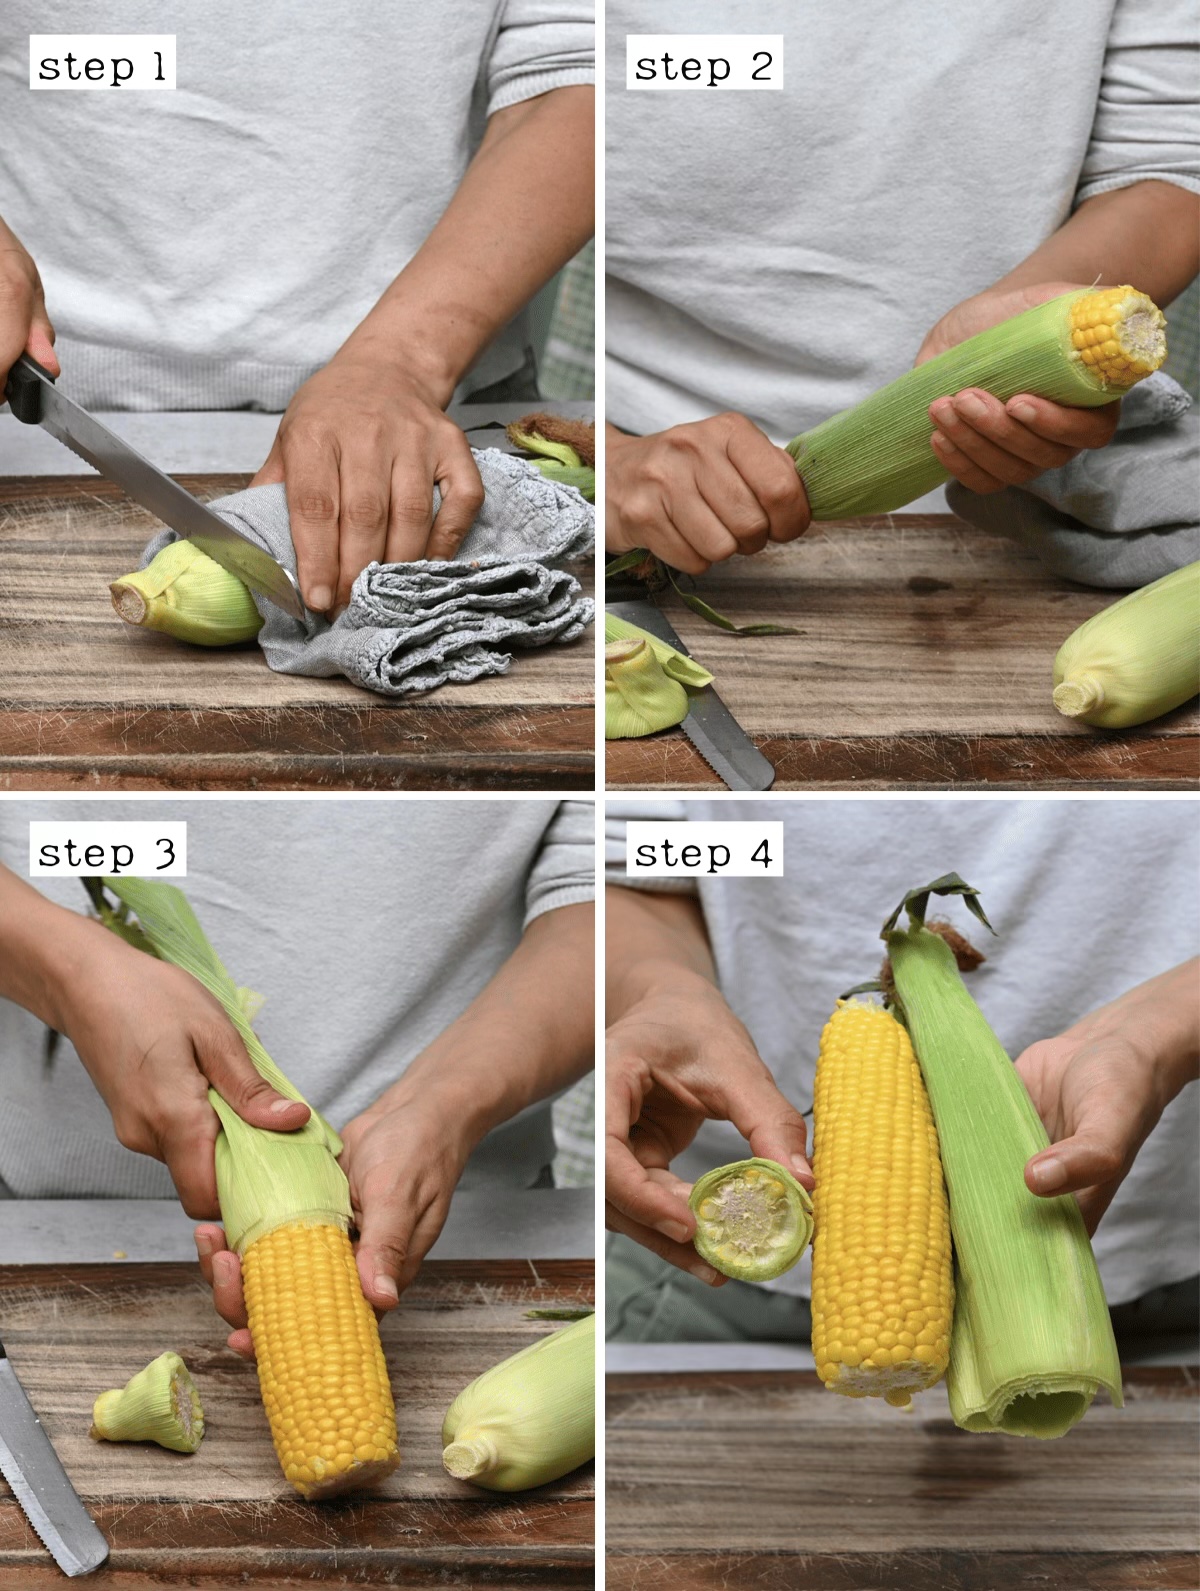
To ensure that the corn is fully cooked, you can check the internal temperature. You want it to be around 160-170ºF/71-77Cº, or just peel back the husk slightly to test.

Once cooked, using tongs or oven gloves, remove the corn on the cob from the microwave. Then cut off the stem end (about 2 inches). Finally, push the cooked cob up through the husk; it will easily slide out (and without hardly any silk clinging to it).
Now that we know how to quickly and effortlessly get our cobbed corn cooked, here’s a delicious salad that calls for freshly cooked corn kernels. You can use frozen corn, of course. But while it’s in season, let’s take advantage!
Easy Corn and Blackeyed Pea Salad
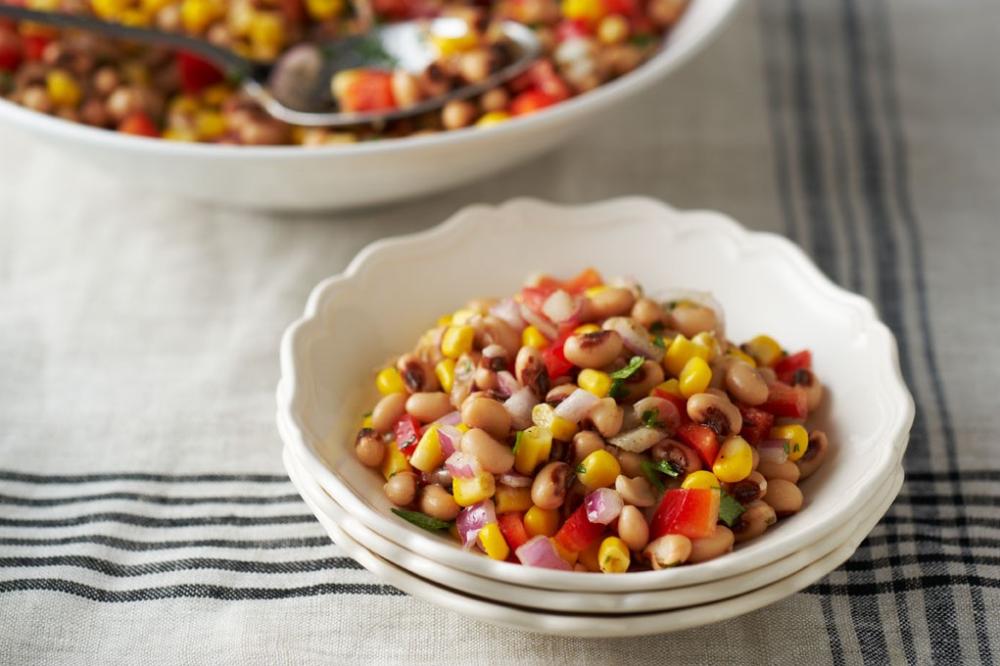
(This dish, by Chef Del Sroufe, comes together in just fifteen minutes if you have black eyed peas already cooked.)
Yield: 4 servings
Ingredients:
1 1/2 cups cooked blackeyed peas
1 cup cooked fresh or frozen corn kernels
1/2 cup diced red onions
1/2 cup diced red bell peppers
1 small jalapeÒo pepper seeded and diced small
1/4 cup minced fresh basil
1 lemon zested and juiced
1 teaspoon dried oregano
sea salt to taste
black pepper to taste
Directions:
1. Combine all ingredients in a large bowl and mix well.
2. Refrigerate for 1 hour to allow the flavors to marry.
3. Store refrigerated for up to four days.
2. Refrigerate for 1 hour to allow the flavors to marry.
3. Store refrigerated for up to four days.
Recipe formatted with the Cook'n Recipe Software from DVO Enterprises.
 Alice Osborne
Weekly Newsletter Contributor since 2006
Email the author! alice@dvo.com
Sources:
- www.parade.com
- www.simplyrecipes.com
- www.dinner-mom.com
- www.alphafoodie.com
- www.nutritionforme.org