Let’s Talk Gravy!
In its most basic form, gravy consists of stock and seasonings, often thickened with flour or cornstarch. And if you make it with those elements, you’ll likely end up with a perfectly passable gravy.
But is “passable” gravy, the goal? Of course not! We all want the kind of rich, savory, flavorful gravy that turns non-gravy users into gravy lovers. We want a gravy so good it causes people to lose all sense of portion control!
According to professional chefs and experienced home cooks, the difference between that “holy cow!” gravy and gravy that’s just “so-so” basically comes down to what you decide to cook it in. They say the biggest mistake people make is cooking their gravy in anything other than the roaster!
Make gravy in anything other than the roaster and you give up the tasty benefits of all those scrumptious pan drippings (all the gristle, fat, and meat or poultry bits) that resulted from the roasting process. This stuff is perfectly primed for gravy making and is loaded with infused flavor that you don’t want to miss.
So, using the roasting pan to make your gravy not only saves you from needing to clean another pan, it’s the best choice for flavor. Even using some of the drippings to make gravy in a separate pot won’t yield as good results as using the roaster itself!
With this protocol established, let’s look at the steps to roaster-pan gravy. Jillee, from One Good Thing by Jillee (www.onegoodthingbyjillee.com) mapped it out for us:
First, empty the roaster. When your meat or poultry is done cooking, transfer it to a platter to rest under a foil tent. Pour all liquid from the roasting pan into a bowl, measuring cup, or fat separator and let it sit for a few minutes.
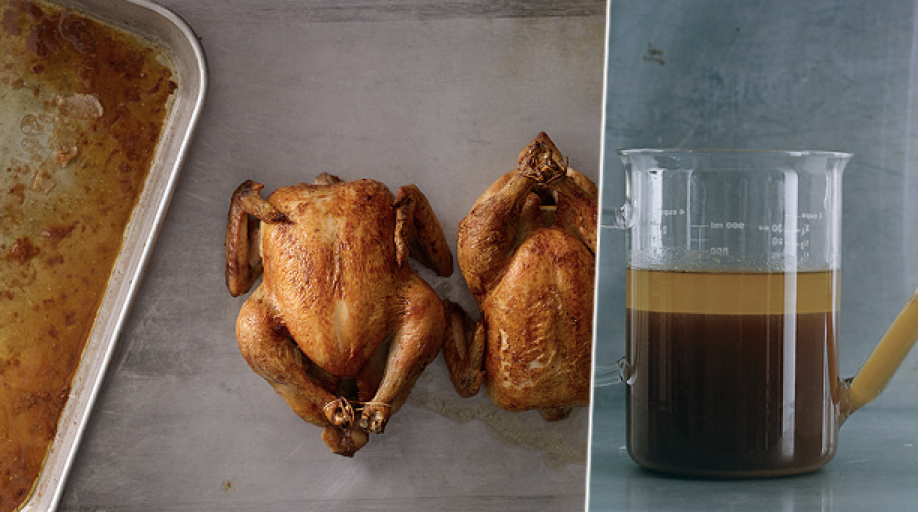
Once the fat has risen to the top, skim it off into a separate container. Keep the remaining liquid to add to your gravy, if desired.
Next, make your roux. ROUX? Yes, it’s a mixture of equal amounts of fat and flour, heated, blended, and used as a foundation for sauces (white, bechamel, mornay, velouté, etc.).
The standard procedure is to add 1 tablespoon of fat back into the roasting pan for every cup of liquid your gravy calls for. (If you don’t end up with quite enough fat to make this work, add some butter to get the amount you need.)
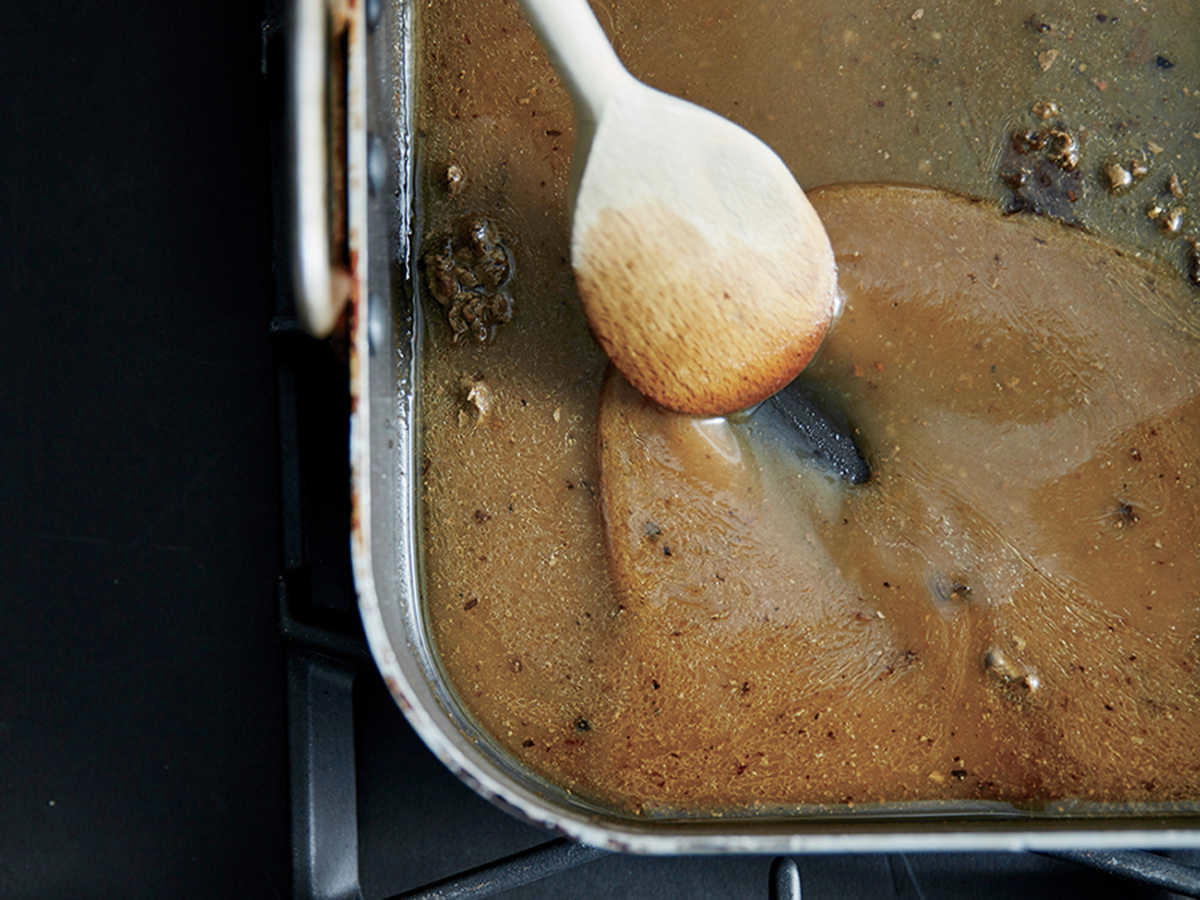
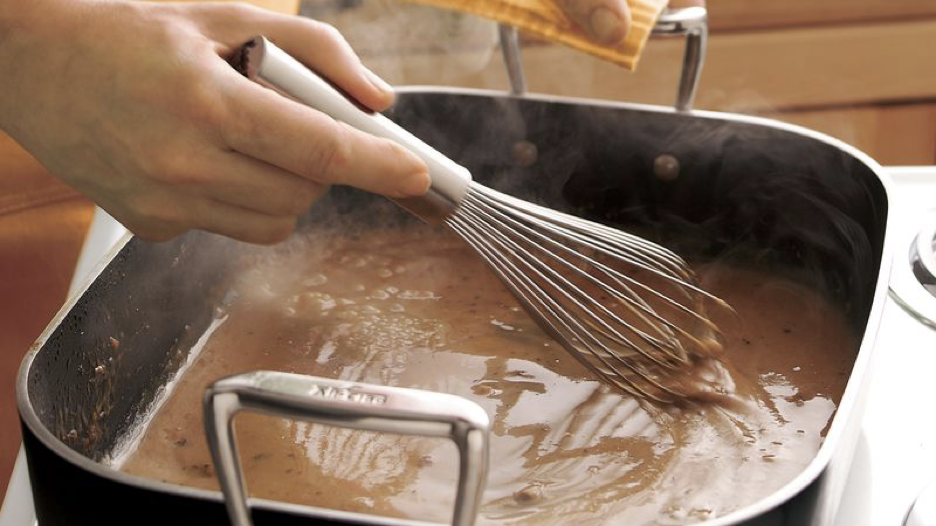
You can plop your roasting pan right on the stovetop over medium heat. Whisk in about 1 tablespoon of flour per tablespoon of fat, and cook the roux until light brown and fragrant.
Then you add your liquid. Slowly whisk your liquid(s) of choice into the roux a little bit at a time. Continue whisking until everything is incorporated, and work on scraping up any crispy bits that are still stuck to the bottom of the pan. The more the better.
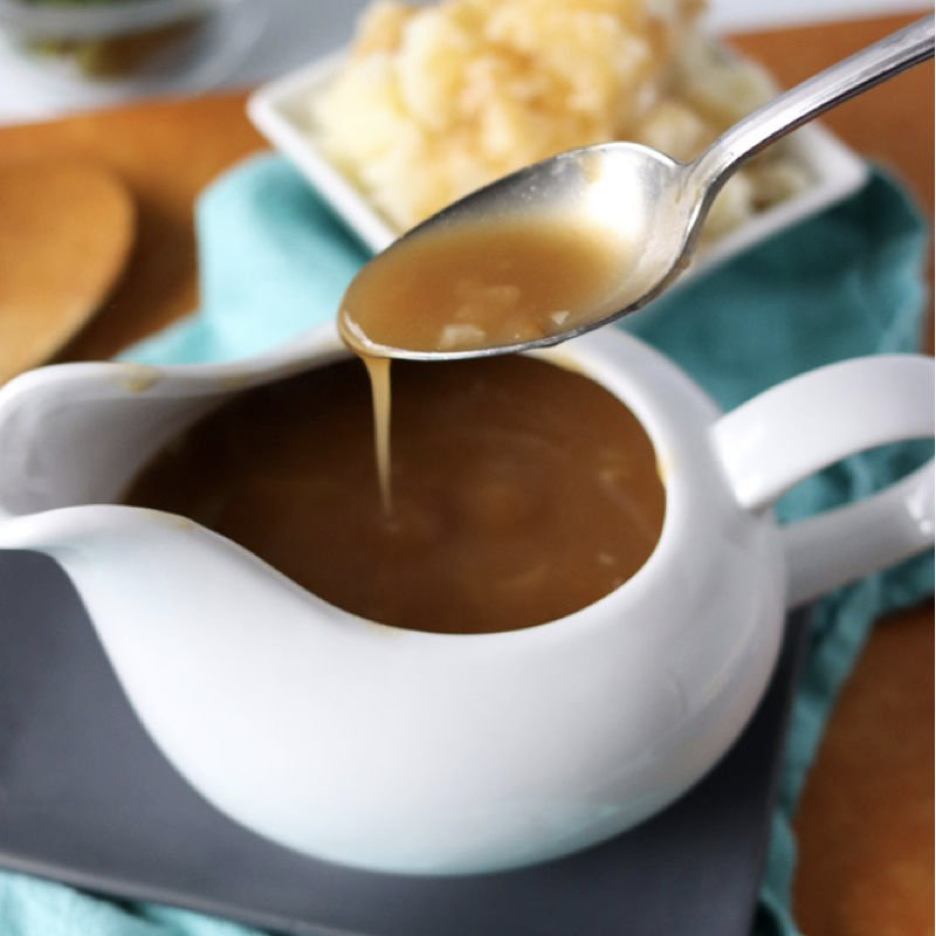
Finally, finish it off. Add some fresh thyme if you’d like, and let the mixture simmer for about 5 minutes. Give it a taste, add salt and pepper as needed, and continue simmering until the gravy reaches your desired consistency.
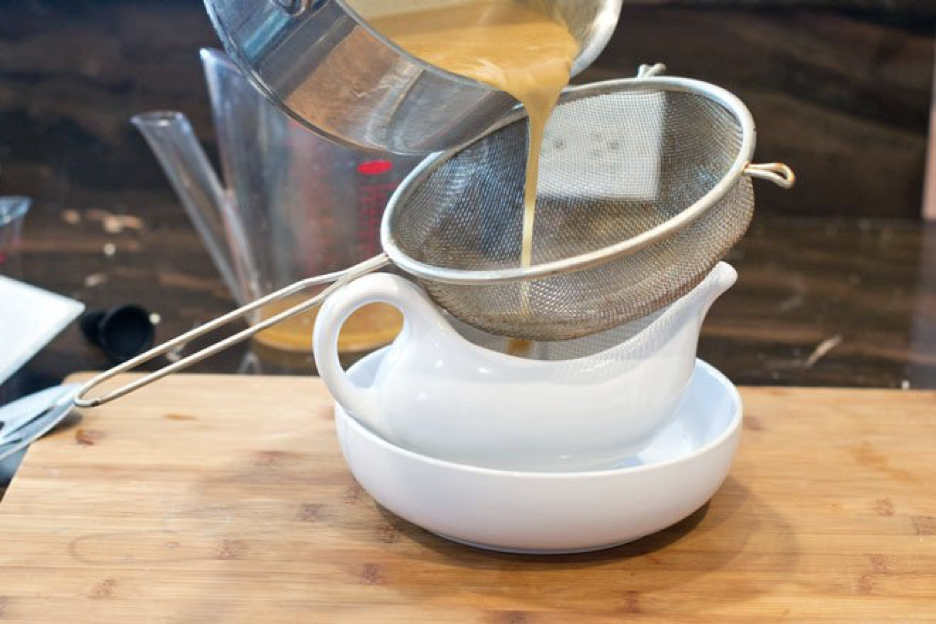
Strain the finished gravy through a mesh sieve, then serve immediately. (The pros suggest making gravy at the absolute last minute to make sure it’s hot when the rest of the meal is served!)
Jillee closes her gravy tutorial with the question, “Are you a ‘gravy on everything’ eater, or are you more selective about what you’ll put it on?” It’s an interesting question, so I’ll ask it as well. What’s your gravy approach?
But is “passable” gravy, the goal? Of course not! We all want the kind of rich, savory, flavorful gravy that turns non-gravy users into gravy lovers. We want a gravy so good it causes people to lose all sense of portion control!
According to professional chefs and experienced home cooks, the difference between that “holy cow!” gravy and gravy that’s just “so-so” basically comes down to what you decide to cook it in. They say the biggest mistake people make is cooking their gravy in anything other than the roaster!
Make gravy in anything other than the roaster and you give up the tasty benefits of all those scrumptious pan drippings (all the gristle, fat, and meat or poultry bits) that resulted from the roasting process. This stuff is perfectly primed for gravy making and is loaded with infused flavor that you don’t want to miss.
So, using the roasting pan to make your gravy not only saves you from needing to clean another pan, it’s the best choice for flavor. Even using some of the drippings to make gravy in a separate pot won’t yield as good results as using the roaster itself!
With this protocol established, let’s look at the steps to roaster-pan gravy. Jillee, from One Good Thing by Jillee (www.onegoodthingbyjillee.com) mapped it out for us:
First, empty the roaster. When your meat or poultry is done cooking, transfer it to a platter to rest under a foil tent. Pour all liquid from the roasting pan into a bowl, measuring cup, or fat separator and let it sit for a few minutes.
Once the fat has risen to the top, skim it off into a separate container. Keep the remaining liquid to add to your gravy, if desired.
Next, make your roux. ROUX? Yes, it’s a mixture of equal amounts of fat and flour, heated, blended, and used as a foundation for sauces (white, bechamel, mornay, velouté, etc.).
The standard procedure is to add 1 tablespoon of fat back into the roasting pan for every cup of liquid your gravy calls for. (If you don’t end up with quite enough fat to make this work, add some butter to get the amount you need.)
You can plop your roasting pan right on the stovetop over medium heat. Whisk in about 1 tablespoon of flour per tablespoon of fat, and cook the roux until light brown and fragrant.
Then you add your liquid. Slowly whisk your liquid(s) of choice into the roux a little bit at a time. Continue whisking until everything is incorporated, and work on scraping up any crispy bits that are still stuck to the bottom of the pan. The more the better.
Finally, finish it off. Add some fresh thyme if you’d like, and let the mixture simmer for about 5 minutes. Give it a taste, add salt and pepper as needed, and continue simmering until the gravy reaches your desired consistency.
Strain the finished gravy through a mesh sieve, then serve immediately. (The pros suggest making gravy at the absolute last minute to make sure it’s hot when the rest of the meal is served!)
Jillee closes her gravy tutorial with the question, “Are you a ‘gravy on everything’ eater, or are you more selective about what you’ll put it on?” It’s an interesting question, so I’ll ask it as well. What’s your gravy approach?
Sources:
www.persnicketyplates.com
www.bettycrocker.com
www.epicurious.com
www.cookinglight.com
www.cookthestory.com
 Alice Osborne
Weekly Newsletter Contributor since 2006
Email the author! alice@dvo.com