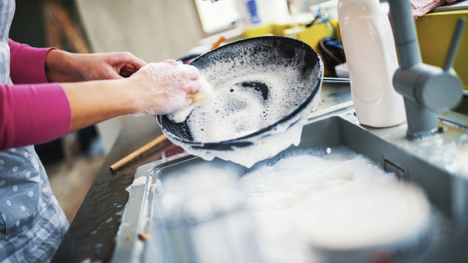
Opt for Easy Clean-Up and Prepping Ahead!
When I’m cooking, I try to work as cleanly as possible. This means I’m washing dishes as I go; loading the dishwasher in preparation for its third run of the day; wiping down the counter constantly; and keeping the cooking to one bowl, one skillet, or one pot as much as possible. Not a single dish sits in that sink for longer than it takes to chop an onion. That’s my goal, anyway. Easy cleanup starts with not making a mess.
And, as you know, taking time to prep a week’s-worth of menu ingredients ahead of time also makes cooking neater, cleaner, and actually saves lots of time in the long run. Here are some terrific clean-cooking, time-saving tips from AMERICA’S TEST KITCHEN cooks:
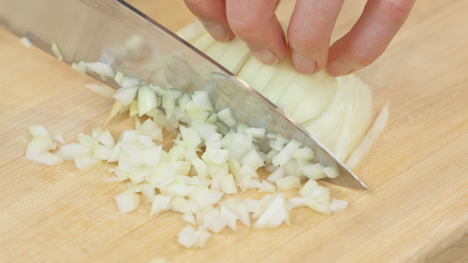
“Rather than pulling out a knife and cutting board and chopping an onion each time you cook, chop a bunch of onions at once and freeze them in portions in zipper-lock bags. 1 medium onion yields close to 1 cup of chopped onion. They should last for about one month. When cooking, you can simply add the frozen onions right to the pan and add a few extra minutes of cooking time.”
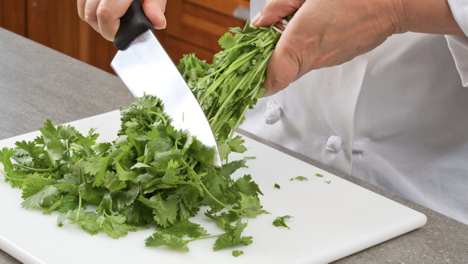
“Parsley, cilantro, and mint will last a surprisingly long time in the fridge if you wash and stem the leaves before storing. And prepping them ahead will save you time when you need to mince a few tablespoons to add to a dish. Store the leaves wrapped in a damp paper towel in a partially open zipper-lock bag for one to two weeks. And by the way, save those stems as well; they’re a great flavor-booster in soups and stews.”
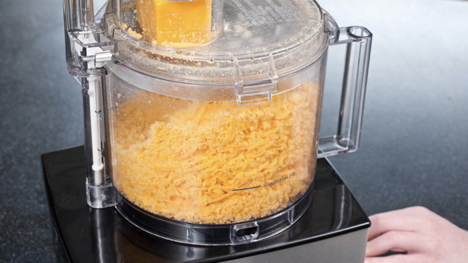
“Packaged, pre-shredded cheeses are not just expensive, they’re not that good for your or great-tasting. This is because they are coated with powdered cellulose to prevent clumping. The cellulose affects the cheese’s flavor and its ability to melt smoothly. Instead, buy cheese in large blocks and use the food processor fitted with the shredding disk to prep it quickly all at once. Shredded cheese can be refrigerated in a zipper-lock bag for up to two weeks or frozen for up to one month.”
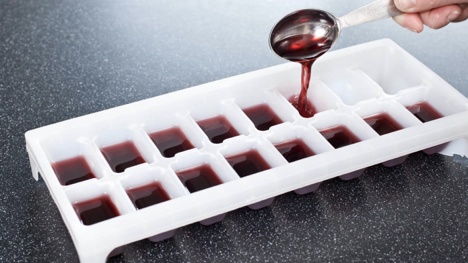
“An opened bottle of wine doesn’t last long. But it’s so nice to cook with, so you do want it on hand. So, to make it easy to keep wine on hand for cooking, measure 1 tablespoon into each well of an ice cube tray and freeze. The frozen cubes can be added straight to pan sauces, braises, and stews.”
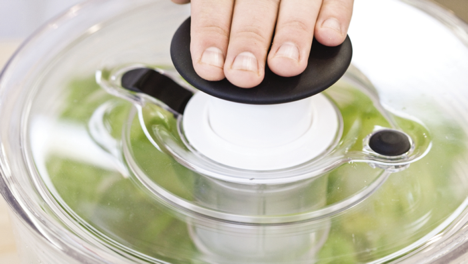
“Washing lettuce and hearty greens as soon as you get them home will not only save you time later, it will help prolong their freshness as well. Once you wash the greens, spin them dry in a salad spinner, the store them right in the spinner (lined with paper towels) or wrap them in paper towels and store them in a partially open zipper-lock bag. Hearty greens like kale and chard can even be chopped ahead of time so you can grab a handful to stir into a soup or pasta dinner.”
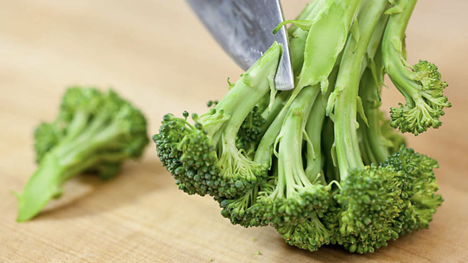
“Broccoli, cauliflower, bell peppers, carrots, and leeks can all be washed and prepped ahead of time without browning or losing moisture like more delicate veggies. Cut broccoli and cauliflower into florets, bell peppers into cubes or strips, and peel and chop carrots. Leeks require careful rinsing to remove the grit hiding between their layers, so prepping them ahead of time is a particularly good time saver. Store the chopped vegetables in an airtight container layered with damp paper towels for up to one week.”
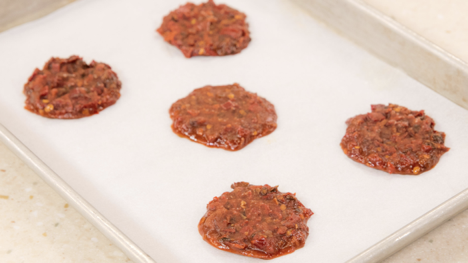
Chipotle chilies add lots of flavor to dishes, but prepping them can be a hassle. Instead, save time and cook cleaner, by mincing an entire can of chilies at once, then place teaspoonfuls onto a parchment-lined baking sheet and freeze. Then you can peel off the disks, place them in a plastic bag, and freeze until you’re ready to use them.
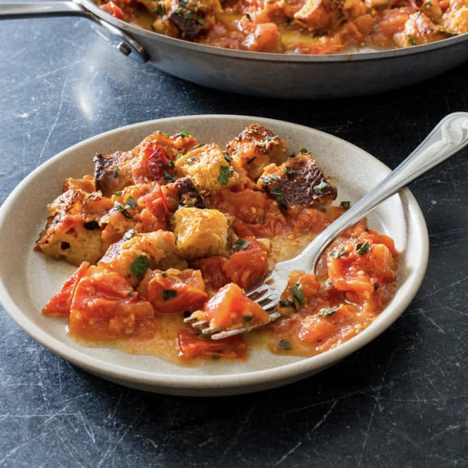
I’ll close with thanking AMERICA’S TEST KITCHEN for generously sharing these helpful tips and leaving you with one of their recipes that draws on seasonal ingredients—tomatoes. This gratin is one of my very favorites—good enough for a company side dish besides being a delicious breakfast.
The TEST KITCHEN cooks set out to deliver a summer tomato gratin with concentrated, bright tomato flavor and contrasting texture from the bread, rather than the mushy results of most recipes. Starting on the stovetop initiates the breakdown of the tomatoes, driving off some moisture that would have otherwise sogged out the bread. Toasting large cubes of a crusty artisan-style baguette ensures that the bread doesn’t get too soggy once it’s combined with the tomatoes. Just before moving the skillet to the oven, they folded in most of the toasted bread and scattered the remainder over the top along with some Parmesan to create a crusty, savory topping that contrasts with the custardy interior.
For the best results, use the ripest in-season tomatoes you can find. Supermarket vine-ripened tomatoes will work, but the gratin won’t be as flavorful as one made with locally grown tomatoes. Do not use Roma or plum tomatoes, which contain less juice than regular round tomatoes and will result in a dry gratin. For the bread, we prefer a crusty baguette with a firm, chewy crumb. You can serve the gratin hot, warm, or at room temperature.

6 tablespoons extra virgin olive oil
6 ounces crusty baguette cut into 3/4-inch cubes (4 cups)
3 cloves garlic sliced thin
3 pounds tomatoes cored and cut into 3/4-inch pieces
2 teaspoons sugar
1 teaspoon salt
1 teaspoon pepper
1 cup grated Parmesan cheese
2 tablespoons chopped fresh basil
Directions:
Add Recipe to Cook'n
blog comments powered by Disqus
And, as you know, taking time to prep a week’s-worth of menu ingredients ahead of time also makes cooking neater, cleaner, and actually saves lots of time in the long run. Here are some terrific clean-cooking, time-saving tips from AMERICA’S TEST KITCHEN cooks:
“Rather than pulling out a knife and cutting board and chopping an onion each time you cook, chop a bunch of onions at once and freeze them in portions in zipper-lock bags. 1 medium onion yields close to 1 cup of chopped onion. They should last for about one month. When cooking, you can simply add the frozen onions right to the pan and add a few extra minutes of cooking time.”
“Parsley, cilantro, and mint will last a surprisingly long time in the fridge if you wash and stem the leaves before storing. And prepping them ahead will save you time when you need to mince a few tablespoons to add to a dish. Store the leaves wrapped in a damp paper towel in a partially open zipper-lock bag for one to two weeks. And by the way, save those stems as well; they’re a great flavor-booster in soups and stews.”
“Packaged, pre-shredded cheeses are not just expensive, they’re not that good for your or great-tasting. This is because they are coated with powdered cellulose to prevent clumping. The cellulose affects the cheese’s flavor and its ability to melt smoothly. Instead, buy cheese in large blocks and use the food processor fitted with the shredding disk to prep it quickly all at once. Shredded cheese can be refrigerated in a zipper-lock bag for up to two weeks or frozen for up to one month.”
“An opened bottle of wine doesn’t last long. But it’s so nice to cook with, so you do want it on hand. So, to make it easy to keep wine on hand for cooking, measure 1 tablespoon into each well of an ice cube tray and freeze. The frozen cubes can be added straight to pan sauces, braises, and stews.”
“Washing lettuce and hearty greens as soon as you get them home will not only save you time later, it will help prolong their freshness as well. Once you wash the greens, spin them dry in a salad spinner, the store them right in the spinner (lined with paper towels) or wrap them in paper towels and store them in a partially open zipper-lock bag. Hearty greens like kale and chard can even be chopped ahead of time so you can grab a handful to stir into a soup or pasta dinner.”
“Broccoli, cauliflower, bell peppers, carrots, and leeks can all be washed and prepped ahead of time without browning or losing moisture like more delicate veggies. Cut broccoli and cauliflower into florets, bell peppers into cubes or strips, and peel and chop carrots. Leeks require careful rinsing to remove the grit hiding between their layers, so prepping them ahead of time is a particularly good time saver. Store the chopped vegetables in an airtight container layered with damp paper towels for up to one week.”
Chipotle chilies add lots of flavor to dishes, but prepping them can be a hassle. Instead, save time and cook cleaner, by mincing an entire can of chilies at once, then place teaspoonfuls onto a parchment-lined baking sheet and freeze. Then you can peel off the disks, place them in a plastic bag, and freeze until you’re ready to use them.
I’ll close with thanking AMERICA’S TEST KITCHEN for generously sharing these helpful tips and leaving you with one of their recipes that draws on seasonal ingredients—tomatoes. This gratin is one of my very favorites—good enough for a company side dish besides being a delicious breakfast.
The TEST KITCHEN cooks set out to deliver a summer tomato gratin with concentrated, bright tomato flavor and contrasting texture from the bread, rather than the mushy results of most recipes. Starting on the stovetop initiates the breakdown of the tomatoes, driving off some moisture that would have otherwise sogged out the bread. Toasting large cubes of a crusty artisan-style baguette ensures that the bread doesn’t get too soggy once it’s combined with the tomatoes. Just before moving the skillet to the oven, they folded in most of the toasted bread and scattered the remainder over the top along with some Parmesan to create a crusty, savory topping that contrasts with the custardy interior.
For the best results, use the ripest in-season tomatoes you can find. Supermarket vine-ripened tomatoes will work, but the gratin won’t be as flavorful as one made with locally grown tomatoes. Do not use Roma or plum tomatoes, which contain less juice than regular round tomatoes and will result in a dry gratin. For the bread, we prefer a crusty baguette with a firm, chewy crumb. You can serve the gratin hot, warm, or at room temperature.
Test Kitchen Tomato Gratin
Ingredients:
6 tablespoons extra virgin olive oil
6 ounces crusty baguette cut into 3/4-inch cubes (4 cups)
3 cloves garlic sliced thin
3 pounds tomatoes cored and cut into 3/4-inch pieces
2 teaspoons sugar
1 teaspoon salt
1 teaspoon pepper
1 cup grated Parmesan cheese
2 tablespoons chopped fresh basil
Directions:
1. Adjust oven rack to middle position and heat oven to 350 degrees. Heat ¼ cup oil in 12-inch oven-safe skillet over medium-low heat until shimmering. Add bread and stir to coat. Cook, stirring constantly, until bread is browned and toasted, about 5 minutes. Transfer bread to bowl.
2. Return now-empty skillet to low heat and add remaining 2 tablespoons oil and garlic. Cook, stirring constantly, until garlic is golden at edges, 30 to 60 seconds. Add tomatoes, sugar, salt, and pepper and stir to combine. Increase heat to medium-high and cook, stirring occasionally, until tomatoes have started to break down and have released enough juice to be mostly submerged, 8 to 10 minutes.
3. Remove skillet from heat and gently stir in 3 cups bread until completely moistened and evenly distributed. Using spatula, press down on bread until completely submerged. Arrange remaining 1 cup bread evenly over surface, pressing to partially submerge. Sprinkle evenly with Parmesan.
4. Bake until top of gratin is deeply browned, tomatoes are bubbling, and juice has reduced, 40 to 45 minutes; after 30 minutes, run spatula around edge of skillet to loosen crust and release any juice underneath. (Gratin will appear loose and jiggle around outer edges but will thicken as it cools.)
5. Remove skillet from oven and let stand for 15 minutes. Sprinkle gratin with basil and serve.
Recipe formatted with the Cook'n Recipe Software from DVO Enterprises.
Sources:
- www.ctvnews.ca
- www.americastestkitchen.com
 Alice Osborne
Weekly Newsletter Contributor since 2006
Email the author! alice@dvo.com