
Dimpled Perfection: The Magic of Focaccia Bread
Food historians tend to agree that the soul of Italian baking rests in focaccia, a flatbread celebrated for its crisp exterior and pillowy crumb. Originating along the rugged Ligurian coast (northwester Italy), authentic focaccia is defined by a distinct harmony of high hydration, generous olive oil, and patient fermentation. Unlike pizza dough, which is stretched thin to carry heavy toppings, focaccia dough is allowed to rise thick, transforming into crunchy-on-the-outside, and deliciously chewy bread.
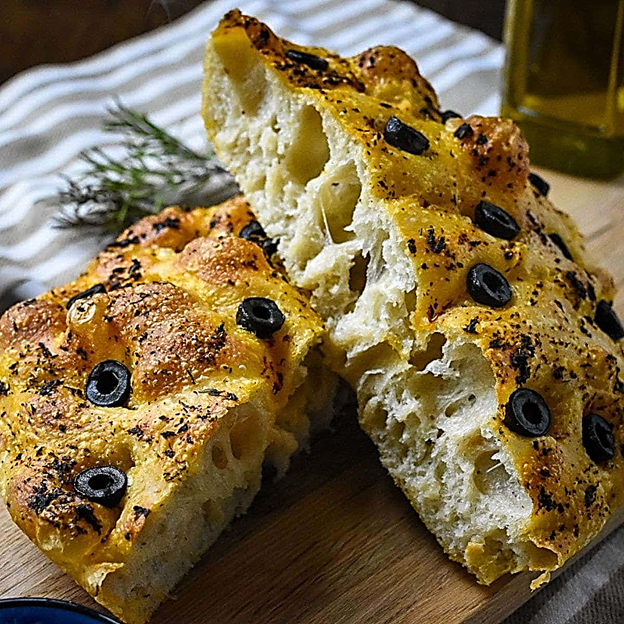
At the heart of focaccia’s unique texture is its hydration level. The dough incorporates a remarkably high ratio of water to flour, often exceeding eighty percent. This creates a wet, sticky dough that traps carbon dioxide during fermentation, resulting in large, irregular air pockets. When baked at high temperatures, this moisture turns to steam, causing the bread to puff up while maintaining a remarkably soft, custard-like interior.
The defining characteristic of focaccia, however, lies in its dimples. Before the bread enters the oven, bakers use their fingertips to press deep wells into the dough. This traditional technique serves a dual purpose. Visually, it gives the bread its iconic cratered landscape. Functionally, these dimples act as reservoirs. They trap pools of extra virgin olive oil and brine, preventing the dough from rising uniformly like a standard loaf of bread and ensuring every bite is intensely flavorful.
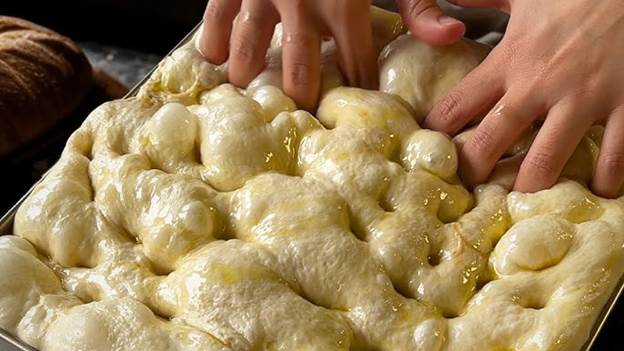
Olive oil is not merely an ingredient in focaccia; it is the structural backbone. The dough is mixed with oil, proofed in a heavily oiled pan, and dimpled with a final, generous pour before baking. This abundance of fat essentially fries the bottom and sides of the dough against the hot pan. The result is a golden, shattered-glass crust that contrasts beautifully with the tender crumb inside.
True Ligurian tradition demands a simple finish: a coarse scattering of sea salt and a splash of water or brine just before baking to keep the dimples moist. While modern variations include rosemary, cherry tomatoes, or olives, the foundation remains unchanged.
Besides its beautiful presentation and incredible taste, focaccia is a favorite bread because it’s so easy to make—truly a beginner-friendly bread for three important reasons:
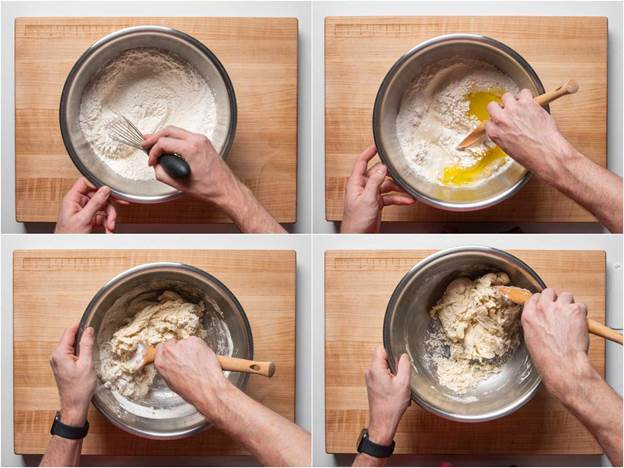
1. ITS NO-KNEAD METHOD: The dough is very wet and sticky, so it is just mixed with a spoon, spatula, or Danish dough whisk in a single bowl. Gluten develops naturally through resting time and simple occasional folding.
2. ITS FORGIVING SHAPE: You don't have to worry about a neat or uniform loaf shape. You press the dough directly into a 9x13-inch oiled baking pan, and your dimples give it its rustic look.
3. IT OFFERS HIGH REWARD: Pouring extra virgin olive oil into the pan and over the top ensures a crispy, golden crust and a soft, airy inside with minimal effort. It’s difficult to fail when making this bread.
If you haven’t made this bread before, you might want to try it. As mentioned above, it’s beginner friendly, so what the heck, why not? Here’s a wonderful recipe from www.foodandwine.com.
Garden Focaccia
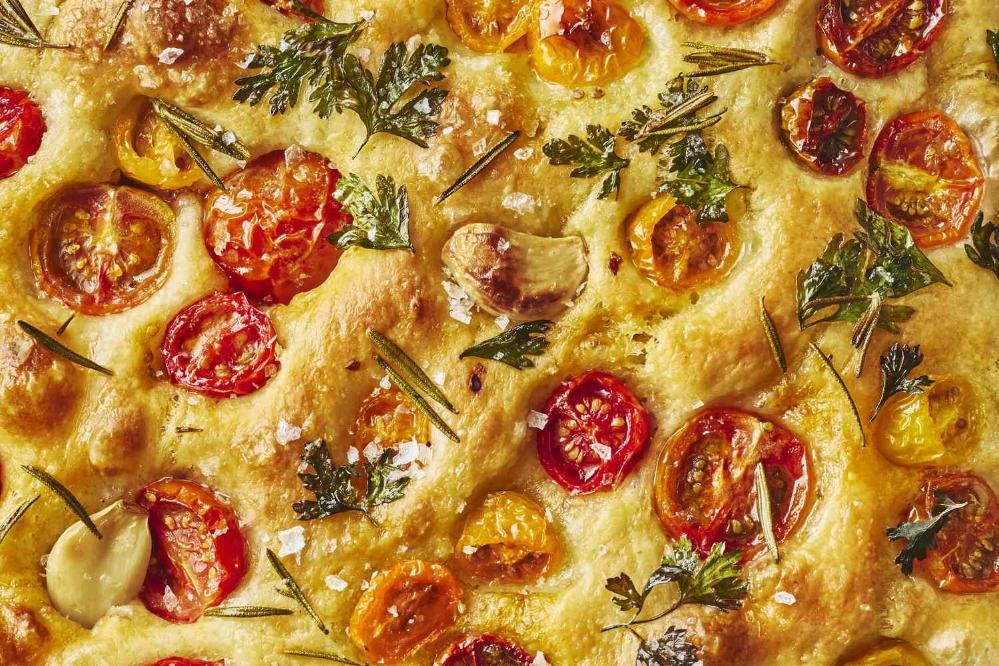
DOUGH
3 1/2 cups water
3 tablespoons extra virgin olive oil plus more for greasing and drizzling
2 teaspoons raw honey
8 1/4 cups (1,000 grams) bread flour plus more for work surface
1 7 gram package instant yeast (about 2 1/4 teaspoons)
2 tablespoons kosher salt
TOPPING
3 cups red, yellow, orange cherry tomatoes halved
1/4 cup extra virgin olive oil plus more for drizzling
12 cloves (large) garlic peeled
2 sprigs (6 inch) rosemary plus 1 tablespoon fresh rosemary leaves, divided
3 tablespoons fresh parsley
flaky sea salt
Directions:
Make the dough: Stir together 3 1/2 cups water, oil, and honey in bowl of a stand mixer until fully combined. Using a fork, stir in flour and yeast until just starting to combine. Add salt; stir with a fork until dough comes together and looks shaggy. Cover bowl with plastic wrap, and let stand in a warm place (75°F) until puffed slightly, about 15 minutes.
Beat dough on low speed in stand mixer fitted with the dough hook attachment until dough starts to look smooth (a sign of gluten strength), about 5 minutes. Place in a large bowl greased with additional oil. Cover with plastic wrap; let stand in a warm place (75°F) for 3 hours total to ferment. Follow folding instructions in steps 3 through 5 during this time.
During the first hour: Wet your fingers with water, and fold dough by pulling 1 side several inches above dough and folding over the top. Repeat this until all 4 sides have been folded in. Fold dough in this way every 20 minutes for a total of 3 times, covering with plastic wrap after each series of folds.
STRETCH THE DOUGH
During the second hour: Fold dough as directed above after 45 minutes.
During the third hour: Let dough rest and do its thing; no folding needed.
Meanwhile, make the topping: Preheat oven to 250°F with rack in center position. Toss together tomatoes, oil, garlic, and rosemary sprigs in a 13- x 9-inch baking dish. Bake until tomatoes are soft, about 1 hour. Discard rosemary. Set topping aside until ready to use. Increase oven temperature to 425°F.
Line bottom and sides of 2 (12-inch) cast-iron skillets, 2 (13- x 9-inch) baking pans, or 1 (12-inch) cast-iron skillet and 1 (13- x 9-inch) baking pan using parchment paper; grease parchment paper lightly with additional oil. Set aside.
After dough is fully fermented, delicately turn out dough onto a heavily floured work surface. Divide dough in half with a bench scraper, and place each half in 1 of the prepared pans. (Be careful not to rip the dough.) Using oiled hands, gently spread the dough into pans. Dimple deeply with oiled fingers, ideally seeing air pockets puffing up. Let stand at room temperature until lightly puffed, about 30 minutes.
DIMPLE THE DOUGH
Sprinkle parsley and rosemary leaves over loaves. Divide reserved topping evenly over loaves. Sprinkle with flaky sea salt to taste.
ADD THE TOPPINGS
Bake both pans at once on center rack at 425°F until deep golden brown and crispy, 25 to 30 minutes. Drizzle with additional oil after removing from oven.
Using parchment paper as handles, remove focaccia from pans, and let cool slightly, about 15 minutes, before serving.
MAKE AHEAD TIP:
The tomato-garlic topping can be prepared up to one day in advance and refrigerated in an airtight container. Bring it to room temperature before topping the dough. Baked focaccia can be frozen for up to two months; thaw and reheat in a 350°F oven until warmed through and crisp.
Recipe formatted with the Cook'n Recipe Software from DVO Enterprises.
 Alice Osborne
DVO Newsletter Contributor since 2006
Email the author! alice@dvo.com
www.somebodyfeedseb.com
www.youtube.com
www.seriouseats.com
www.foodandwine.com