How to Make a Bundt Cake Perfectly Every Time
For some reason this year when it’s getting close to Valentine’s Day, I get a really strong urge to bake, and I’m sure I’m not alone! And not just any baking--it’s got to be cake and more specifically it’s got to be red velvet cake. If I can’t justify the huge ticket price for one from the masters of the best red velvet cake from Nothing Bundt Cakes, I’m gonna have to make it on my own. And boy do I want to get as close to the ooey gooey perfection that is their red velvet nothing bundt cake!
Today I am going to share an amazing copycat recipe for that at the bottom, but first I am going to share a few tips for how to make a bundt cake perfectly every time. There are a few key tips you need to know for the cake to come out of the pan flawlessly, etc.
Can I Use Any Cake Recipe for Bundt Cakes?
The short answer is no. Bundt cakes need to come from a recipe resulting in a cake that is relatively dense (like a pound cake) with a tight crumb. Light, fluffy cakes wouldn’t work well for this, so as a general rule, just make cakes developed for their own specific pan each time, ie. layer, sheet, loaf and snacking cakes.
How Full Should I Fill a Bundt Pan?
Your pan should be filled about 3/4ths of the way up the pan. After you fill the pan, smooth it out with a spatula--you can even drag the spatula or a spoon through the center of the batter to create a divot, which helps ensure a flat bottom. Then lift the pan a few inches from the counter top and drop it to release the air bubbles in the batter.
How to Prepare a Bundt Pan so the Cake Releases Easily?
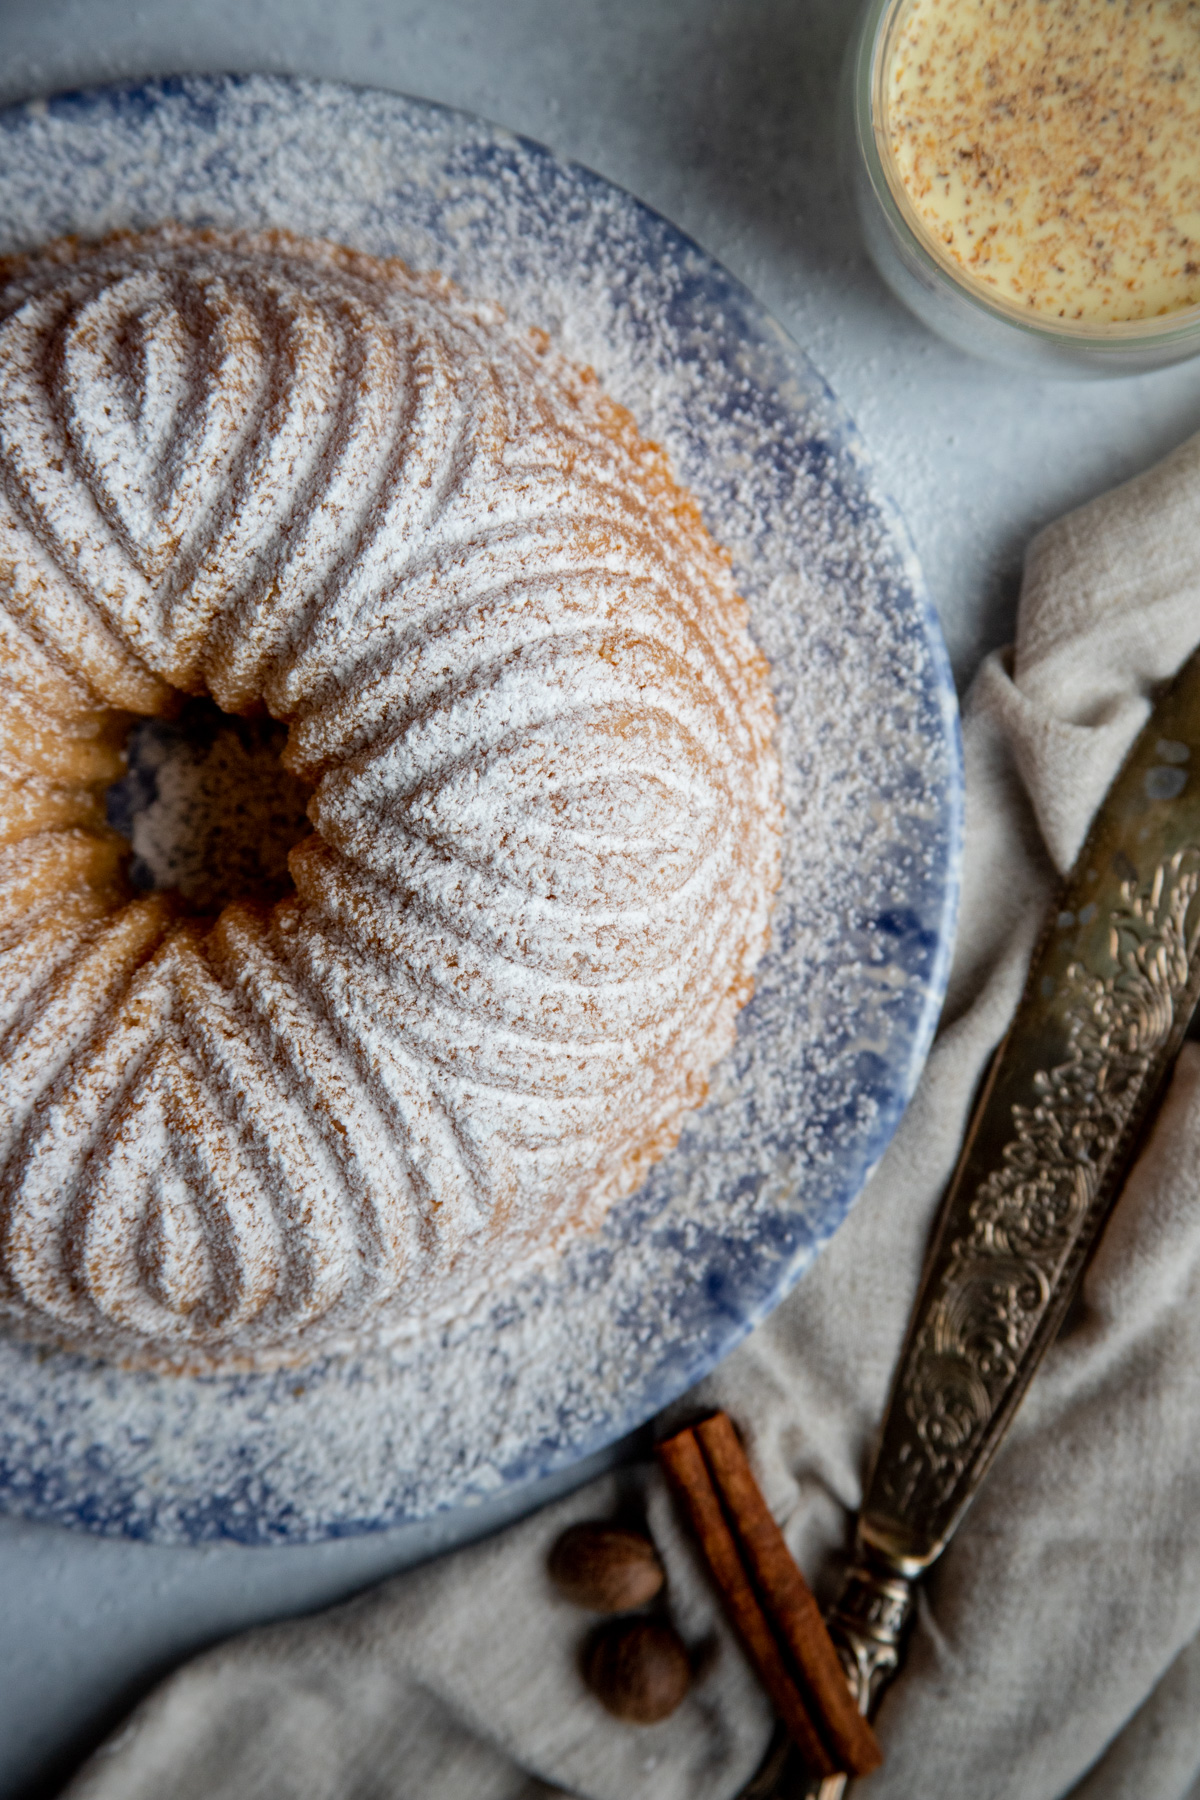
The trickiest and most intimidating part of making a bundt cake is the worry of it not coming out of the pan with the beautiful design you desired. To avoid this problem, for starters, especially if you are a beginner, make sure you choose a classically shaped bundt pan. You want a sturdy aluminum pan and you can even get a nonstick pan for even more ease releasing from the pan. Make sure you generously grease your pan with plenty of non-stick spray, followed by a generous sprinkling of all-purpose flour, granulated sugar, or cocoa powder. Swirl the pan around and flip upside down to dump out any excess coating. Alternatively, you can also use the baking spray that has flour in it. This works beautifully for Bundt cakes, but not every baker always has this in their pantry.
How to Release the Bundt Cake from the Pan Easily?
After your cake is finished baking, let your freshly baked cake rest for about 5-10 minutes on a cooling rack. Once rested, gently run a thin rubber spatula or butter knife around the edges and inner tube of the pan. Place a cooling rack over the pan and with hot pads on your hands, flip the cake over into the rack. If a bit of the cake does stick inside the pan, try pressing the piece back into the cake where it belongs and the warmth of the cake should help “glue” it back together. If you add any glaze or icing on it, no one will even notice!
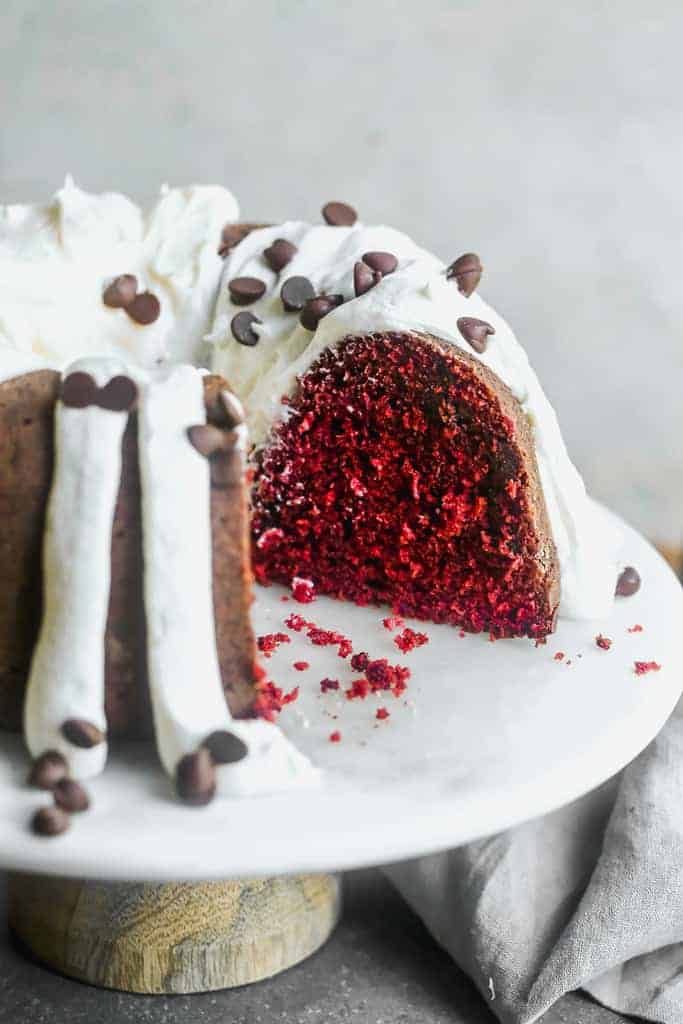
I hope these tips are helpful and if you have that inkling for a nice Valentine’s day bundt cake like I do, here is a fantastic recipe from Better from Scratch for Red Velvet Bundt Cake with a perfect cream cheese icing. I hope you enjoy it as much as I do!
2 3/4 cups all-purpose flour
1/4 cup unsweetened cocoa powder
1 teaspoon baking soda
3/4 teaspoon salt
2 cups granulated sugar
3/4 cup unsalted butter , room temperature
1/3 cup oil , vegetable or canola oil
3 large eggs
2 large egg yolks
1 tablespoon vanilla extract
1 1/2 teaspoons vinegar
1 ounce liquid red food coloring
1 1/3 cups buttermilk
1 1/2 cups chocolate chips , optional
FOR THE CREAM CHEESE FROSTING:
12 ounces cream cheese , room temperature
1/4 cup butter , room temperature (salted or unsalted)
1 1/2 teaspoons vanilla extract
2 1/2 - 3 cups powdered sugar, to taste
Directions:
Add Recipe to Cook'n
blog comments powered by Disqus
Today I am going to share an amazing copycat recipe for that at the bottom, but first I am going to share a few tips for how to make a bundt cake perfectly every time. There are a few key tips you need to know for the cake to come out of the pan flawlessly, etc.
Can I Use Any Cake Recipe for Bundt Cakes?
The short answer is no. Bundt cakes need to come from a recipe resulting in a cake that is relatively dense (like a pound cake) with a tight crumb. Light, fluffy cakes wouldn’t work well for this, so as a general rule, just make cakes developed for their own specific pan each time, ie. layer, sheet, loaf and snacking cakes.
How Full Should I Fill a Bundt Pan?
Your pan should be filled about 3/4ths of the way up the pan. After you fill the pan, smooth it out with a spatula--you can even drag the spatula or a spoon through the center of the batter to create a divot, which helps ensure a flat bottom. Then lift the pan a few inches from the counter top and drop it to release the air bubbles in the batter.
How to Prepare a Bundt Pan so the Cake Releases Easily?
The trickiest and most intimidating part of making a bundt cake is the worry of it not coming out of the pan with the beautiful design you desired. To avoid this problem, for starters, especially if you are a beginner, make sure you choose a classically shaped bundt pan. You want a sturdy aluminum pan and you can even get a nonstick pan for even more ease releasing from the pan. Make sure you generously grease your pan with plenty of non-stick spray, followed by a generous sprinkling of all-purpose flour, granulated sugar, or cocoa powder. Swirl the pan around and flip upside down to dump out any excess coating. Alternatively, you can also use the baking spray that has flour in it. This works beautifully for Bundt cakes, but not every baker always has this in their pantry.
How to Release the Bundt Cake from the Pan Easily?
After your cake is finished baking, let your freshly baked cake rest for about 5-10 minutes on a cooling rack. Once rested, gently run a thin rubber spatula or butter knife around the edges and inner tube of the pan. Place a cooling rack over the pan and with hot pads on your hands, flip the cake over into the rack. If a bit of the cake does stick inside the pan, try pressing the piece back into the cake where it belongs and the warmth of the cake should help “glue” it back together. If you add any glaze or icing on it, no one will even notice!
I hope these tips are helpful and if you have that inkling for a nice Valentine’s day bundt cake like I do, here is a fantastic recipe from Better from Scratch for Red Velvet Bundt Cake with a perfect cream cheese icing. I hope you enjoy it as much as I do!
Red Velvet Bundt Cake
Moist and tender Red Velvet Bundt Cake with cream cheese frosting. Add some chocolate chips for a richer chocolate flavor. Author: Lauren Allen
Prep time:
Cook time:
Serving size: 12
Calories per serving: 255
Ingredients:
Cook time:
Serving size: 12
Calories per serving: 255
2 3/4 cups all-purpose flour
1/4 cup unsweetened cocoa powder
1 teaspoon baking soda
3/4 teaspoon salt
2 cups granulated sugar
3/4 cup unsalted butter , room temperature
1/3 cup oil , vegetable or canola oil
3 large eggs
2 large egg yolks
1 tablespoon vanilla extract
1 1/2 teaspoons vinegar
1 ounce liquid red food coloring
1 1/3 cups buttermilk
1 1/2 cups chocolate chips , optional
FOR THE CREAM CHEESE FROSTING:
12 ounces cream cheese , room temperature
1/4 cup butter , room temperature (salted or unsalted)
1 1/2 teaspoons vanilla extract
2 1/2 - 3 cups powdered sugar, to taste
Directions:
1. Preheat oven to 350 degrees F. Grease the bundt pan (see my tips above) and set aside.
2. To a mixing bowl add flour, baking soda, salt and cocoa powder and whisk well to combine.
3. In another bowl add the sugar and butter and cream together with an electric mixer until pale and fluffy, 4-5 minutes.
4. Add oil and mix. Add eggs and yolks, one at a time, mixing after each addition. Add vanilla, vinegar and red food coloring.
5. Add about 1/3 of the flour mixture and stir to combine. Add half of the buttermilk and stir to combine. Repeat, alternately adding the flour and then buttermilk, ending with flour.
6. Fold in chocolate chips, if using.
7. Pour batter into prepared bundt pan and smooth into an even layer. Bake in preheated oven for 40-55 minutes or until a toothpick inserted into the center of the cake comes out clean.
8. Cool in cake pan for 10 minutes and then invert onto a wire cooling rack to cool completely.
For the frosting:
1. Beat cream cheese and butter together until smooth. Add vanilla. Add powdered sugar, one cup at a time, until frosting has the consistency and taste you desire.
2. Frosting can be made days in advance. Refrigerate in an airtight container, or freeze.
NOTES:
Make ahead, storing and freezing instructions:
*The frosting can be made several days ahead of time and storee in the fridge, or frozen for up to 3 months. Thaw overnight in the fridge.
*Store the cake covered in the fridge for up to 5 days. Freeze (frosted or unfrosted), covered well, for up to 3 months.
Source: tastesbetterfromscratch.com
Recipe formatted with the Cook'n Recipe Software from DVO Enterprises.
 Mary Richardson
Weekly Newsletter Contributor since 2014
Email the author! mary@dvo.com
Sources:
- www.publicdomainpictures.net
- www.foodnetwork.com
- www.commons.wikimedia.jpg
- www.tastesbetterfromscratch.com