Have You Tried the Pan-Banging Chocolate Chip Cookie Everyone is Making?
As I’ve really had time while being home so much the last few months, I’ve decided that at the top of my priority list was making a couple of the fussier chocolate chip cookie recipes out there to see if they really are worth the fuss (compared to my usual go-to of the Nestle Toll House recipe) and which one reigns truly supreme out of all of them. Quite a big, albeit delicious feat! I will keep you posted after I make all three of the fussy ones I have in mind and let you know my final, very scientific conclusions.
But first, I had to start with the biggest craze the chocolate chip cookie has had during this quarantine period, which is the pan-banging chocolate chip cookie recipe. This recipe originated from Sarah Kieffer of thevanillabeanblog.com in her cookbook and it has become quite the internet sensation. It has now been reposted on New York Times cooking blog and has a cult following, among many other places. Apparently people are making these and posting all their pan-banging antics all over Instagram. I think I was late to the party because I only just barely learned about this recipe. But as soon as I saw it there was no going back. I made them within a few hours of seeing that beautiful giant, crinkly cookie the size of your face. See for yourself….
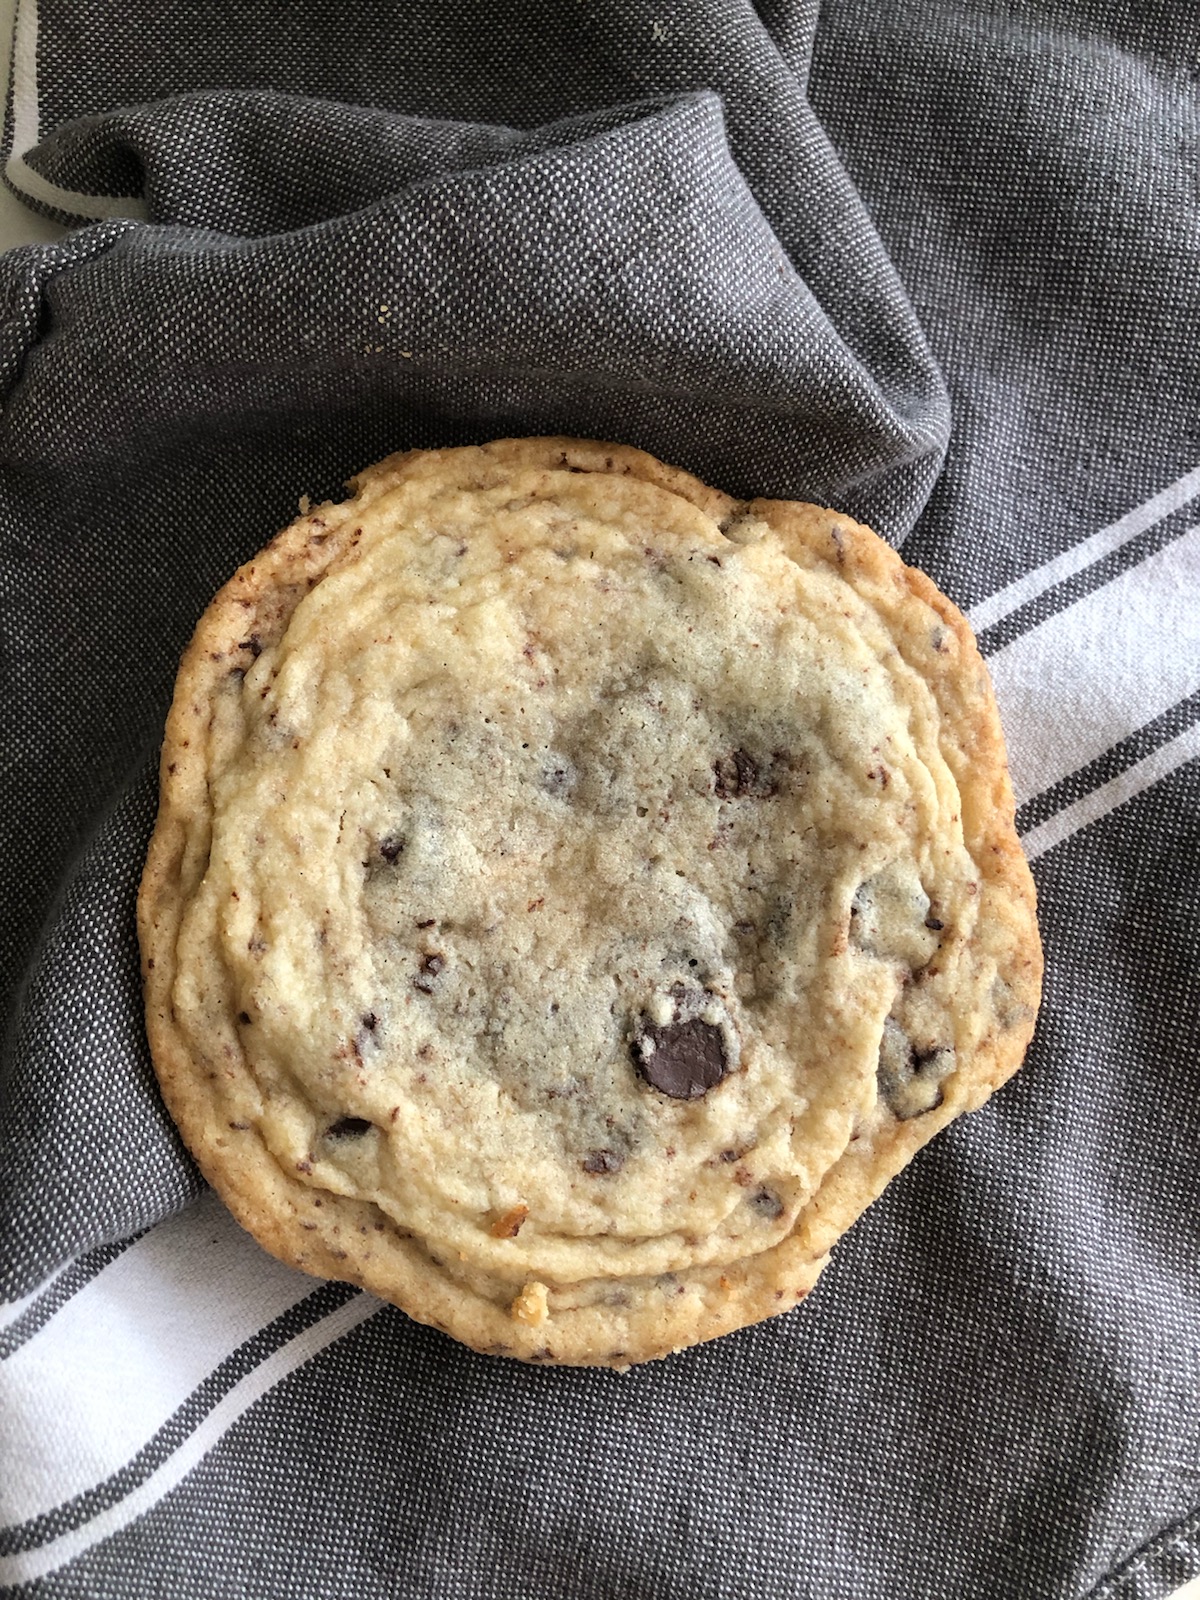
(This is a picture of the ones I made and mine aren’t quite as ripply as the ones on the blog--I’ll explain why later. So check out the original post to see an even cooler looking perfectly rippled cookie). Like the name implies, you bang the pan of cookies to achieve those perfect crinkles, or ripples . You bake them for a total of 16-18 minutes. They are giant 3.5 ounce cookies--that is a heaping ⅓ cup of cookie dough! You do your first bang at 10 minutes by lifting up the pan in the front about 4 inches and dropping it back onto the rack. The pan banging gives them their signature rippled look and helps them spread evenly. It also helps release the air bubbles to help prevent them from getting cakey.
These turn out wonderfully rippled and a bit crispy around the outside edges of the cookie, while still maintaining a soft, gooey center. If you are able to cut up your own semi sweet chocolate from a chocolate bar, you can even get lovely pools of chocolate throughout and better crinkles. I only had extra dark chocolate chips on hand, but I was still able to get quite a few crinkly rings in my cookie and it tasted delicious!

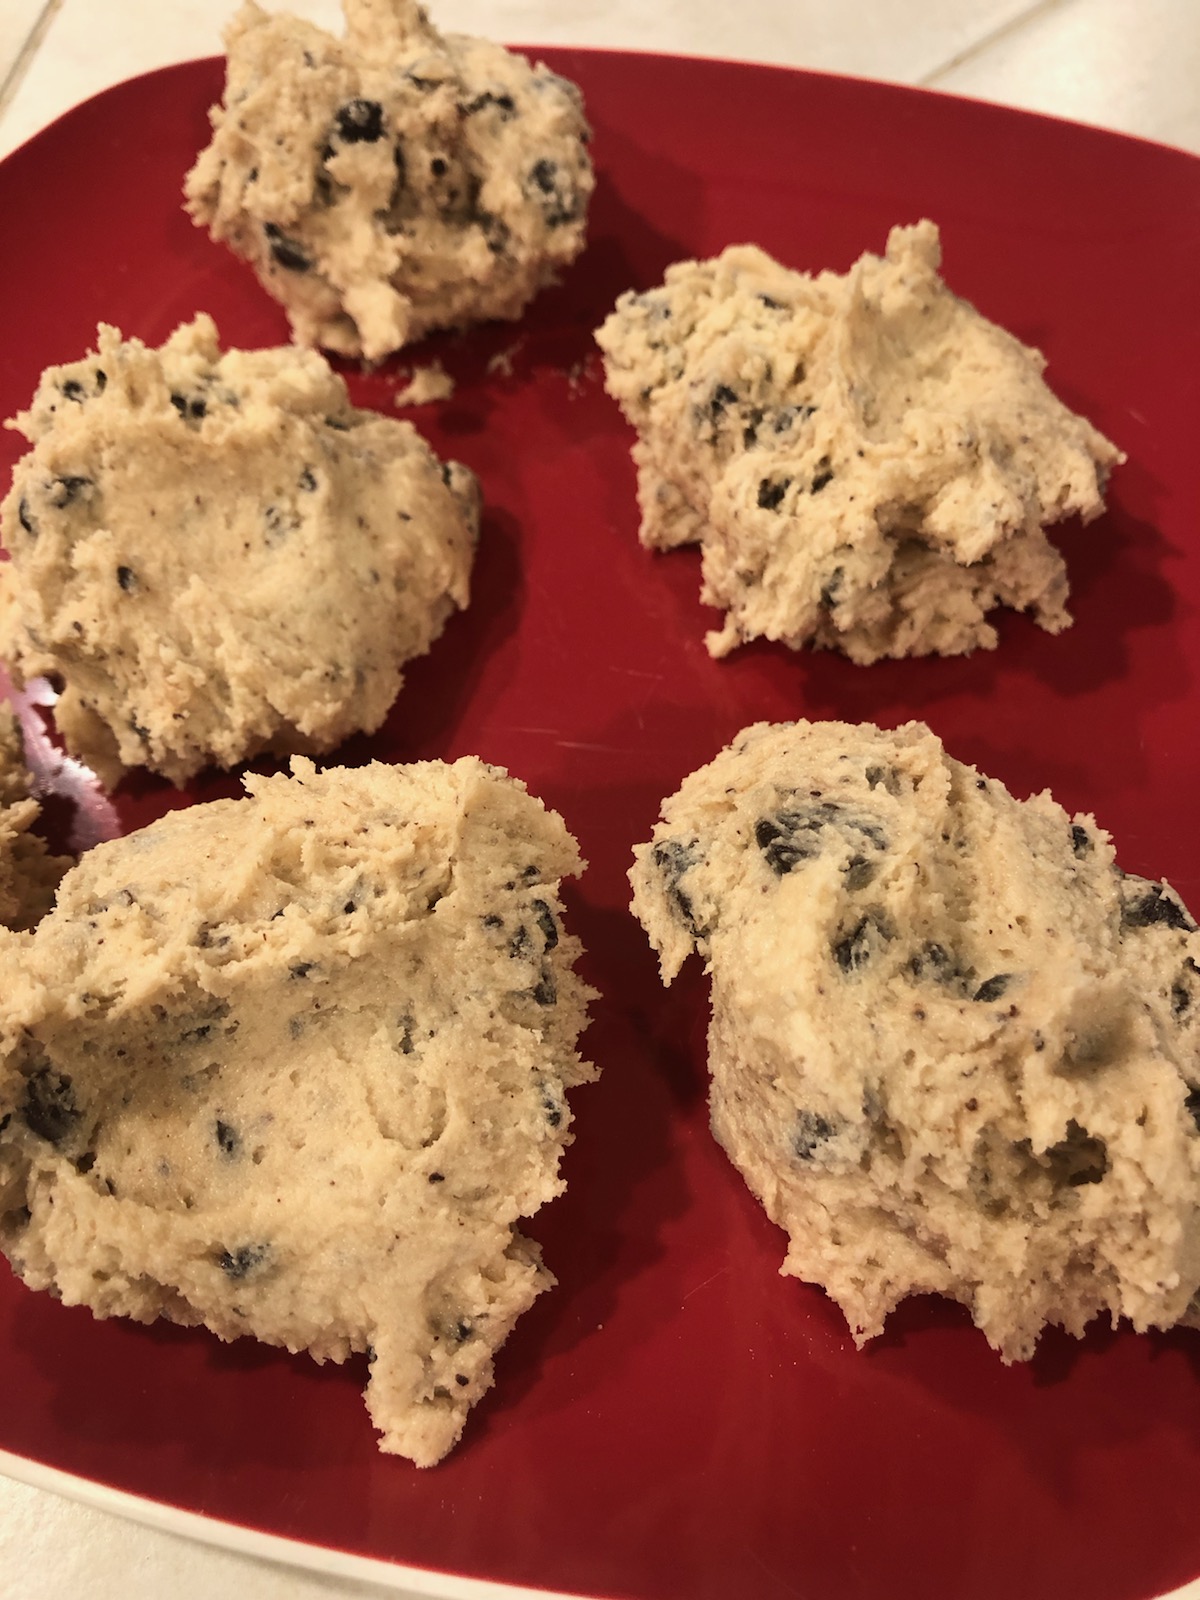
To sum up the recipe, it is a pretty straightforward recipe with none of the fuss of brown butter or anything refrigerating for multiple days before you bake them. Just typical chocolate chip cookie ingredients, but it does have double the butter than usual since the butter is the key to helping the cookie spread like it does. After you mix up the batter, it is very soft and feels like it couldn’t use more flour--it doesn’t look like typical cookie dough when it is mixed right. You measure out your balls of cookie dough and pop them in the freezer for 15-20 minutes before they hit the oven.
Then you bake them for a few minutes, do your pan banging every couple minutes until they are golden brown around the edges and soft in the middle. They will continue cooking a bit after you get them out. You are supposed to let them cool all the way to room temperature before removing them from the pan.
To me, even with the pan banging, which I just thought was fun and exciting as I could see the progress of the crinkly rings forming, and the short burst of freezer time, I thought overall they were very easy to make and I loved how giant they were. This is my husband’s dream cookie with the crispy edges so he was one happy man! I think those other two “fussy” recipes will have big shoes to fill.
So comparing these and the Nestle Toll House cookie recipe--which one do I like better? It depends on my mood. These really are ginormous--probably about the size of three Nestle Toll House Cookies--but they were really fun and great if you love a bit of a crispy cookie. I tend to favor a softer cookie, so I think overall I choose the Toll eHouse recipe--but my husband would hands down choose this cookie. It is all about your cookie preference.
Have you tried (or will you try) the latest chocolate chip cookie trend? It’s pretty fun and unique with really awesome results. I think you will really enjoy trying it if you haven’t already. And if chocolate chip cookies are not your favorite kind, the author has also made similar giant crinkly ripple cookies in ginger molasses and molasses espresso cookies.

2 cups (284 g) all-purpose flour
1/2 tsp baking soda
3/4 tsp kosher salt
1/2 lb . (2 sticks) unsalted butter, at room temperature
1 1/2 cups 1-1/2 (297 g) sugar
1/4 cup (50 g) packed brown sugar
1 large egg
1 1/2 tsp 1-1/2 pure vanilla extract
2 t. water
6 ounces (170 g) bittersweet chocolate, chopped into bite-size pieces averaging 1/2" with some smaller and some larger
Directions:
Add Recipe to Cook'n
blog comments powered by Disqus
But first, I had to start with the biggest craze the chocolate chip cookie has had during this quarantine period, which is the pan-banging chocolate chip cookie recipe. This recipe originated from Sarah Kieffer of thevanillabeanblog.com in her cookbook and it has become quite the internet sensation. It has now been reposted on New York Times cooking blog and has a cult following, among many other places. Apparently people are making these and posting all their pan-banging antics all over Instagram. I think I was late to the party because I only just barely learned about this recipe. But as soon as I saw it there was no going back. I made them within a few hours of seeing that beautiful giant, crinkly cookie the size of your face. See for yourself….
(This is a picture of the ones I made and mine aren’t quite as ripply as the ones on the blog--I’ll explain why later. So check out the original post to see an even cooler looking perfectly rippled cookie). Like the name implies, you bang the pan of cookies to achieve those perfect crinkles, or ripples . You bake them for a total of 16-18 minutes. They are giant 3.5 ounce cookies--that is a heaping ⅓ cup of cookie dough! You do your first bang at 10 minutes by lifting up the pan in the front about 4 inches and dropping it back onto the rack. The pan banging gives them their signature rippled look and helps them spread evenly. It also helps release the air bubbles to help prevent them from getting cakey.
These turn out wonderfully rippled and a bit crispy around the outside edges of the cookie, while still maintaining a soft, gooey center. If you are able to cut up your own semi sweet chocolate from a chocolate bar, you can even get lovely pools of chocolate throughout and better crinkles. I only had extra dark chocolate chips on hand, but I was still able to get quite a few crinkly rings in my cookie and it tasted delicious!
To sum up the recipe, it is a pretty straightforward recipe with none of the fuss of brown butter or anything refrigerating for multiple days before you bake them. Just typical chocolate chip cookie ingredients, but it does have double the butter than usual since the butter is the key to helping the cookie spread like it does. After you mix up the batter, it is very soft and feels like it couldn’t use more flour--it doesn’t look like typical cookie dough when it is mixed right. You measure out your balls of cookie dough and pop them in the freezer for 15-20 minutes before they hit the oven.
Then you bake them for a few minutes, do your pan banging every couple minutes until they are golden brown around the edges and soft in the middle. They will continue cooking a bit after you get them out. You are supposed to let them cool all the way to room temperature before removing them from the pan.
To me, even with the pan banging, which I just thought was fun and exciting as I could see the progress of the crinkly rings forming, and the short burst of freezer time, I thought overall they were very easy to make and I loved how giant they were. This is my husband’s dream cookie with the crispy edges so he was one happy man! I think those other two “fussy” recipes will have big shoes to fill.
So comparing these and the Nestle Toll House cookie recipe--which one do I like better? It depends on my mood. These really are ginormous--probably about the size of three Nestle Toll House Cookies--but they were really fun and great if you love a bit of a crispy cookie. I tend to favor a softer cookie, so I think overall I choose the Toll eHouse recipe--but my husband would hands down choose this cookie. It is all about your cookie preference.
Have you tried (or will you try) the latest chocolate chip cookie trend? It’s pretty fun and unique with really awesome results. I think you will really enjoy trying it if you haven’t already. And if chocolate chip cookies are not your favorite kind, the author has also made similar giant crinkly ripple cookies in ginger molasses and molasses espresso cookies.
Pan-Banging Chocolate Chip Cookies
Chocolate Chip Cookies from The Vanilla Bean Baking Book: The amazing pan-banging, GIANT (big-as-your-head!), crinkled chocolate chip cookies recipe! Author: A Farmgirl's Dabbles Recipe Type: Dessert Total Time: PT1H35M
Yield: 10
Serving size: 5
Calories per serving: 426
Ingredients:
Serving size: 5
Calories per serving: 426
2 cups (284 g) all-purpose flour
1/2 tsp baking soda
3/4 tsp kosher salt
1/2 lb . (2 sticks) unsalted butter, at room temperature
1 1/2 cups 1-1/2 (297 g) sugar
1/4 cup (50 g) packed brown sugar
1 large egg
1 1/2 tsp 1-1/2 pure vanilla extract
2 t. water
6 ounces (170 g) bittersweet chocolate, chopped into bite-size pieces averaging 1/2" with some smaller and some larger
Directions:
Adjust an oven rack to the middle position. Preheat the oven to 350° F. Line three baking pans (I find that commercial-grade 12" x 17" rimmed pans give me the best results with this recipe) with aluminum foil, dull side up. This helps create the crinkles in the cookies and lends an extra-crisp, golden brown bottom.
In a small bowl, whisk the flour, baking soda, and salt.
In the bowl of a stand mixer fitted with a beater blade, beat the butter on medium until creamy, about 2 minutes. Add the sugar and brown sugar and beat on medium until light and fluffy, 2 to 3 minutes. Add the egg, vanilla, and water and mix on low to combine. Add the flour mixture and mix on low until combined. Add the chocolate and mix on low into the batter.
Form the dough into balls weighing 3-1/2 ounces (100 g) each. This is approximately a heaping 1/3 cup each. I wanted my cookies to match Sarah's as much as possible and measured each dough ball with a kitchen scale. If you make the dough balls smaller, you won’t get as many ridges on the outer layer, and your centers won’t be as gooey. Place four balls an equal distance apart on prepared pan and transfer to the freezer for 15 minutes before baking. Do not skip freezing the dough, as it's essential in keeping the dough from spreading too much, and aids in the creation of the crinkly outer layer. After putting the first baking pan in the oven, put the second one in the freezer.
Place the chilled baking pan in the oven and bake 10 minutes, until the cookies are puffed slightly in the center. Lift the side of the baking sheet up about 4" from the oven rack and let it drop down against the rack, so the edges of the cookies set and the inside falls back down. To quote Sarah, "this will feel wrong, but trust me". After the cookies puff up again in 2 minutes, repeat lifting and dropping the pan. Repeat a few more times to create ridges around the edge of the cookie. Bake 16 to 18 minutes total, until the cookies have spread out and the edges are golden brown but the centers are much lighter and not fully cooked.
Transfer the baking pans to a wire rack; let cool completely before removing the cookies from the pan.
Source: afarmgirlsdabbles.com
Recipe formatted with the Cook'n Recipe Software from DVO Enterprises.
Sources:
- www.afarmgirlsdabbles.com
- www.pxhere.com
- www.thevanillabeanblog.com
 Mary Richardson
Weekly Newsletter Contributor since 2014
Email the author! mary@dvo.com