The Staff of Life the World Over
Bread. Don’t you love bread? I’ve been practicing making it using natural yeast and I’ve been making whole wheat bread and French bread for years. I’m guessing our Cook’n readers are pretty adept at bread-making as well. Don’t you think there’s something so satisfying about making your own bread?
That said, there’s an organization located in the UK, the Flour Advisory Board, that has some fascinating information about the many different types of bread in the world. There are literally hundreds of bread variations people have created throughout history.
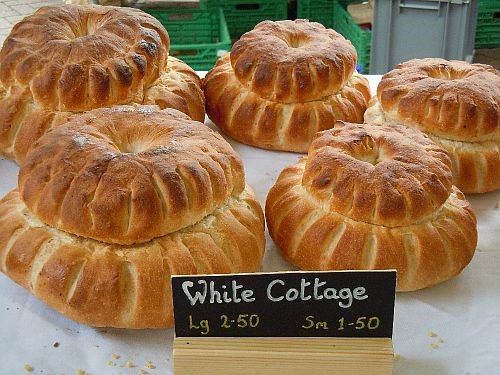
For instance, the British were the originators of a rustic bread that’s become very popular in the U.S.—cottage bread. It’s a white loaf made from two round pieces of dough. One (smaller than the other) is secured on top of the larger piece. This is often dusted with flour before baking. My neighbor, Jeanne, makes a beautiful cottage bread.
And the Irish gave us the soda bread. It’s a flat, round, heavy loaf usually marked into quarters and risen with baking powder, not yeast.
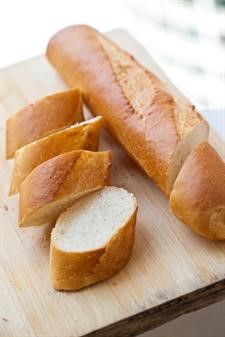
From France we inherit the baguette. It’s become a staple at our spaghetti dinners. This is just a thinner loaf of French bread. It’s easy and fun to make.
France gives us another delicious bread—the brioche. This bread is noted for its high butter and egg content, commonly served as a component of French desserts.
Eastern Europe is the birthplace of the ever-popular bagel. It’s characterized by its ring shape and pleasant chewy texture. One of these days we gotta talk bagels. Do any of you make these?

Ciabatta is originally from Italy. I didn’t know that this loaf, which is somewhat elongated and broad and flattish, should be slightly collapsed in the middle. I’ve tried making it and thought I’d messed up somehow, because of the collapsed middle. Well now I know!
Foccacia is also from Italy. Often punctured with a knife to relieve surface bubbling. I buy mine covered in veggies that were baked atop of it (green peppers, tomato slices, onion slices, even black olive slices).
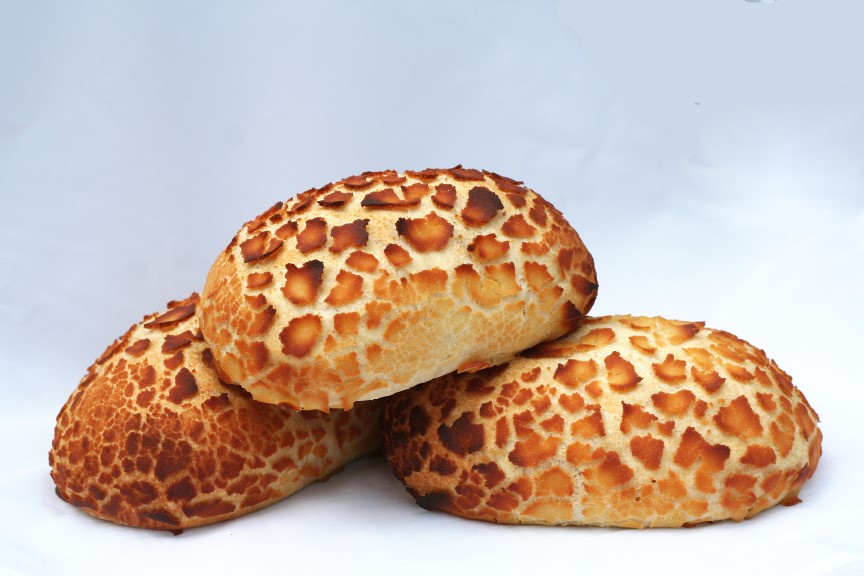
Tiger bread. It o riginated in the Netherlands; it’s also known as Dutch Crunch Bread in the U.S. The secret to getting the crackled effect is painting the half-risen rolls (or loaves) with a yeast paste made with rice flour. Let the bread finish rising, then bake as usual.
When the proved dough hits the heat of the oven, it continues to rise. The rice paste, because its gluten-free, doesn’t stretch and so as the dough rises, the paste ‘tears apart’ to give the distinctive mottled appearance.
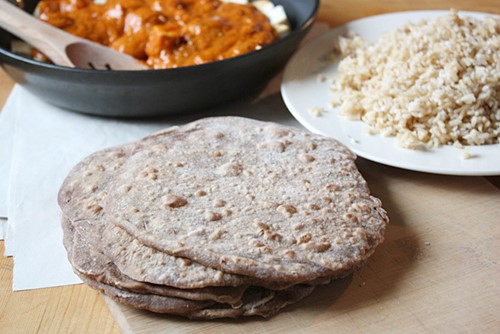
Chapatti is a south Asian bread, usually eaten with cooked dhal (lentil soup), vegetable curry, and chicken and mutton curry dishes. Pieces of chapatti are used to wrap around and pick up each bite of the cooked dish.
Tortillas are a flatbread which originated in Mexico. We all know and love these and use them all the time. I like to cut white tortillas in quarters, sprinkle them with olive oil and salt and bake them. These make inexpensive and healthy tortilla chips.
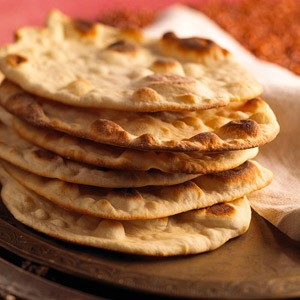
Naan comes from Northern India and Pakistan. This is a favorite at our house. It’s the base for our individual pizzas. I also cut and toast it to make “crackers” for my homemade stews and soups.
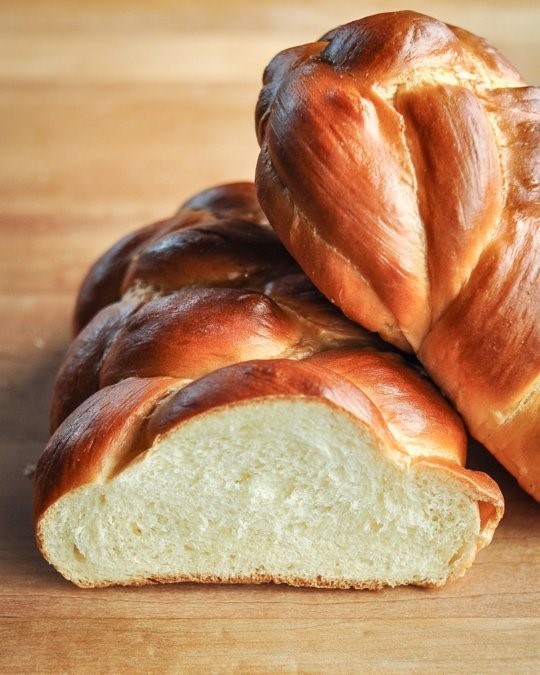
Challah, the braided bread of Israel, is probably one of the most delicious breads I’ve ever had. While all breads smell heavenly when baked and are pretty to look at, I think the challah is spectacular. For celebrating everything from Hanukkah to the arrival of spring, challah is the just the bread for the job. In fact, professional chefs and bakers all agree—challah-making should be part of every cooks’ repertoire. In the off-chance you agree, here’s a tutorial and recipe for this superb bread found on www.thekitchn.com. Let’s give this bread a try and compare notes!
The Kitchn folks say challah is a very straightforward bread to make. The dough is enriched with eggs and oil, while a few tablespoons of sugar to add sweetness. It doesn't require any fussy techniques and can be made from start to finish in the space of an afternoon.
The real magic, however, comes in braiding the loaf. Even a simple three-stranded braid is impressive, though a four- or six-stranded braid (as shown below) will bring the house down. For major celebrations, like the Jewish high holidays, you can also coil the long braided loaf into a circle. A simple brushing of egg white is all you need to make that loaf shiny and magnificent. Here’s a braiding picture tutorial and then the recipe:

CHALLAH BREAD
2 teaspoons active dry or instant yeast
1 cup (8 ounces) lukewarm water
4 to 4 1/2 cups all-purpose flour
1/4 cup sugar
2 teaspoons salt
2 large eggs
1 large egg yolk (reserve the white for the egg wash)
1/4 cup neutral-flavored vegetable oil
Equipment needed:
Standing mixer (optional)
Large mixing bowl
Bench scraper or sharp knife
Baking sheet
Parchment paper
1. Dissolve yeast: Sprinkle the yeast over the water in a small bowl, and add a healthy pinch of sugar. Stir to dissolve the yeast and let stand until you see a thin frothy layer across the top. This means that the yeast is active and ready to use. (If you do not see this or if your yeast won't dissolve, it has likely expired and you'll need to purchase new yeast.)
2. Mix dry ingredients: Whisk together 4 cups of the flour, sugar, and salt in the bowl of a standing mixer (or in a large mixing bowl if kneading by hand).
3. Add eggs, yolk, and oil: Make a well in the center of the flour and add the eggs, egg yolk, and oil. Whisk these together to form a slurry, pulling in a little flour from the sides of the bowl.
4. Mix to form a shaggy dough: Pour the yeast mixture over the egg slurry. Mix the yeast, eggs, and flour with a long-handled spoon until you form a shaggy dough that is difficult to mix.
5. Knead dough 6 to 8 minutes: With a dough hook attachment, knead the dough on low speed for 6 to 8 minutes. (Alternatively, turn out the dough onto a floured work surface and knead by hand for about 10 minutes.) If the dough seems very sticky, add flour a teaspoon at a time until it feels tacky, but no longer like bubblegum. The dough has finished kneading when it is soft, smooth, and holds a ball-shape.
6. Let dough rise until doubled: Place the dough in an oiled bowl, cover with plastic wrap, and place somewhere warm. Let the dough rise until doubled in bulk, 1 1/2 to 2 hours.
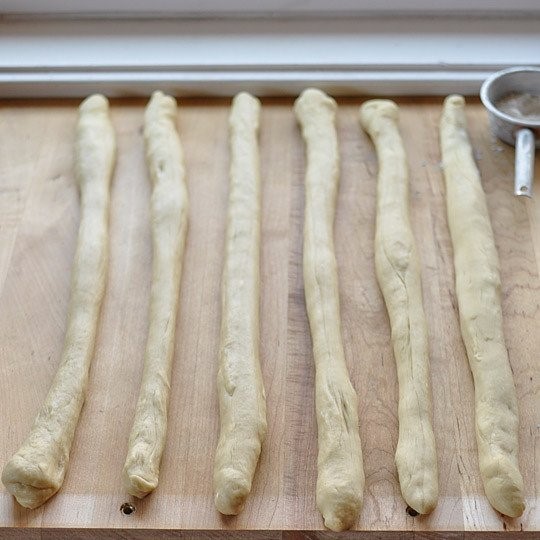
7. Separate dough and roll into ropes: Separate the dough into three or six equal pieces, depending on the type of braid you'd like to do. Roll each piece of dough into a long rope roughly 1-inch thick and 16 inches long. If the ropes shrink as you try to roll them, let them rest for 5 minutes to relax the gluten and then try again.
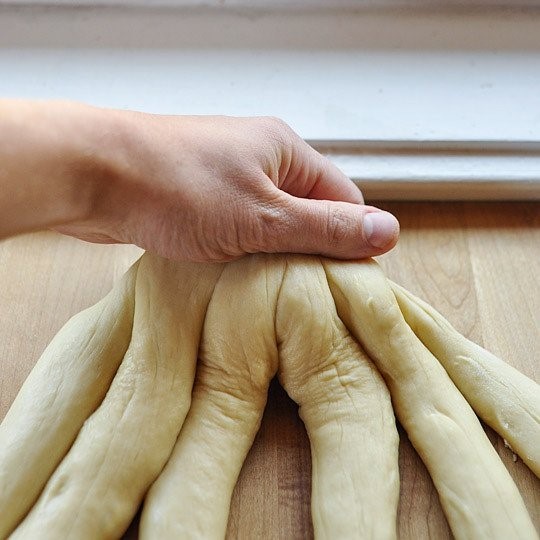
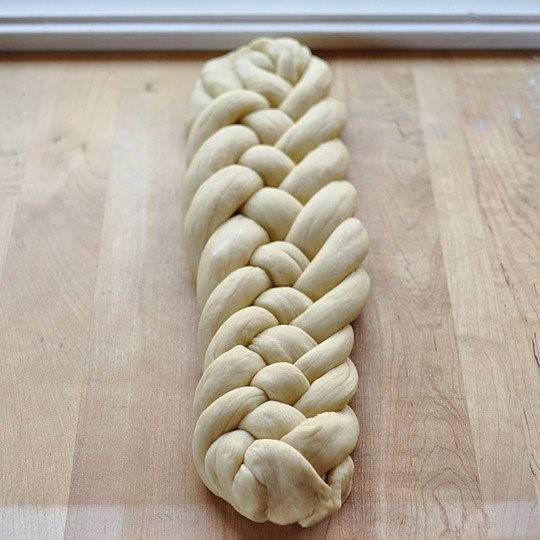
8. Braid dough: Gather the ropes and squeeze them together at the very top. If making a 3-stranded challah, braid the ropes together like braiding hair or yarn and squeeze the ends together when complete. If making a 6-stranded challah, the directions are below.
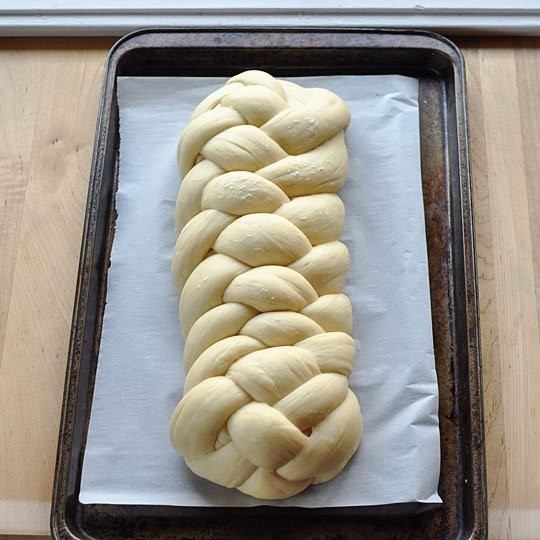
9. Let rise: Line a baking sheet with parchment and lift the loaf on top. Sprinkle the loaf with a little flour and drape it with a clean dishcloth. Place the pan somewhere warm and away from drafts and let it rise until puffed and pillowy, about an hour.
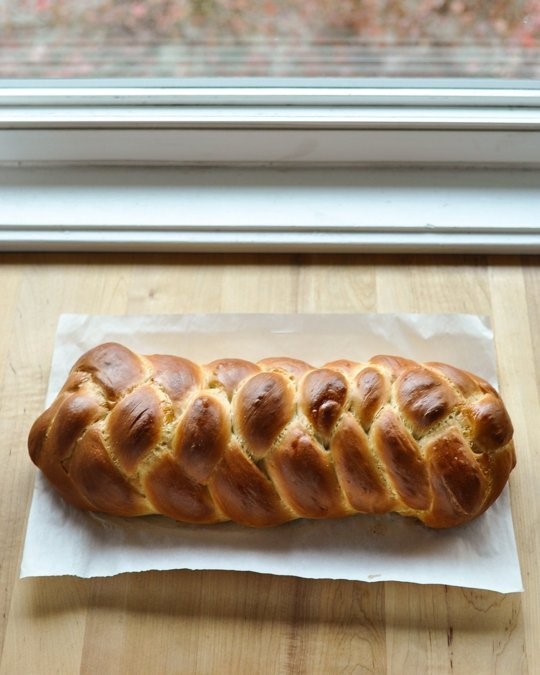
10. Brush with egg white: About 20 minutes before baking, heat the oven to 350°F. When ready to bake, whisk the reserved egg white with a tablespoon of water and brush it all over the challah. Be sure to get in the cracks and down the sides of the loaf.
11. Bake: Slide the challah on its baking sheet into the oven and bake for 30 to 35 minutes, rotating the pan halfway through cooking. The challah is done when it is deeply browned and registers 190°F in the very middle with an instant-read thermometer.
12. Cool: Let the challah cool on a cooling rack until just barely warm.
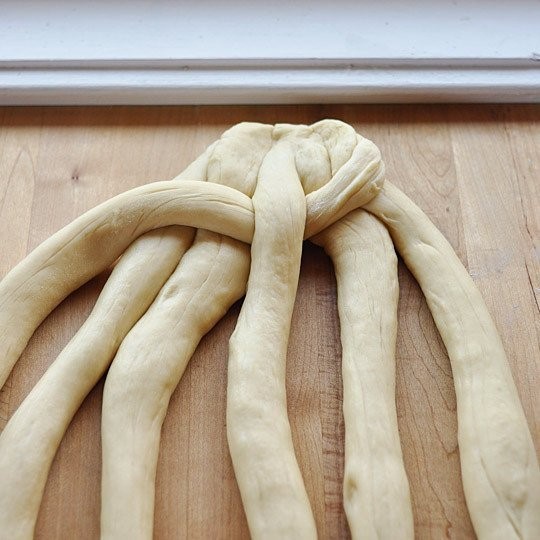
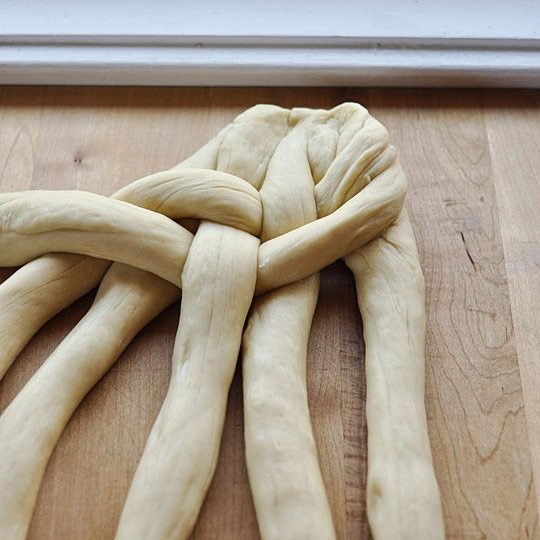
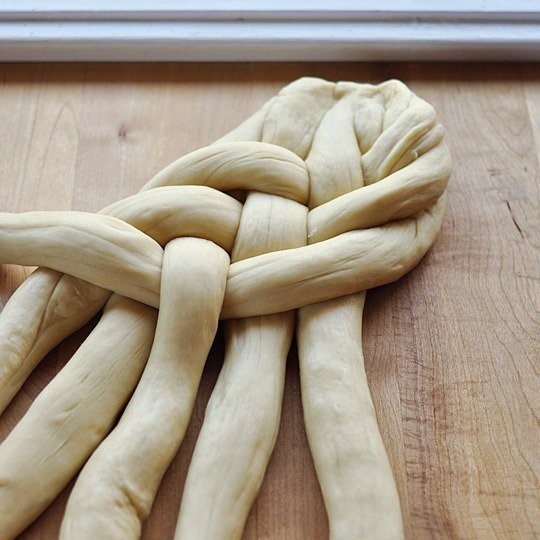
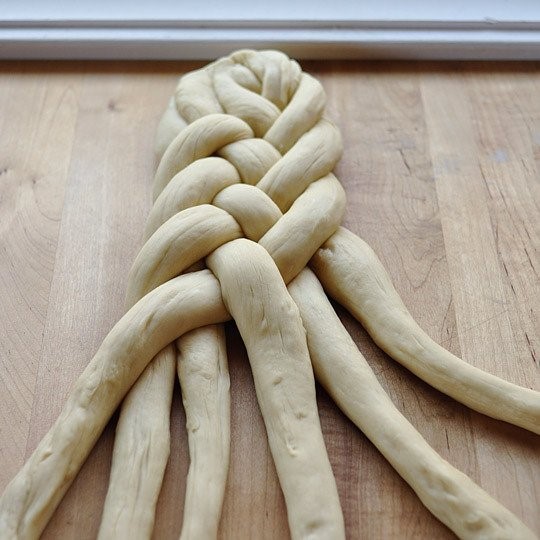
6-Stranded Challah Braid:
The process is "over two, under one, over two." Carry the right-most rope over the two ropes beside it, slip it under the middle rope, and then carry it over the last two ropes. Lay the rope down parallel to the other ropes; it is now the furthest-left strand. Repeat this pattern until you reach the end of the loaf. Try to make your braid as tight as possible. Your braid will start listing to the left as you go; it's ok to lift it up and recenter the loaf if you need to. Once you reach the end, squeeze the ends of the ropes together and tuck them under the loaf.
At this point, your loaf is fairly long and skinny. If you'd like to make a celebration ring, stretch the loaf a little longer and pull the ends toward each other to create a circle. You can either squeeze the ends together, or if you're feeling adventurous, braid them into a continuous circle.
If you're making a regular loaf (as pictured), you need to "plump" it a little to tighten the ropes into more of a loaf shape. Place your left palm at the end of the braid and your right palm at the top, and gently push the two ends toward each other, just like plumping a pillow in slow motion. Then slip your fingers under the dough along either side and gently lift the dough while cupping it downwards. (This isn't a vital step, so don't worry if you're not sure you did it correctly.)
- www.europeantraveler.net
- www.flouradvisoryboard.co.uk
- www.thefreshloaf.com
- www.timetocookonline.com
- www.tablespoon.com
- www.recipe.com
- www.thekitchn.com
 Alice Osborne
Weekly Newsletter Contributor since 2006
Email the author! alice@dvo.com