
With warmer weather upon us, the idea of backyard barbecues and picnics is becoming more and more real. But I'd like to do something once in awhile besides the proverbial hot dog and hamburger routine-especially for a picnic.
It was with this desire that I went looking through Aunt Annie's old cooking and homemaking books. And boy did I find a neat idea. Now you may already be aware of this, or already doing it, so be patient with me...
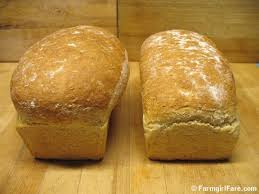
But here's the idea: do things--several things, actually--with a humble loaf of bread! The end products almost turn you into your own caterer. Learning to make elegant sandwiches is just not that hard.
Let's start with some basic but yummy fillings. Tuna (with chopped ripe olives and the usual mayo) is a good choice; ham mixed with pickle relish, mustard, and mayo is delicious; egg salad is always a winner; leftover cooked chicken with grape halves or crushed pineapple, chopped celery and mayo is a winner; shrimp with hard-cooked egg and chopped celery is a real treat. Then there's one that sounds wonderful: olive and nut filling (cream cheese is the base with chopped walnuts and pimiento-stuffed olives added).
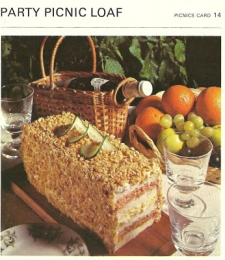
But here's where it gets interesting and fun--putting your chosen filling with the bread. The first approach, a Sandwich Loaf:
- Trim the crust from 1 loaf of unsliced sandwich bread. Cut the loaf horizontally into 4 slices. Spread 3 of the slices lightly with softened butter.
- Place 1 buttered slice on a platter or tray. Spread evenly with filling choice (shrimp, for instance). Top that with a second slice of bread and spread evenly with another choice of filling (olive-nut perhaps). Top that with a third slice of bread and spread it evenly with still another filling (maybe ham or chicken this time). Top it all with the last slice of bread. Press the loaf together gently but firmly.
- Mix 2 packages (8 ounces each) of softened cream cheese with 1/2 cup of light cream. Blend well and "frost" top and sides of loaf with this cream cheese mixture. Refrigerate until "frosting" is set. Wrap the loaf with a damp cloth and refrigerate at least 2 1/2 hours. Before serving, top with garnishes. Slice into 12 to 14 vertical slices.
Next, Pinwheel Sandwiches:

- Trim the crust from 1 loaf of unsliced sandwich bread. Cut the loaf horizontally into 1/4-inch slices. Spread each slice lightly with softened butter and one of the suggested fillings.
- Cut each slice crosswise into halves for easier handling. Roll the slice tightly together, lengthwise (creating a long roll). Secure with toothpicks. Wrap snuggly in plastic wrap and chill several hours or overnight. Cut chilled rolls into 1/2-inch slices when ready to serve.
And then there's Ribbon Sandwiches:

- Trim crusts from 1 loaf of white and 1 loaf of dark brown (whole wheat, rye, pumpernickel, etc.) unsliced sandwich bread. Cut each loaf horizontally into 6 slices. For each ribbon loaf, spread each of 2 slices white and 1 slice dark bread with 3/4 cup of one of the suggested fillings.
- Assemble loaf, alternating white and whole wheat slices; top with unspread dark bread slice. Press loaf together gently but firmly. Wrap in plastic wrap and chill at least 2 hours. Cut into 1/2-inch slices, and then each small slice into halves when ready to serve.
Lastly, Cutout Sandwiches:

- Using white and whole wheat bread slices, and using a doughnut cutter, cut 2 rounds in each slice. Insert a small rounds of whole wheat bread into the holes of large white rounds, and small rounds of white bread into the holes of large whole wheat rounds.
- Spread whole rounds of bread with desired fillings and cover with opposite-colored cutout rounds. Wrap and chill before serving.
To conclude, here are a few tips to remember when working many ways with a loaf of bread:

- If you're making more than one kind of sandwich, then work only on one type at a time, to ensure maximum freshness of bread.
- Spread bread with butter before adding filling to prevent the filling from soaking into the bread. No one wants soggy bread.
- As individual sandwiches are assembled, place them in a shallow pan lined with a damp (not wet) paper towel and waxed paper; separate layers of sandwiches with the waxed paper. Cover with another layer of waxed paper and a damp towel; store in the refrigerator until ready to use.
- Once arranged on serving trays, be sure to cover until last-minute serving.
- www.farmgirlfare.com
- www.sheridanrogers.com.au
- www.recipe.com
- www.etsy.com
- www.picklebarrelcatering.com
