Another Clever Way to Save Some Money!
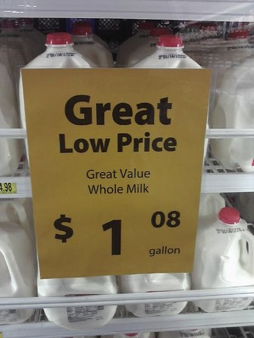
On a favorite site, Food Storage Moms (www.foodstoragemoms.com) I found some exciting information on freezing milk. Why is knowing how to freeze milk of any interest? Well, for one, when it goes on sale, it’s nice to have a reliable way to stock up.
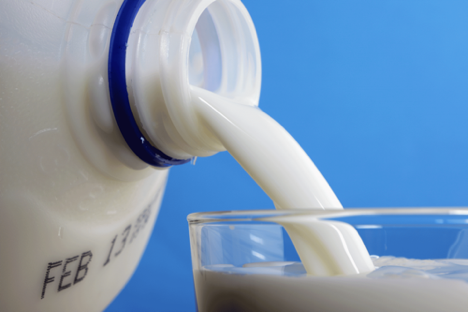
First of all, it’s a smart idea to freeze it unopened. This prevents any possibility of deterioration in quality from exposure to air—ensuring it’ll stay fresher longer.
Linda (Food Storage Moms owner and author) also suggests you shake your gallon of milk vigorously for at least a minute before you put it into the freezer. This will allow the fats in your milk to freeze better, especially if you’re drinking raw or whole milk.
It’s important to remember that milk, just like most other liquids, will expand once it’s been frozen, so leaving your milk in a glass, cardboard, or even plastic container isn’t a good idea unless you pour a little out to allow for expansion. Not doing this means not just wasted milk, but a big mess in your freezer.
Also, a gallon of milk can take up a lot of space in your freezer, and you may not have the room to spare. So freezing in smaller portions is an good option. For instance, many baking recipes list one cup of milk as part of the ingredients. So why not freeze your milk in cup-size increments?
Simply pour a single cup of milk into a plastic zippered freezer bag and lay it flat on your freezer shelf. When you’re ready to use it, simply plan accordingly by giving it time to thaw at room temperature prior to use.
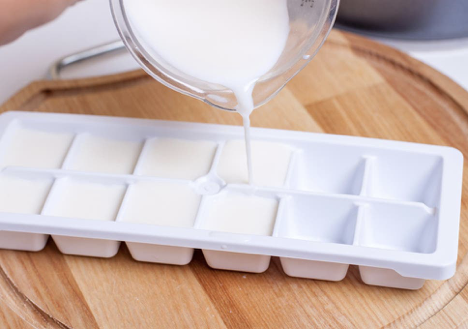
But what about recipes that are only calling for 1 to 2 tablespoons of milk? You can accommodate this by freezing small amounts in ice trays and then placing the frozen milk cubes in plastic zippered freezer bags.
Whichever approach you take to freezing your milk, make sure that you place it in an air-tight container or baggie.
In the freezer, frozen milk will last between 3 to 6 months, though it’s better to enjoy it within a month or less. Don’t let it sit around once you thaw it out. You’ll want to use it up within 7 days. Most people can notice a difference in the texture of the milk after it’s been frozen, so instead of drinking it as is, it’s better suited for making smoothies, baking, or cooking with it.
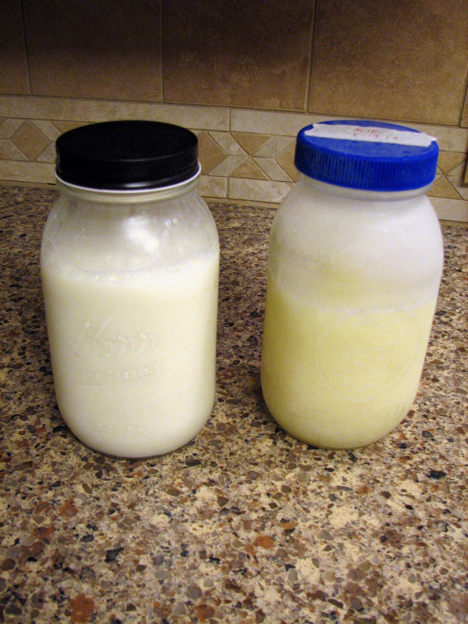
When you’re ready to use some frozen milk, you may notice that it isn’t the normal white color you expect from milk. It’ll have a slightly yellow tint right out of the freezer. But once it’s thawed it will return to its original whiteness. All you are seeing is the fats that have separated during the freezing process.
If you’ve ever heard that you can thaw milk at room temperature, don’t believe it. Doing so puts the quality of your milk at risk, and may even create the right conditions for bacteria to grow. Stead, thaw only what you intend to use gently and slowly by moving that amount to your refrigerator.
Lastly, if you do intend to use your frozen milk for drinking, then give it a good shake (for about 1 minute) every hour or so. You’ll know it’s thawed when you no longer hear or feel any ice sloshing around. You can even use a blender to help thoroughly mix it if you wish. Now it’s ready for use.
I’ll close with one last thought and a favorite recipe that uses milk. The thought: As you’re very cleverly saving some money by freezing your milk, you can do so with the assurance that you’re not forfeiting any of its nutrients. The only thing that’s changed is the homogenization of it (the even distribution of fats.) It’s a smart thing to do when you run onto a sale you can’t resist. So freeze away!
Now the recipe. This is a potato and onion gratin recipe that’s a good use for some of your frozen milk. And since it’s time to start pulling potatoes and onions from our gardens, this recipe is not just tasty, it’s especially useful.
1/4 cup PURE extra virgin olive oil
4 cups thinly sliced onions
4 sprigs fresh thyme
2 tablespoons chopped fresh sage
salt to taste
pepper to taste
6 cups thinly sliced potatoes
1/2 cup flour
2 tablespoons chopped fresh parsley
3/4 cup grated fontina cheese
1/2 cup heated milk
1 1/2 cups fresh bread crumbs
Directions:
Add Recipe to Cook'n
First of all, it’s a smart idea to freeze it unopened. This prevents any possibility of deterioration in quality from exposure to air—ensuring it’ll stay fresher longer.
Linda (Food Storage Moms owner and author) also suggests you shake your gallon of milk vigorously for at least a minute before you put it into the freezer. This will allow the fats in your milk to freeze better, especially if you’re drinking raw or whole milk.
It’s important to remember that milk, just like most other liquids, will expand once it’s been frozen, so leaving your milk in a glass, cardboard, or even plastic container isn’t a good idea unless you pour a little out to allow for expansion. Not doing this means not just wasted milk, but a big mess in your freezer.
Also, a gallon of milk can take up a lot of space in your freezer, and you may not have the room to spare. So freezing in smaller portions is an good option. For instance, many baking recipes list one cup of milk as part of the ingredients. So why not freeze your milk in cup-size increments?
Simply pour a single cup of milk into a plastic zippered freezer bag and lay it flat on your freezer shelf. When you’re ready to use it, simply plan accordingly by giving it time to thaw at room temperature prior to use.
But what about recipes that are only calling for 1 to 2 tablespoons of milk? You can accommodate this by freezing small amounts in ice trays and then placing the frozen milk cubes in plastic zippered freezer bags.
Whichever approach you take to freezing your milk, make sure that you place it in an air-tight container or baggie.
In the freezer, frozen milk will last between 3 to 6 months, though it’s better to enjoy it within a month or less. Don’t let it sit around once you thaw it out. You’ll want to use it up within 7 days. Most people can notice a difference in the texture of the milk after it’s been frozen, so instead of drinking it as is, it’s better suited for making smoothies, baking, or cooking with it.
When you’re ready to use some frozen milk, you may notice that it isn’t the normal white color you expect from milk. It’ll have a slightly yellow tint right out of the freezer. But once it’s thawed it will return to its original whiteness. All you are seeing is the fats that have separated during the freezing process.
If you’ve ever heard that you can thaw milk at room temperature, don’t believe it. Doing so puts the quality of your milk at risk, and may even create the right conditions for bacteria to grow. Stead, thaw only what you intend to use gently and slowly by moving that amount to your refrigerator.
Lastly, if you do intend to use your frozen milk for drinking, then give it a good shake (for about 1 minute) every hour or so. You’ll know it’s thawed when you no longer hear or feel any ice sloshing around. You can even use a blender to help thoroughly mix it if you wish. Now it’s ready for use.
I’ll close with one last thought and a favorite recipe that uses milk. The thought: As you’re very cleverly saving some money by freezing your milk, you can do so with the assurance that you’re not forfeiting any of its nutrients. The only thing that’s changed is the homogenization of it (the even distribution of fats.) It’s a smart thing to do when you run onto a sale you can’t resist. So freeze away!
Now the recipe. This is a potato and onion gratin recipe that’s a good use for some of your frozen milk. And since it’s time to start pulling potatoes and onions from our gardens, this recipe is not just tasty, it’s especially useful.
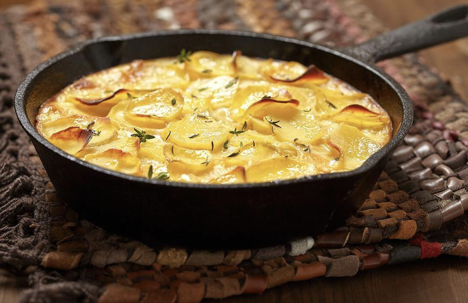
Potato Gratin with Onions and Sage
Ingredients:
1/4 cup PURE extra virgin olive oil
4 cups thinly sliced onions
4 sprigs fresh thyme
2 tablespoons chopped fresh sage
salt to taste
pepper to taste
6 cups thinly sliced potatoes
1/2 cup flour
2 tablespoons chopped fresh parsley
3/4 cup grated fontina cheese
1/2 cup heated milk
1 1/2 cups fresh bread crumbs
Directions:
1. Preheat oven to 350°F. Butter a casserole dish or cast iron pan.
2. Heat half the oil in a skillet over medium heat. Add the onion, thyme, sage and cook, stirring frequently, until the onions are lightly caramelized, about 15 minutes.
3. Season with half a teaspoon of salt and pepper to taste. Spread in the gratin dish. Return the skillet to medium heat, and add the remaining oil.
4. Toss the potatoes in the flour, letting the excess fall away. Add it to the pan and cook until it begins to brown in places on both sides, about 7 minutes.
5. Add the parsley, season with salt and plenty of pepper, cook for 1 minute more. Layer the potatoes over the onions, cover with the cheese, then add the milk.
6. Cover and bake for 25 minutes, then uncover, add the bread crumbs, and bake until the top is browned and the liquid absorbed. Around 25 minutes.
Recipe formatted with the Cook'n Recipe Software from DVO Enterprises.
Sources:
- www.tripadvisor.com
- www.independent.co.uk
- www.maryannshouse.blogspot.com
- www.allrecipes.com
- www.thedailymeal.com
 Alice Osborne
DVO Newsletter Contributor since 2006
Email the author! alice@dvo.com