Protect Your Investment; Clean Your Instant Pot Properly!
Those of you that have an Instant Pot or other brand of electric pressure cooker know the cost of this appliance. That said, you want to protect your investment by keeping it clean!
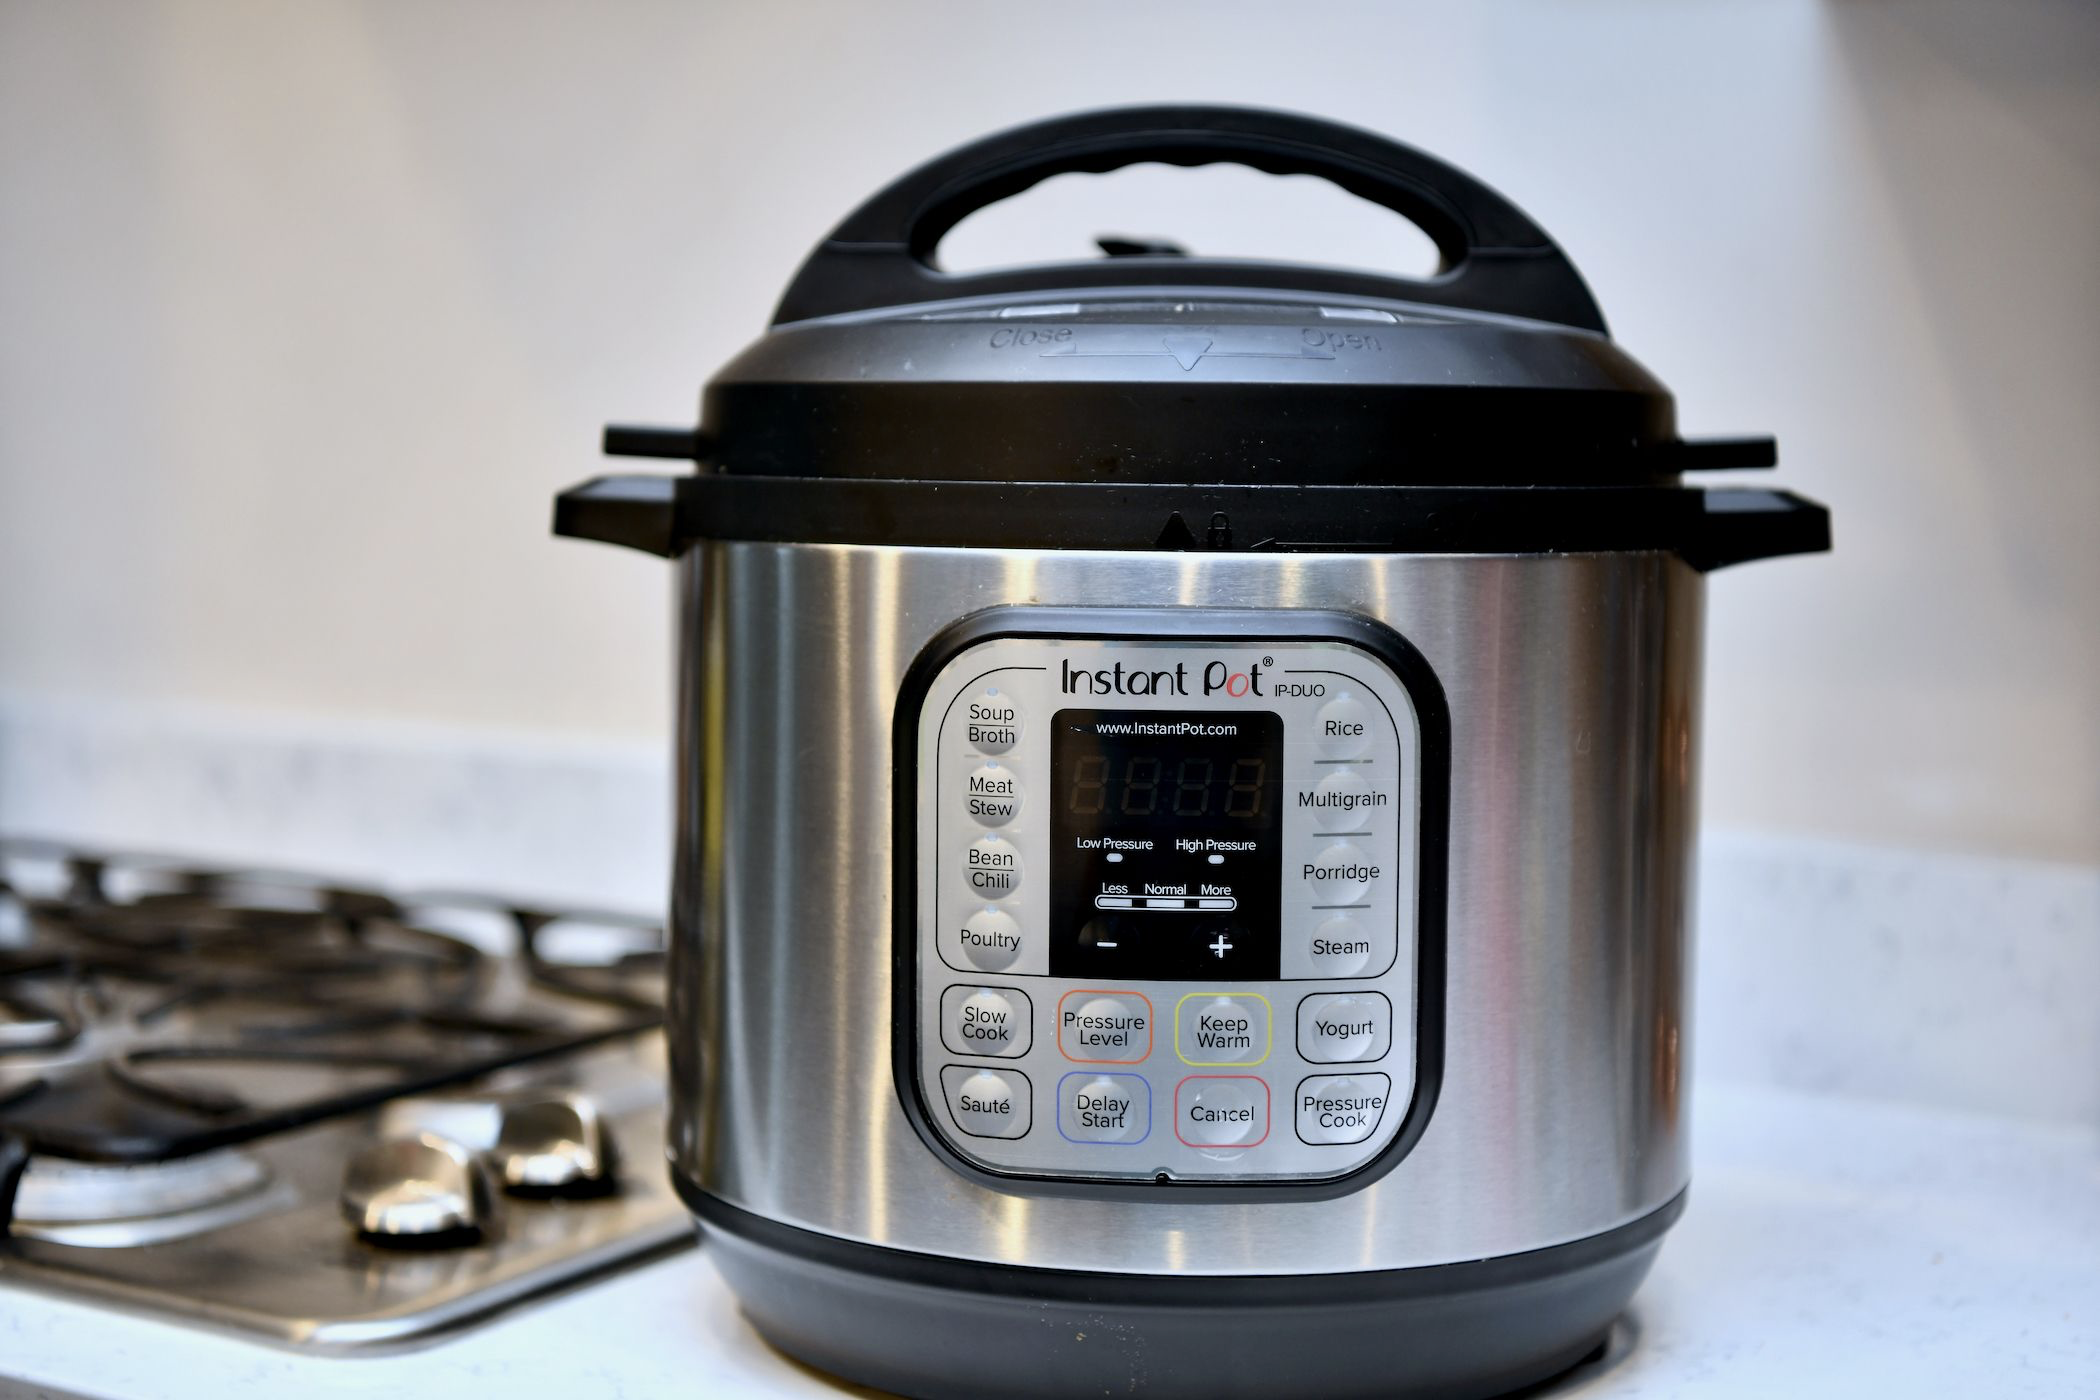
While this statement likely results in a “DUH!” response, keeping it clean and deep cleaning it are not all that easy to do. But homemaker supreme, Jillee, of www.onegoodthingbyjillee.com, shares some tips on just how to do this.
She starts her cleaning tutorial with steps for keeping your Instant Pot clean during day-to-day use. Jillee says if you get into the habit of doing these things after each use, you’ll save yourself a lot of time and effort in the future when cleaning it.
After Each Use, be sure to:
Step 1: Unplug to avoid any chance of electrical shock.
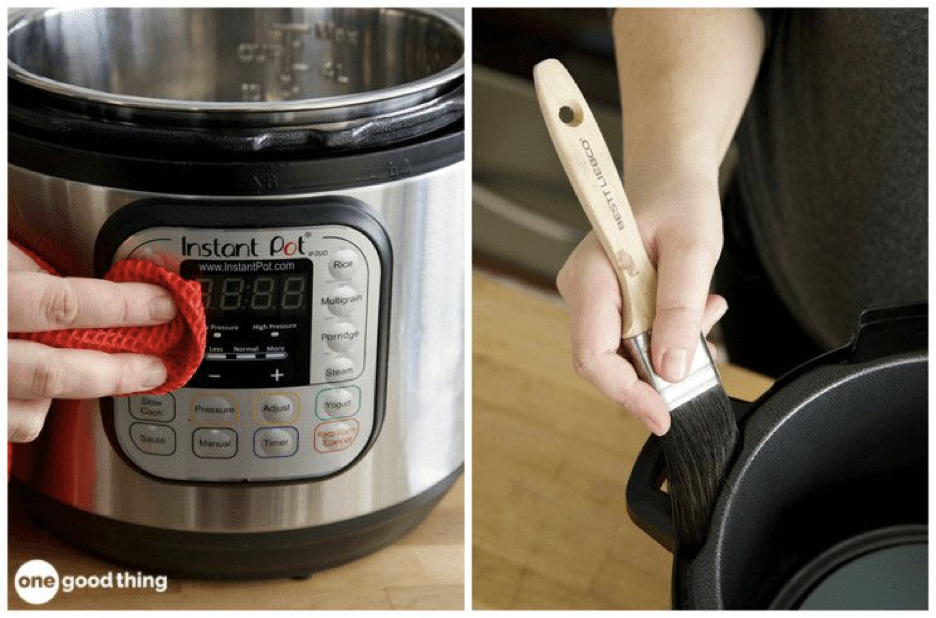
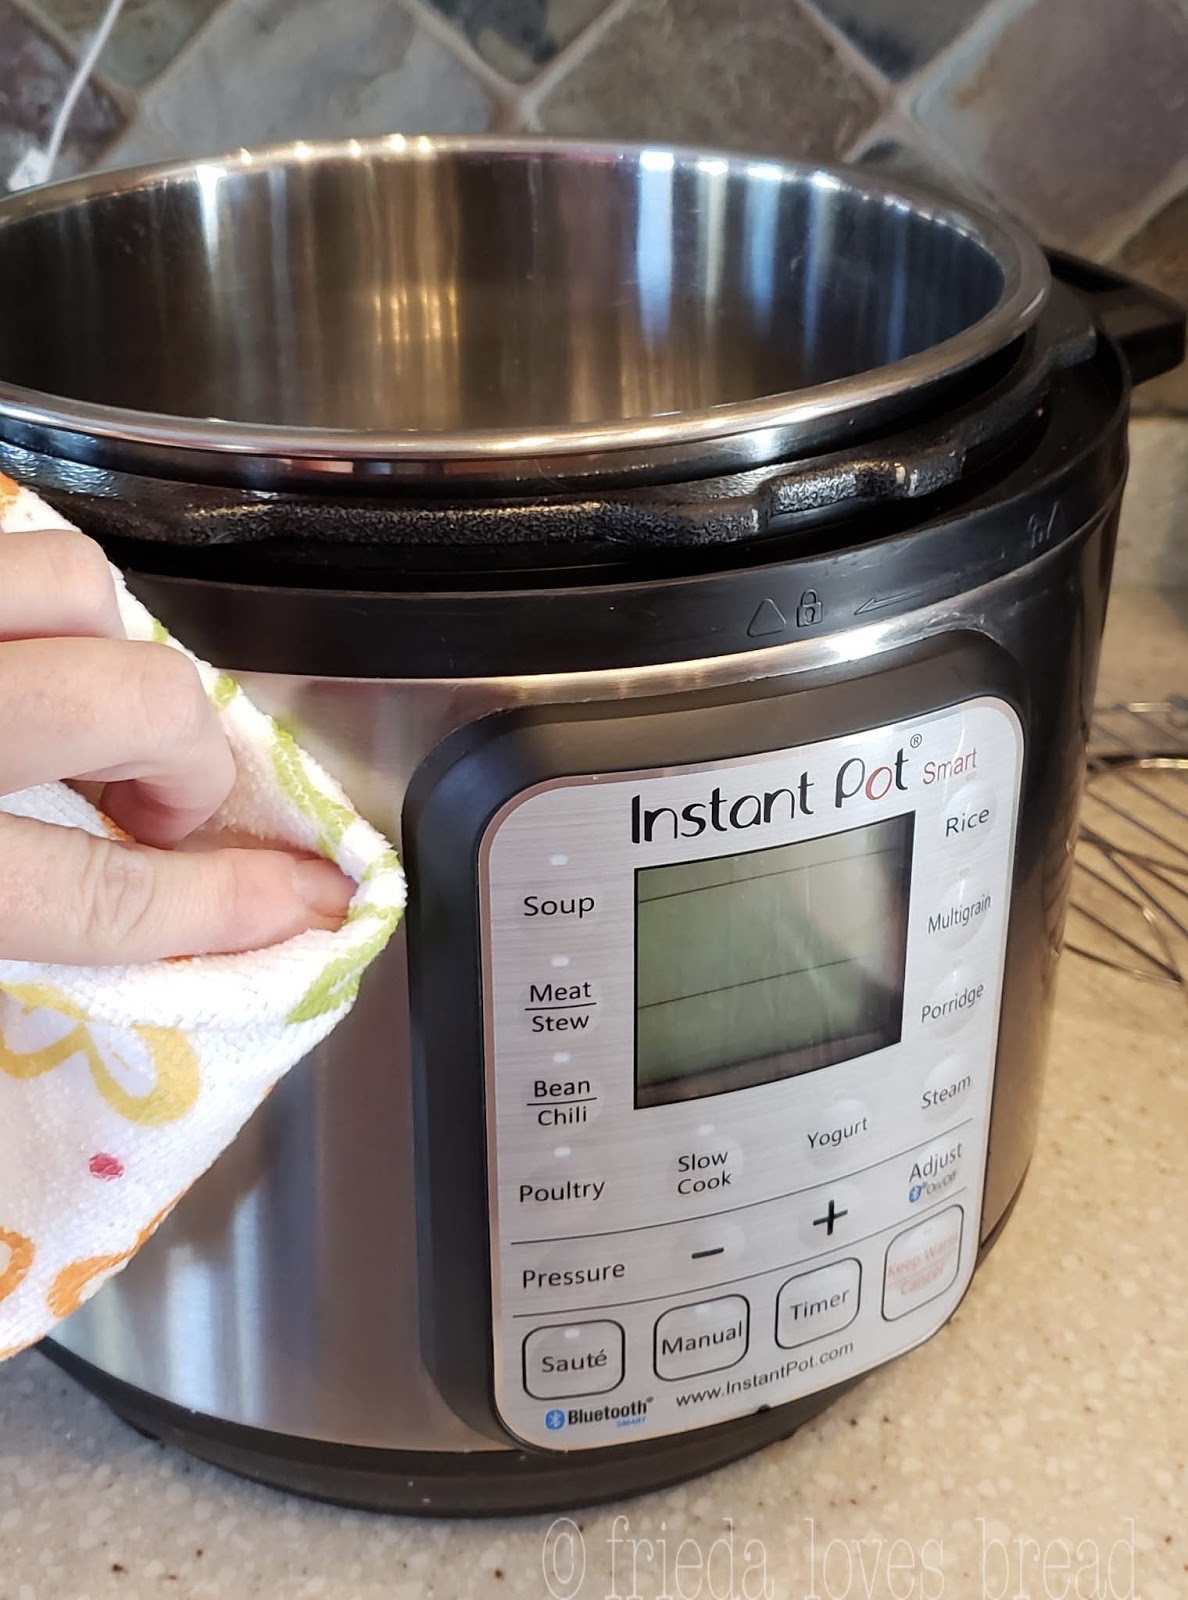
Step 2: Clean the Housing Unit with a clean, damp rag. Wipe down the inside and the outside of the “housing unit” (or the main cooker part of the Instant Pot). Use a small brush to remove any dried food residue from the bottom of the unit. Make sure to get your brush into all those nooks and crannies!
Step 3: Wash the Lid with warm, soapy water; focus on the smaller parts (those around the steam valve). These can get blocked with food or food residues. First, remove the Quick Release handle by pulling straight up on it. Give it a quick wash with warm soap water and replace it.
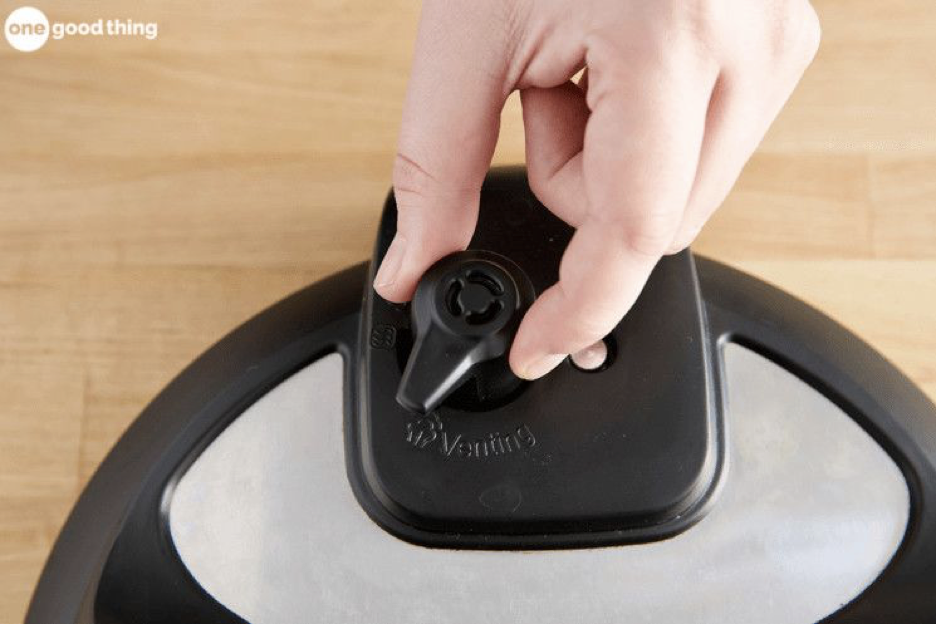
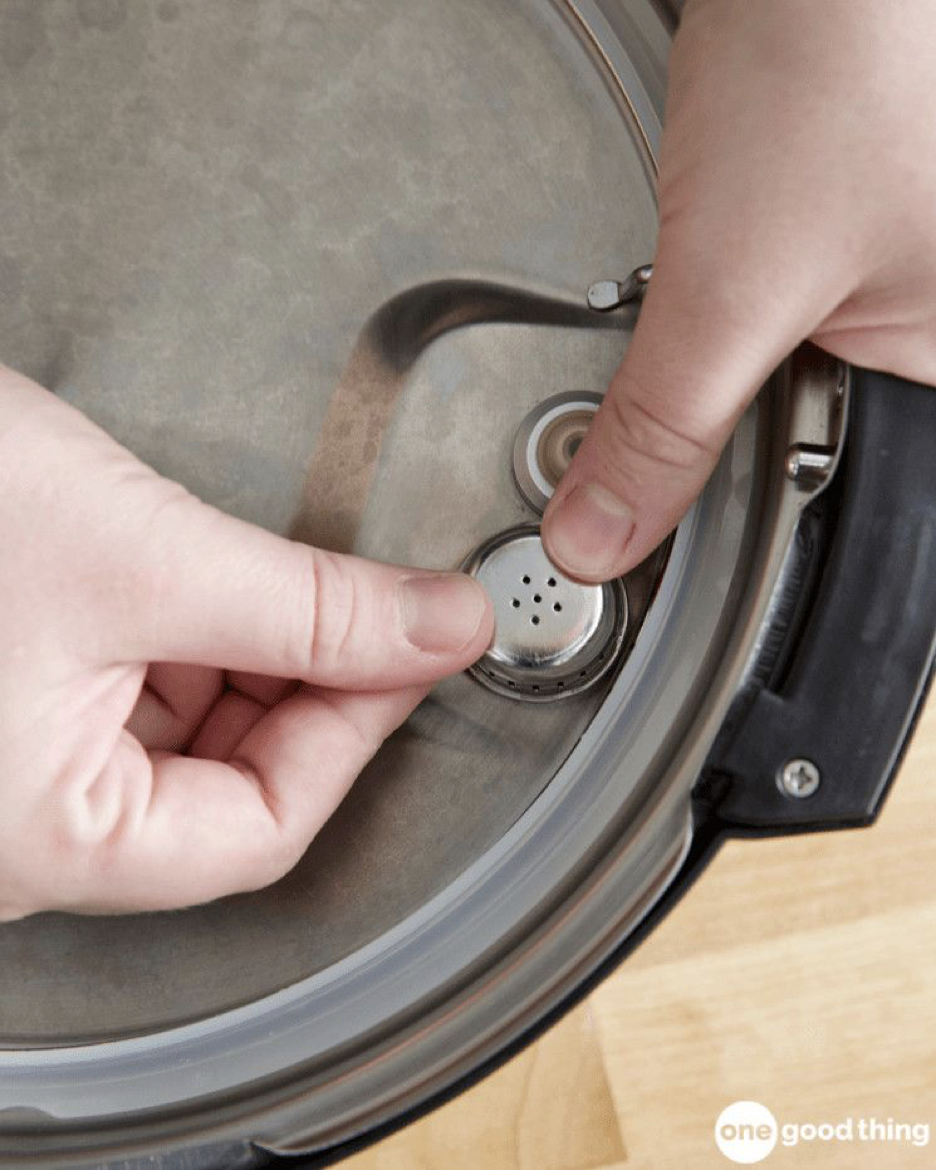
Next, remove the shield that covers the steam valve on the inside of the lid. It might screw off or just pop off, depending on the model. Wash the shield and replace it.
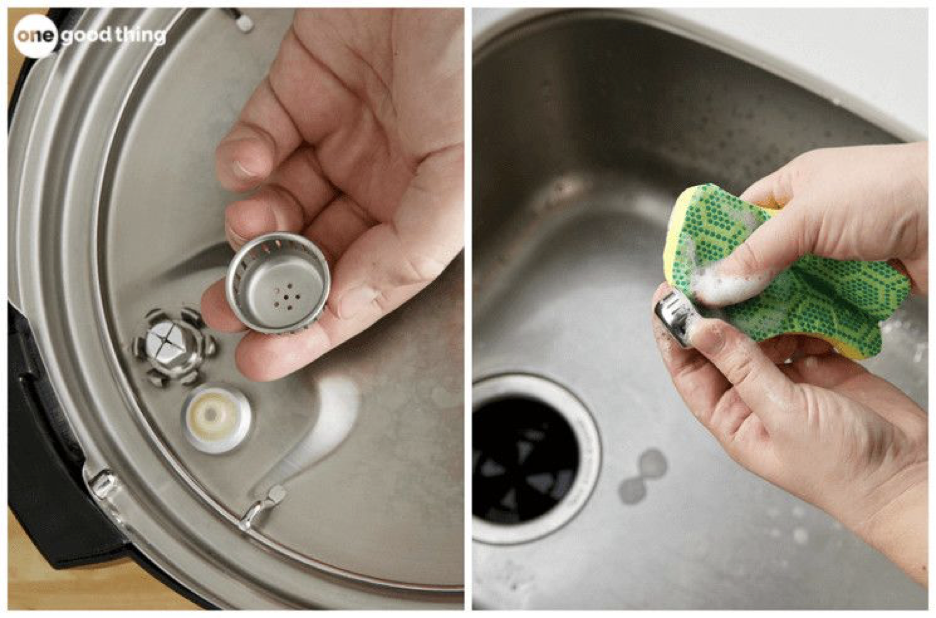
Finally, inspect the condensation collection cup that attaches to the outside of your Instant Pot. Give it a wash if necessary, and replace it.
Step 4: Remove and Clean the Sealing Ring either in the top rack of your dishwasher, or by hand. Be sure to inspect the ring for cracking, deformities, or other damage. Any of these issues call for replacement as soon as possible. You can find relatively inexpensive replacement rings online. Once clean, put the ring back in place and make sure it’s seated snugly against the lid.
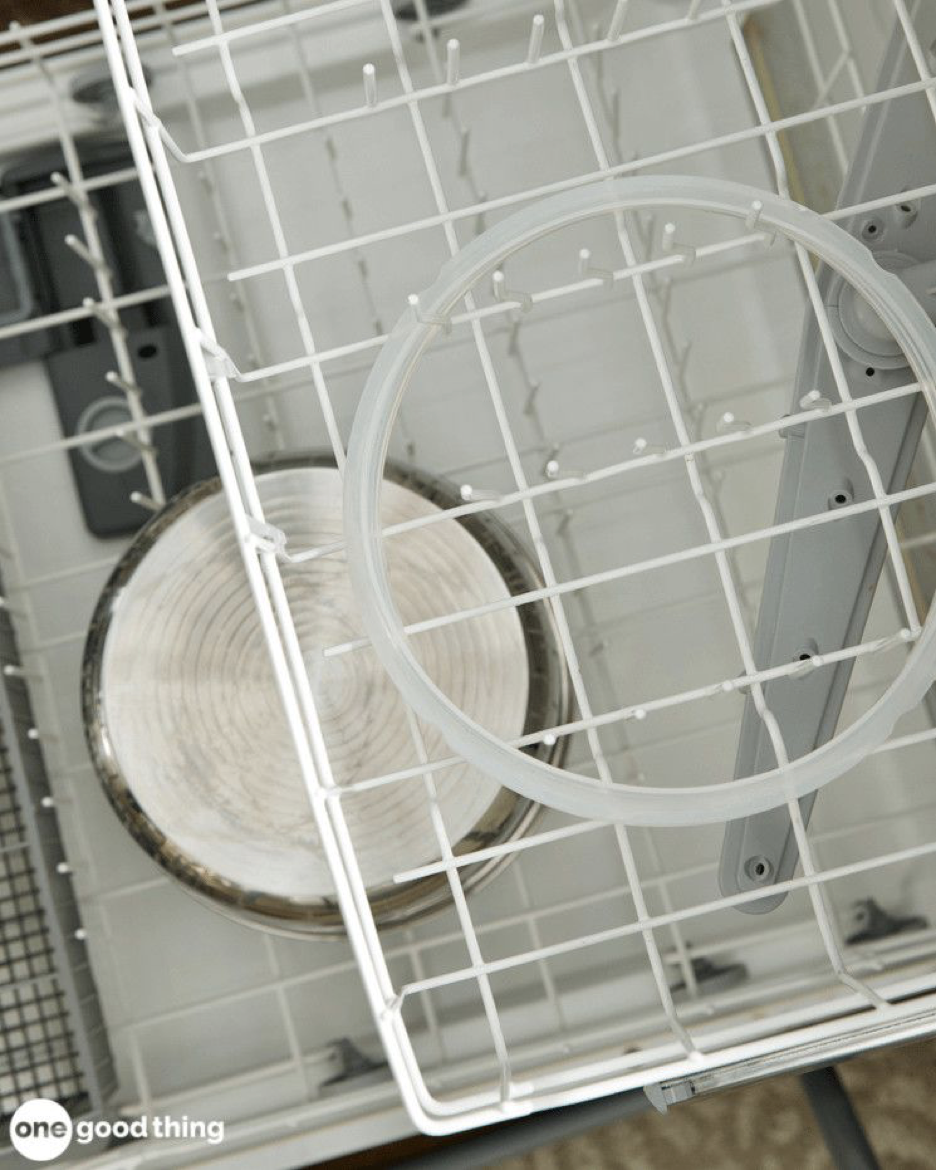
Step 5: Wash The Inner Pot and Accessories (any you regularly use, such as the steam rack). As mentioned above, the inner pot is dishwasher safe, and so is the steam rack. Do check the labeling on your other accessories before putting them in your dishwasher, though.
Once the inner pot is clean, wipe it down with a paper towel and vinegar to remove any detergent residues and to keep the finish shiny. (Never use steel wool or anything scratchy to clean the inner pot as they’ll damage the finish.)
Step 6: Reassemble, paying close attention to installing all the small parts, including the sealing ring, valve shield, and Quick Release handle.
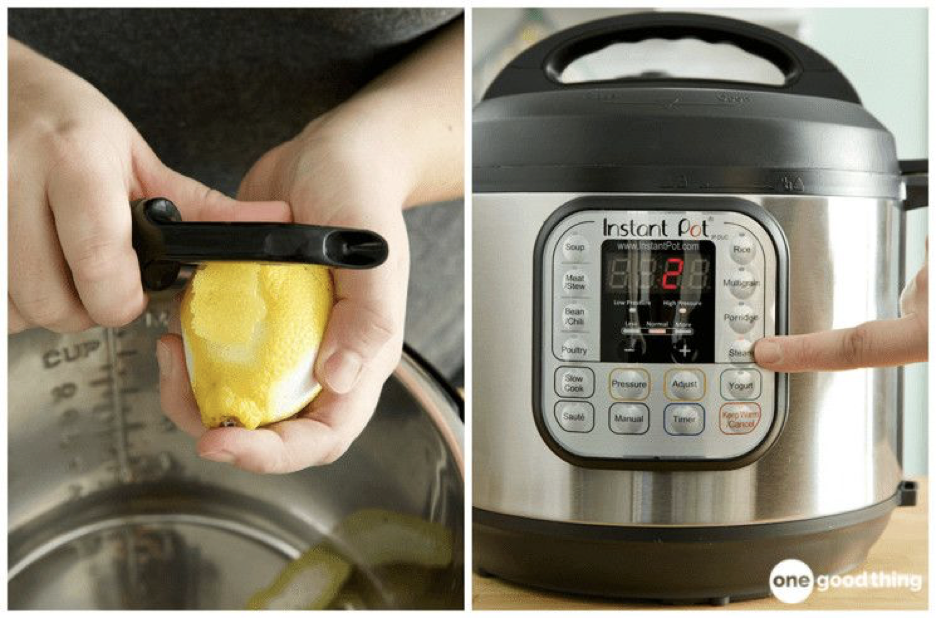
Lastly, how to deodorize the sealing ring in case yours has taken on any funky food smells. Deodorize it by doing a vinegar steam-clean right in your Instant Pot. Fill the inner pot with 1 cup water, 1 cup vinegar, and a few lemon peels. Run the Instant Pot on the “Steam” setting for 2 minutes, then let the pressure release naturally. When the Instant Pot unlocks, remove the sealing ring from the lid and let it air dry.
I’ll close Jillee’s Instant Pot cleaning tutorial with an easy recipe for potatoes I found two years ago on a great site, www.thereciperebel.com. It’s become a favorite; it involves 5 minutes of prep time and 2 minutes cook time. Couldn’t be easier. Paired with a hearty tossed salad and crusty artisan bread, you’ve got a quick and delicious dinner!
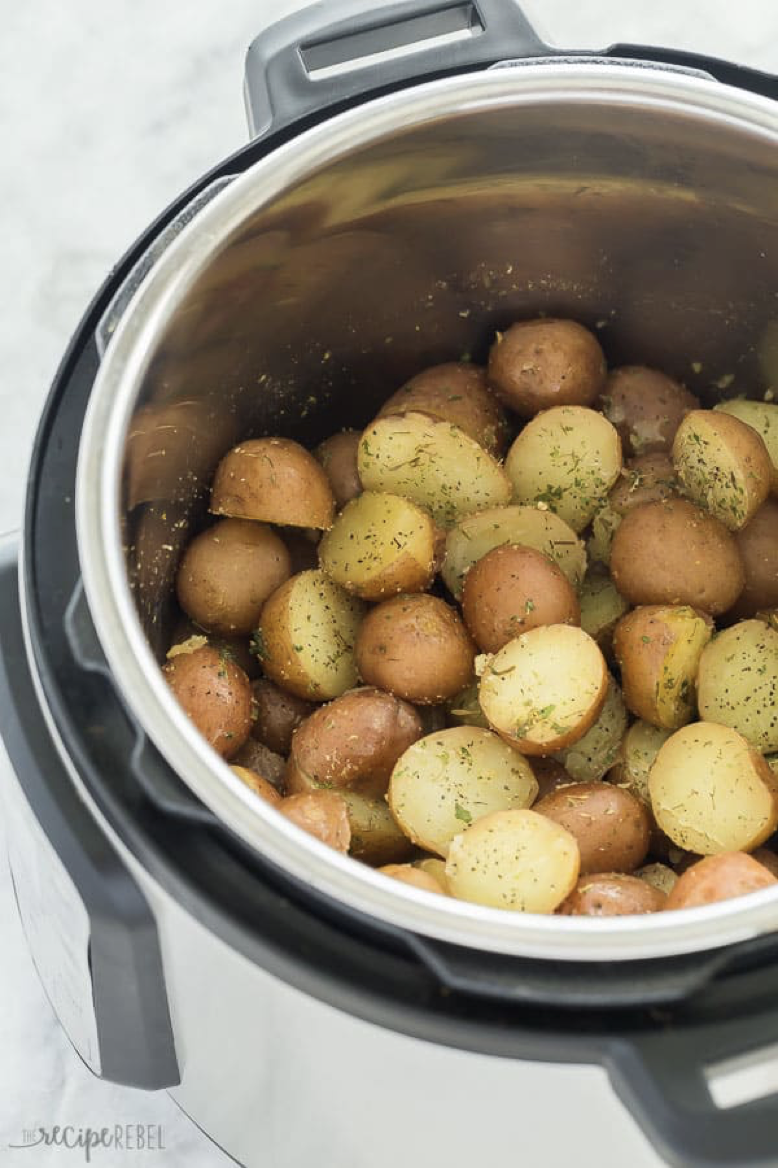
2 pounds Creamer or baby potatoes
1 1/2 cups low sodium chicken broth
1 1/2 teaspoons salt, divided
2 tablespoons butter
1 teaspoon parsley, dried
1/2 teaspoon garlic powder
1/4 teaspoon thyme, dried
1/4 teaspoon black pepper
Directions:
Note: You can cook more or less potatoes than this recipe calls for without changing the cook time or liquid, though it is recommended you adjust the amount of seasoning.
Add Recipe to Cook'n
While this statement likely results in a “DUH!” response, keeping it clean and deep cleaning it are not all that easy to do. But homemaker supreme, Jillee, of www.onegoodthingbyjillee.com, shares some tips on just how to do this.
She starts her cleaning tutorial with steps for keeping your Instant Pot clean during day-to-day use. Jillee says if you get into the habit of doing these things after each use, you’ll save yourself a lot of time and effort in the future when cleaning it.
After Each Use, be sure to:
- Wash the dishwasher-safe inner pot. It can go right in with the rest of your dishes.
- Wipe the entire appliance down. Use a wet dishcloth to wipe down the inside and the outside of the cooker. Dedicate a clean, small paintbrush to cleaning the lid track.
- Clean the inner silicone sealing ring (after each use, always). This habit prevents it from absorbing food odors or colors. You can safely wash it in the top rack of your dishwasher.
- Wipe the inside of the lid as one of the surfaces that gets the dirtiest!
Step 1: Unplug to avoid any chance of electrical shock.
Step 2: Clean the Housing Unit with a clean, damp rag. Wipe down the inside and the outside of the “housing unit” (or the main cooker part of the Instant Pot). Use a small brush to remove any dried food residue from the bottom of the unit. Make sure to get your brush into all those nooks and crannies!
Step 3: Wash the Lid with warm, soapy water; focus on the smaller parts (those around the steam valve). These can get blocked with food or food residues. First, remove the Quick Release handle by pulling straight up on it. Give it a quick wash with warm soap water and replace it.
Next, remove the shield that covers the steam valve on the inside of the lid. It might screw off or just pop off, depending on the model. Wash the shield and replace it.
Finally, inspect the condensation collection cup that attaches to the outside of your Instant Pot. Give it a wash if necessary, and replace it.
Step 4: Remove and Clean the Sealing Ring either in the top rack of your dishwasher, or by hand. Be sure to inspect the ring for cracking, deformities, or other damage. Any of these issues call for replacement as soon as possible. You can find relatively inexpensive replacement rings online. Once clean, put the ring back in place and make sure it’s seated snugly against the lid.
Step 5: Wash The Inner Pot and Accessories (any you regularly use, such as the steam rack). As mentioned above, the inner pot is dishwasher safe, and so is the steam rack. Do check the labeling on your other accessories before putting them in your dishwasher, though.
Once the inner pot is clean, wipe it down with a paper towel and vinegar to remove any detergent residues and to keep the finish shiny. (Never use steel wool or anything scratchy to clean the inner pot as they’ll damage the finish.)
Step 6: Reassemble, paying close attention to installing all the small parts, including the sealing ring, valve shield, and Quick Release handle.
Lastly, how to deodorize the sealing ring in case yours has taken on any funky food smells. Deodorize it by doing a vinegar steam-clean right in your Instant Pot. Fill the inner pot with 1 cup water, 1 cup vinegar, and a few lemon peels. Run the Instant Pot on the “Steam” setting for 2 minutes, then let the pressure release naturally. When the Instant Pot unlocks, remove the sealing ring from the lid and let it air dry.
I’ll close Jillee’s Instant Pot cleaning tutorial with an easy recipe for potatoes I found two years ago on a great site, www.thereciperebel.com. It’s become a favorite; it involves 5 minutes of prep time and 2 minutes cook time. Couldn’t be easier. Paired with a hearty tossed salad and crusty artisan bread, you’ve got a quick and delicious dinner!
Garlic Herb Instant Pot Potatoes
Ingredients:
2 pounds Creamer or baby potatoes
1 1/2 cups low sodium chicken broth
1 1/2 teaspoons salt, divided
2 tablespoons butter
1 teaspoon parsley, dried
1/2 teaspoon garlic powder
1/4 teaspoon thyme, dried
1/4 teaspoon black pepper
Directions:
1. Halve larger potatoes if desired but leave smaller potatoes whole; place in Instant Pot or
electric pressure cooker.
2. Pour in the broth and season with 1 teaspoon salt.
3. Put the lid on and select Manual or Pressure Cook for 2 minutes. The Instant Pot will take
about 10 minutes to reach pressure and begin counting down.
4. Once the cook time is up, let the pressure release naturally for 5 minutes, then open the
valve to release remaining pressure.
5. Drain the liquid from the pot and add the butter, remaining ½ teaspoon salt, parsley, garlic,
thyme, and black pepper.
6. Stir until butter is melted and adjust salt and pepper to taste. Serve.
Recipe formatted with the Cook'n Recipe Software from DVO Enterprises.
Sources:
- www.seacoastoldies.com
- www.friedalovesbread.com
- www.onegoodthingbyjillee.com
- www.thereciperebel.com
 Alice Osborne
Weekly Newsletter Contributor since 2006
Email the author! alice@dvo.com