Secrets to Making Award-Winning Scones
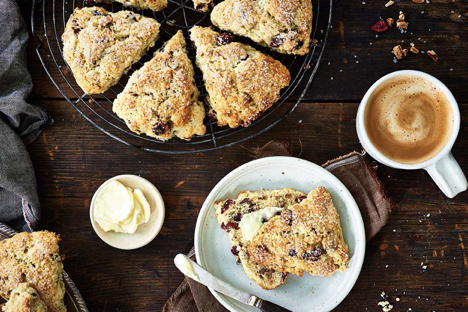
Beautiful summer mornings often find us on the deck for breakfast. And one of our favorites for outdoor breakfasts is scones, served with herbal tea and fresh-squeezed citrus blend juice.

Somewhere between biscuit and muffin - with a delicately crusty exterior, and tender, light crumb within - scones have become part of the morning ritual for many of us: grab your travel mug and a scone, and hit the road. Wedge-shaped or round, plain vanilla, filled with chocolate, or even savory (bacon-cheddar, anyone?), scones are surprisingly simple to make - and irresistible, especially hot from the oven.
Well, simple to make if you know their idiosyncrasies, that it. There are a few tricks to getting this crusty exterior and tender/light crumb. It took me a while to master the art of scone-making. Thanks to the tips I found on a favorite site, King Arthur Flour (www.kingarthurflour.com), my scones now turn out crispy on the outside and tender and light on the inside every time.

Making scones is akin to making biscuits. It's a simple mixture of flour, salt, sugar, baking powder, milk, butter, and often eggs (for added richness). They can be flavored to taste - and loaded with add-ins. This basic scone recipe makes a mildly sweet, vanilla-scented scone, the perfect blank canvas for your favorite additions.
But here's something to understand: A scone is not, and was never intended to be cupcake-like. Many people perceive scones as dry. Again, they're crusty on the outside, and biscuit-textured within. This is the way they're supposed to be (since they're designed to hold butter, jam, lemon curd, clotted cream, and other types of rich spread or topping). So don't bite into a scone expecting cake texture; enjoy it in all its flaky, tender (but not super-moist) glory.
If you, too, need more help with scones, here is King Arthur's secrets on how to make award-winning scones:
Make sure the butter, eggs, and milk (or other dairy) are cold. Like pie crust and biscuits, scones rely on cold fat for their flakiness.
Work the butter into the dry ingredients until the mixture looks like coarse sand with some larger, pea-sized chunks. The smaller particles of butter will tenderize, while the larger will create flaky texture.
No matter your recipe, add eggs. They contribute richness, and enhance your scones' rise. If your recipe doesn't already call for egg, simply substitute 1 egg for an equal volume of the milk or cream in the recipe.
Beware of juicy add-ins, like raspberries or chopped strawberries; they can make scones soggy.
Once you add liquid, stir the dough only enough to combine; don't over-mix, or scones will be tough.
For soft-sided scones, bake very close together; or bake in large rounds, then cut once they're out of the oven. See our blog post, An easy way to shape scones.
Freeze the pan of scones for 30 minutes before baking. This step relaxes the flour's gluten (encouraging tenderness), and chills the fat (enhancing flaky texture).
Bake scones until they're barely done: their interior will be fully baked (not doughy), but still moist. Over-baking is the reason scones turn out dry.
Opt for higher fat content in your liquid. Can you use lower-fat or nonfat dairy (skim milk, low-fat yogurt) as your liquid? Yes, but scones will be dry and hard. The higher their fat content, the more tender the scones.
Now it's time for my favorite scone recipe. This is courtesy of King Arthur's Flour, and when combined with their no-fail scone-making tips, delivers every time! This basic "start here" vanilla scone is delicious as is, but it's also the perfect vehicle for your favorite add-ins; King Arthur recommends dried cranberries and walnuts. Though chocolate chips are tempting, too!
King Arthur's Vanilla Scones
Serving size: 1
Calories per serving: 3,095.417
DOUGH
2 3/4 cups all-purpose flour (or King Arthur's Gluten-Free Measure for Measure Flour)
1/3 cup sugar
3/4 teaspoon salt
1 tablespoon baking powder
1/2 cup cold butter
1 to 2 cup fruit, chopped dried chocolate or other flavored chips, nuts, or a combination, optional
2 large eggs
2 teaspoons vanilla extract or the flavoring of your choice
1/2 to 2/3 cup cream, half-and-half, or whole milk
TOPPING
2 teaspoons whole milk
2 tablespoons sugar or cinnamon sugar, optional
Directions:
2. Work in the butter just until the mixture is unevenly crumbly; it's OK for some larger chunks of butter to remain unincorporated.
3. Stir in the fruit, chips, and/or nuts, if you're using them.
4. In a separate mixing bowl, whisk together the eggs, vanilla or other flavor, and half and half or milk.
5. Add the liquid ingredients to the dry ingredients and stir until all is moistened and holds together.
6. Line a baking sheet with parchment; if you don't have parchment, just use it without greasing it. Sprinkle a bit of flour atop the parchment or pan.
7. Scrape the dough onto the floured parchment or pan, and divide it in half. Round each half into a 5" circle (if you haven't incorporated any add-ins); or a 6" circle (if you've added fruit, nuts, etc.). The circles should be about 3/4" thick.
8. Brush each circle with milk, and sprinkle with coarse white sparkling sugar or cinnamon sugar, if desired.
9. Using a knife or bench knife that you've run under cold water, slice each circle into 6 wedges.
10. Carefully pull the wedges away from the center to separate them just a bit; there should be about 1/2" space between them, at their outer edges.
11. For best texture and highest rise, place the pan of scones in the freezer for 30 minutes, uncovered. Chilling the scones relaxes the gluten in the flour, which makes the scones more tender and allows them to rise higher. It also chills the fat, which will make the scones a bit flakier. While the scones are chilling, preheat the oven to 425°F.
12. Bake the scones for 20 to 25 minutes, or until they're golden brown. When you pull one away from the others, it should look baked all the way through; the edge shouldn't look wet or unbaked.
13. Remove the scones from the oven, and cool briefly on the pan. Serve warm. They're delicious as is, but add butter and/or jam, if you like.
14. When the scones are completely cool, wrap them in plastic and store at room temperature for up to several days. To reheat room-temperature scones, place on a baking sheet, tent lightly with foil, and warm in a preheated 350°F oven for about 10 minutes.
- www.bbonline.com
- www.kingarthurflour.com
- www.victorianhousescones.com
 Alice Osborne
Weekly Newsletter Contributor since 2006
Email the author! alice@dvo.com