Cool Kitchen Tools and Gadgets for Your Mini Chefs
I absolutely love cooking and baking with my kids! I hope they have fond memories when they’re older of making waffles together on Saturdays, baking a batch of cinnamon rolls for a neighbor, and eating so much banana bread we make ourselves sick (on a pretty regular basis ). My oldest is 5 now and I’ve been thinking she’s getting old enough to advance a little more on the cooking spectrum.
Although kids can definitely use regular size kitchen gadgets and tools, there are a few tools they make in a kid’s size (all of these you can find by doing a quick search on Amazon) that make kids feel more independent in the kitchen and gets them excited about experimenting in the kitchen. Here are a few ideas for some tools and gadgets you could consider getting for your little budding chefs.
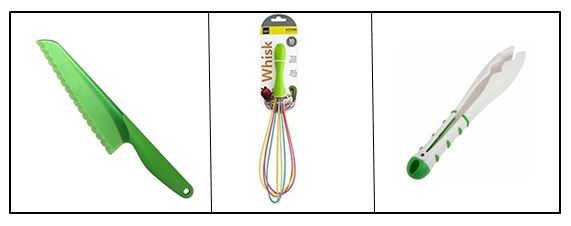
Plastic Lettuce knife
Kids can start using a plastic serrated table knife when they are toddlers, but when they are older than that and ready to move up, a plastic lettuce knife is the perfect next step. It’s plastic and lightweight, plus it has a serrated blade that makes cutting easy. They will feel independent and capable with this real knife and it is really easy for them to use.
I think this is the perfect tool for my own daughter to start using (especially when we make the dessert I have posted at the end!).
Whisk
Getting a smaller whisk that has a silicone grip handle is perfect for kids to use. Saturday morning French toast here we come!
Kitchen Tongs
Here are some really cool kitchen tongs that are made from a company called Curious Chef (you can find them on Amazon). This line of cookware is specifically designed for children. The handle is contoured for small hands and features soft-touch button grips. Kids can pretend they’re holding food in alligator jaws while using these tongs.
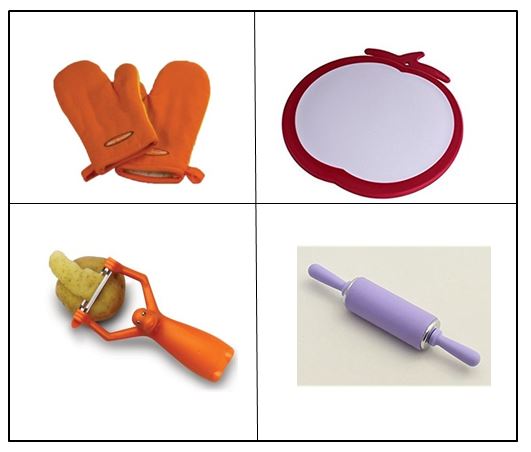
Tomato Cutting Board
Curious Chef also makes an 8x8 inch cutting board in the shape of a tomato that is perfect for beginner tasks. The red border actually serves as a nonslip edge so that it stays in place while they are chopping things.
Kid-Sized Oven Mitts
Of course you will always want to provide careful supervision, but these mitts will make it possible for kids to learn to remove items from the oven and stovetop safely. Because they are smaller and will fit their hands, they will have much better control and feel more confident in their ability to do this safely.
Monkey Peeler
Growing up on Sundays we would always have some sort of potatoes in our big Sunday meal. My mom would always have us kids peel all the potatoes, which was quite a few with a big family of ten. We would whine like crazy but I’m thinking that if I would have had this potato peeler I’m just sure I would have been begging my mom to peel them all every time…by myself none-the-less. Ok, maybe not, but I’m sure this cute monkey peeler would help make the task seem more fun and less daunting.
This peeler, besides just being adorable, has an ergonomic and non-slip handle.
Mini Rolling Pin
And last but not least we have this adorable mini rolling pin. What kid doesn’t love rolling out dough for pizzas and for rolling and cutting out cookie dough? I think it is probably the favorite task of all for kids. The thing is, sometimes big rolling pins can be quite large and cumbersome for small hands. This rolling pin has a 2.5 inch handle and 4.5 inch body and has a silicone non-stick surface, making both rolling dough and cleanup up easier.
And now here is a recipe for one the most perfect things to make with your kids….fruit pizza! You’re rolling dough….slicing fruit…..adding all that fruit to the top to make it look pretty…..it’s perfect for kids of all ages with their different cooking abilities! What’s not to love about fruit pizza? :)
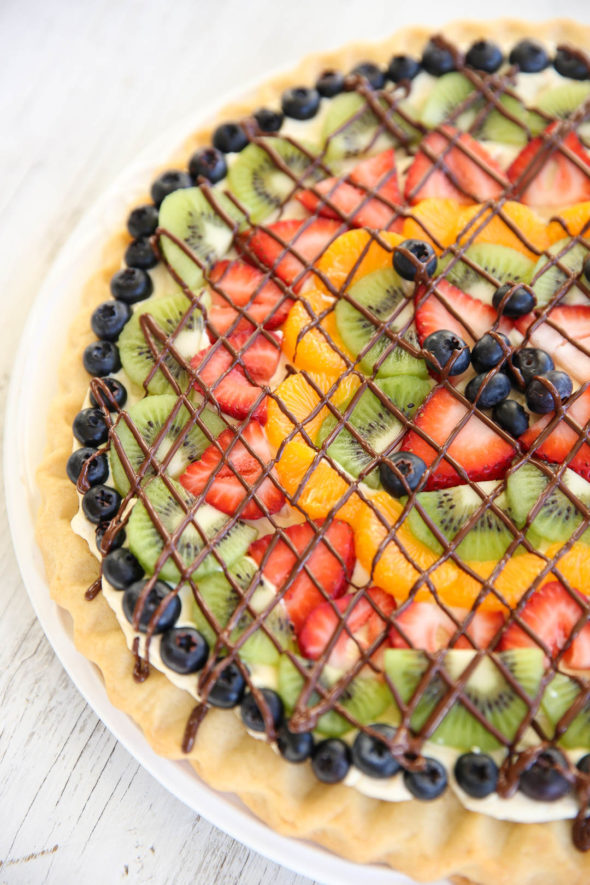
Fruit Pizza
From Our Best Bites
For the crust:
1 c. real butter (no substitutions!)
1 c. white sugar
1 egg (make sure to use a large or extra large egg)
1 tsp. almond extract
3 c. all-purpose flour
1 1/2 tsp. baking powder
1/2 tsp. table salt
Zest of 1 orange
For the topping:
1 8-oz. package cream cheese (light cream cheese is fine)
1/4 c. brown sugar
1/2 tsp. orange extract
1 c. whipping cream
1/2 c. powdered sugar
For the pizza topping:
1 pint strawberries, washed, hulled, sliced, and patted dry
1 pint blueberries, washed and patted dry
(Any other fruit you can think of. Examples: mandarin oranges, kiwis, etc.)
1/2 c. dark or semi-sweet chocolate chips
Instructions:
- For the crust, cream the butter and sugar until light and fluffy--about 2 minutes. Add in egg and extract and mix to incorporate.
- In a separate bowl combine flour, baking powder and salt.
- Slowly add the flour mixture to the butter mixture and mix until completely combined. Add the orange zest and mix until combined.
- Spray a round pizza pan with non-stick cooking spray and using your hands and a rolling pin, spread the dough out to the edges of the pan. If desired, you can add a decorative finish (like fluting) to the edges of the crust. Cover with plastic wrap and refrigerate for at least an hour.
- When ready to bake the crust, preheat your oven to 350. Bake the crust for 18-25 minutes or until golden brown around the edges and completely baked in the center. If you prefer a crisper crust, you can bake the crust for a longer amount of time. Allow to cool completely.
- When the crust is almost cool, use an electric mixer to combine the cream cheese, orange extract, and brown sugar until light and fluffy. In a separate bowl, whip the cream and powdered sugar until medium peaks form. Fold the whipped cream into the cream cheese mixture and combine well.
- Spread the cream cheese mixture over the cooled crust. Arrange the berries as desired over the creamy topping. Place the chocolate chips in a heavy-duty small Ziploc bag and heat in the microwave for 20 seconds at a time, mashing the bag around until the chocolate is completely melted and smooth. Cut a small corner off the bag and drizzle the chocolate over the berries. Refrigerate until ready to serve.
A very important note: It’s important to correctly measure your flour or you will end up with a dry, crumbly dough. Never, ever use your measuring cup to scoop up the flour. Use a regular sized spoon and spoon the flour into the cup and then level it off with a knife.
- www.ourbestbites.com
- www.epicurious.com
- www.amazon.com
 Mary Richardson
Weekly Newsletter Contributor since 2014
Email the author! mary@dvo.com