The Cutest Mini Desserts Ever—Mason Jar Lid Desserts!
The other day while scrolling on Pinterest I stopped dead in my tracks and had one of those moments where I thought, “This is coolest thing I have ever seen! How is it possible I have never seen this before?! Dang, I wish I would have had this most perfect, adorable dessert that would have been PERFECT for ( fill in the blank ) event we just had!”
What is this magical little dessert, you might ask? 4 words….
MASON JAR LID DESSERTS!

Whaaaat??? Have you guys seen or made these before? I could not believe how brilliant this was!
They are really simple to make too! Most of the recipes just use a pre-made pie crusts, scoop in some pie filling from a can, add another layer of crust, pinch some turbine (raw) sugar on top, crimp the edges together and bake it in the oven. They are just too cute and are sure to bring a smile to your guest’s faces when they see these delightful mini desserts.
And I used to think little mini pies in mason jars were cute! They took it to a whole new level by making it as small as physically possible with the Mason jar and went for the lid. I think for whatever reason most humans love miniature things whether it’s babies, puppies, or mini cherry pies, there’s just something about miniature things, am I right?? :)
I just think these would be so perfect for a bridal or baby shower or a party similar to that. One of the authors of the pies said she loves serving these for parties because she likes her guests to feel like portions are small enough that they can sample on all the desserts rather than gorge on one huge piece of pie.
You saw the teaser collage picture--well now why don’t we go ahead and take a closer look at a couple of these beauties?
Cherry Pie
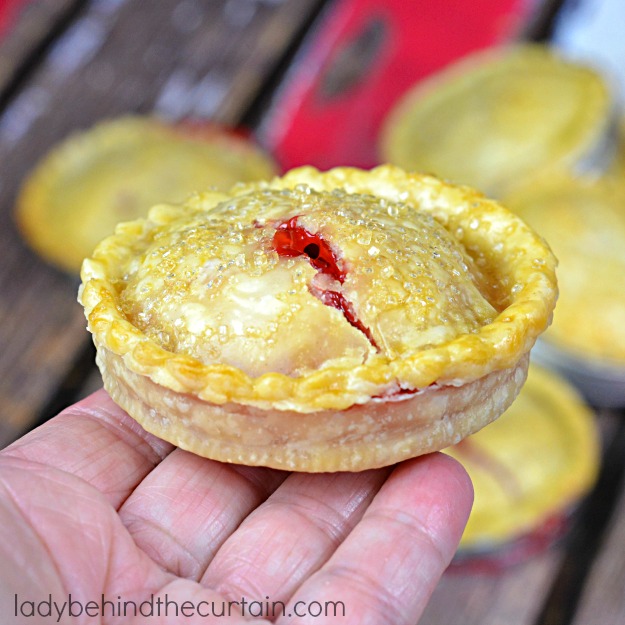
There is not much I love more in this world than a classic piece of cherry pie so I cannot wait to make these!
Mini Cheesecakes
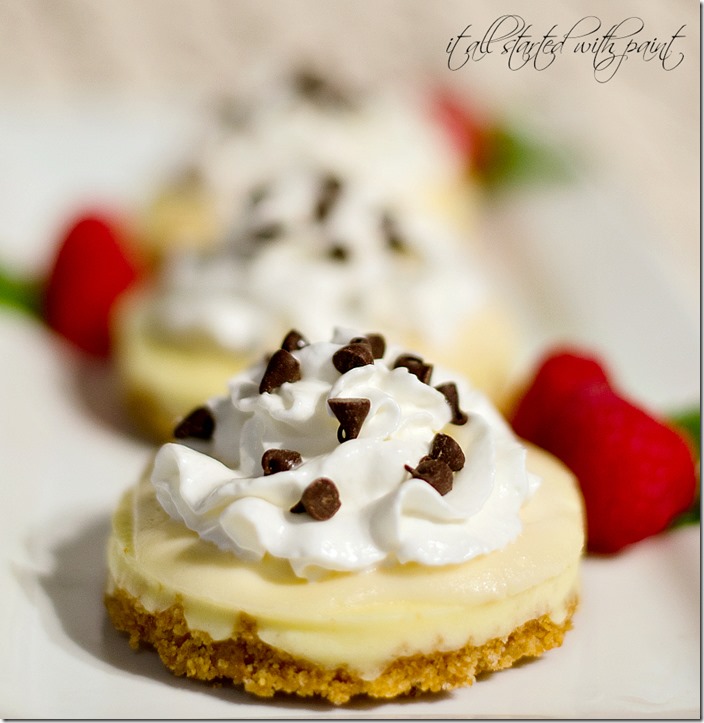
These just seem like a match made in heaven because the little lids with their removable bottom just kind of seems like an ultra mini version of a spring form pan.
Blueberry Pies

That blueberry looks so scrumptious! The possibilities with these are just absolutely endless! You can do tarts, cream pies, fruit pies, etc.
Chocolate Cararmel Tarts
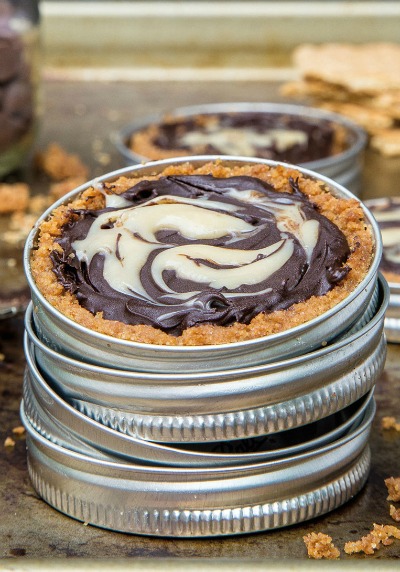
And then we’ll end off with one for all the chocolate lovers out there, like myself. Take a look at this chocolatey, caramely mini tart. It looks so yummy. I did post the recipe for this one since it is a little more complex than the others.
Ingredients
4 graham cracker sheets
2 tsp. granulated sugar
2½ tbsp. unsalted butter
2 c. milk chocolate chips
¼ c. heavy whipping cream
2 to 3 tsp. Salted Caramel Sauce
Directions
Preheat the oven to 350 degrees F. Place four pint-sized mason jar rings on a small baking sheet. Place the lids with the rubber part facing down.
In a food processor, combine the graham crackers and sugar. Pulse for about 30 seconds, or until finely ground. Stream in the melted butter and continue to pulse. The mixture should appear like wet sand, and it should slightly clump together when squeezed in your hand. If you overmix, it will turn into dough — not good.
Divide the graham cracker crumbs between the mason jar lids. Use a shot glass to pack in the crumbs and push them up the sides of the ring.
Bake for 10 minutes. Let cool completely on a cooling rack.
Now we’re going to melt the chocolate. It can be finicky, so this is the way I do it: Bring 1 cup of water to a boil in a small saucepan. Make sure you have a glass bowl that fits over the pan without touching the water. Place the chocolate chips and cream in the glass bowl, and have it ready next to the stove. Once the water boils, turn off the heat and place the bowl of chocolate and cream over the pan. Stir, stir, stir until the chocolate melts. You may have to turn the heat back on to boil the water again, but I find that if I’m patiently daydreaming while stirring the chocolate, it all melts just fine.
Pour the melted chocolate into the tart shells.
Tap the lids gently to get rid of any air bubbles.
Let sit for 10 minutes.
Dot drops of caramel sauce onto the surface of the chocolate, and after a few seconds, run a toothpick or knife through the chocolate to swirl it together.
I recommend refrigerating the tarts for a few hours to set the chocolate. However, before serving, let them come back to room temperature — the chocolate is too hard when cold.
The tarts will keep for up to 3 days refrigerated.
- www.itallstartedwithpaint.com
- www.sheknows.com
- www.ladybehindthecurtain.com
- www.womensday.com
 Mary Richardson
Weekly Newsletter Contributor since 2014
Email the author! mary@dvo.com