SUPER EASY Chocolate Garnishes
I was thumbing through old magazines the other day, and in a Feb 2007 issue of Martha Stewart Living magazine I found an intriguing idea. Martha was showing how to make super easy chocolate garnishes.
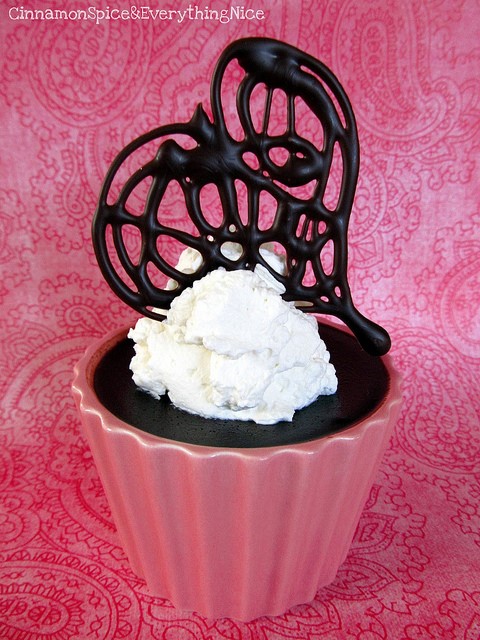
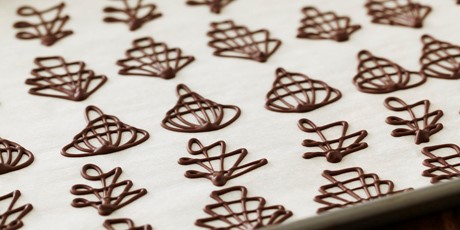
Sorbets, cake tops (or cake slices), cream pies, cookies, ice cream, pudding cups (as shown), cupcakes, and even hot cocoa (as floaters)-there are all sorts of places these fun little garnishes can go.

The photos show heart themes, and while that's a good idea, I'm thinking of trying a couple other shapes that will compliment a New Year's party I'm planning. The numbers 2 0 1 6 and fat question marks (to emphasize the "What will this year hold for you?" idea).
You couldn't get much simpler with this project. All you need is some dark chocolate, parchment paper, and scissors or a sharp paring knife. So in a nutshell, here are Martha's super easy chocolate garnishes instructions:
1. Line a cookie sheet with parchment paper, taping the edges so it doesn't curl.
2. Using another sheet of parchment paper, create a cornet to pipe your chocolate.
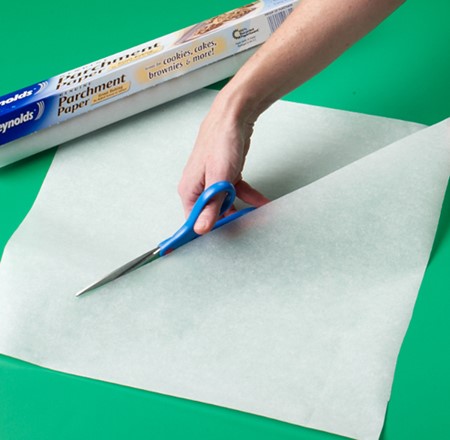
To make the cornet: Cut an 8 x 12 x 14½-inch (or smaller is fine) triangle from a sheet of parchment paper.
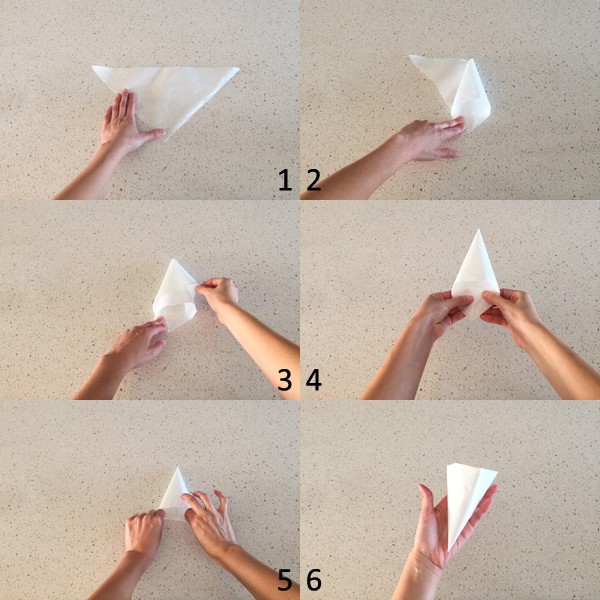
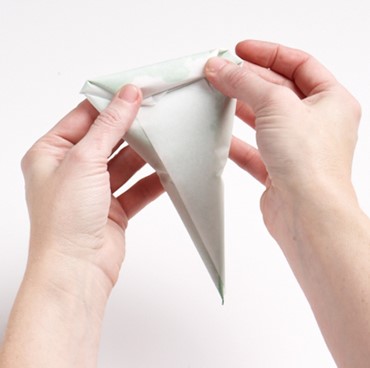
Start by placing the parchment paper on a flat surface with the top of the triangle facing towards you (step 1).
Take the top right corner and bring it over towards the center tip-like you're making an ice cream cone (step 2).
Do the same with the top left corner, but this time wrap it behind the cone (step 3).
Now pull both left and right corners taut towards you to make a very tight tip (step 4).
Once it is as tight as you can get it, start rolling those taut corners firmly on the inside of the cone (step 5).
And voila! You have your very own parchment paper piping bag (step 6).
3. To close the cornet once it has been filled, fold it away from the seam; this will keep the seam from opening. Use a pair of scissors or a sharp paring knife to cut an opening at the tip of the cornet to the desired size.
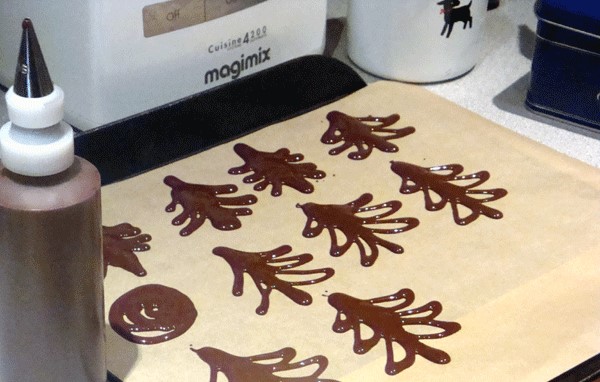
NOTE: If not interested in making a cornet, a plastic bottle with cone tip will work just as well.
4. To make the design: Melt dark chocolate in a double boiler and let cool for a few minutes.
5. Fill a cornet. You need to work quickly so you get your chocolate into the cornet before it sets up. I found placing the cornet in a narrow drinking glass steadied the cornet so I had both hands free to handle my saucepan of chocolate and the spatula I was using to guide the chocolate into the cornet.
6. Fold the top of the filled cornet closed so the chocolate doesn't escape as you pipe your designs.
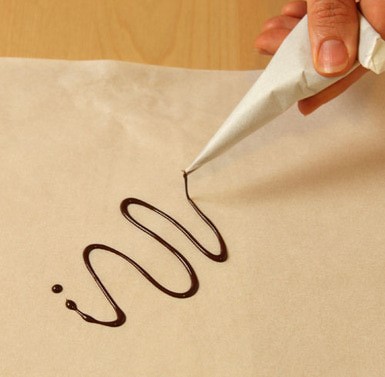
5. Pipe a design freehand onto the parchment paper. Or, pipe chocolate onto designs you traced on the paper beforehand. Just let your creativity flow. Place baking sheet of piped designs in the refrigerator to cool for 15 minutes or until they're set.
6. Separate from parchment paper and place in a parchment-lined storage container with lid; store garnishes in a cool, dark place until ready to use.
When ready to use, handle the designs delicately. They're actually best if consumed within the first day of making. But they will keep in a covered container for three or four days.
- www.cinnamonspiceandeverythingnice.com
- www.marthastewart.com
- www.juliausher.com
- www.sweetsonnets.com
- www.socialnesting.com
- www.candy.about.com
- www.foodnetwork.ca
 Alice Osborne
Weekly Newsletter Contributor since 2006
Email the author! alice@dvo.com