Homemade Apple Chips –NO Dehydrator Needed!
I’m always on the lookout for delicious and healthy snacks and just today my friend, Nola, send me this great information from one of her favorite websites, Broward Saves (www.browardsaves.com). It’s for homemade dried apple chips.
While the recipe sounded great, I have a few recipes for these, so I wasn’t all that impressed. The thing with my recipes, though, is that they all call for dehydrator use—their success depends on it. But when I read further that this recipe didn’t need a dehydrator, that a 200°F oven for a total of only 2 1/2 hours, would work just fine, I was intrigued. I definitely plan to give these a try so we can hopefully forget those fried Potato Chips, Fritos, Cheetos, and Doritos! And by the way, this information showed up at the right time. Produce departments are offering lots of apple varieties on sale right now—last year’s crop is being cleared out to make room for the 2014 season.
The author of Broward Saves, Tiffany, explains that it took her a while to perfect this recipe. Here biggest issue was achieving the right thickness so the chips would be perfectly crunchy and not chewy.
Tiffany suggests that mixing it up by using a variety of types of apples, Fuji, granny smith, red delicious, gala and so on, will give the end product a super flavor snap. Mixing sweet with tart takes the whole thing to flavor Nirvana, she says.
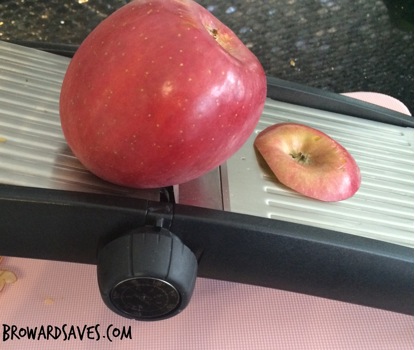
Her recipe calls for 4 apples thinly sliced (to about 1/6-inch thickness). She uses a tried-and-true mandolin so every piece is uniform in size. She starts by cutting the apple bottom away so she has a flat apple to slice. Tiffany says that depending on the size of your apple, you can get approximately 20 slices per apple.
After the apples are cut, Tiffany removes the seeds. This is the one place I would change the technique. I plan to core each apple first so the seeds are removed before slicing. With seeds removed, it’s time to arrange the slices in a single layer on a sheet pan fitted with parchment paper. It takes about one large sheet pan per apple. Remember they will shrink during baking.
Sprinkling the slices with a sweetener is the next step. She uses stevia, but I think I’ll forgo the sweetener and just top them with cinnamon or apple pie seasoning. She says she plans to try a little chili powder or cayenne pepper on her next batch. (Not me…I’m a seasoning coward. Tried and true is what I stick with.)
Finally, Tiffany reminds us that during baking we must not, under any circumstances, open the oven during baking—it’ll be hard, but the peeking must be resisted. Each time the oven door is opened the internal temperature drops almost 15 degrees, thus extending the baking time as the oven returns to that needed 200°F.
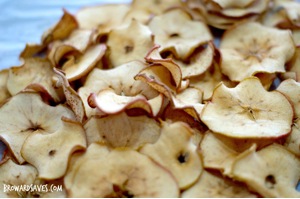
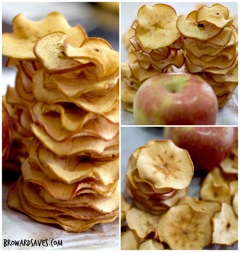
When the time is up, the oven can be turned off and the chips left inside for a few hours or overnight. Tiffany concludes her article by saying “You will not believe how crunchy they will be.”
While there’s a slim chance these will last a week, they will store that long in a plastic re-sealable bag. So here’s her recipe, and we send a big “Thank you!” to Tiffany for sharing:
Homemade Apple Chips
Serving size: 1
Total Calories: 282.964
4 medium to large apples
2 packets stevia or 2 teaspoons sugar
1/2 teaspoon cinnamon
Directions:
- www.browardsaves.com
 Alice Osborne
Weekly Newsletter Contributor since 2006
Email the author! alice@dvo.com