

Avoiding Burnt Pie Crust
By Sharon Ng
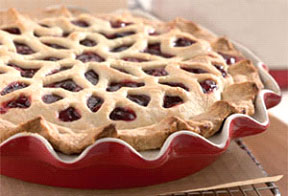
Nothing is more annoying than having spent the afternoon making a delicious pie, and then burning the edges of the crust. It can be not just annoying, but also frustrating when that pie is intended for a family meal, get together, or gift (check out my article Pies in Jars). There are some tips however to save your bacon when it comes to pie crust.
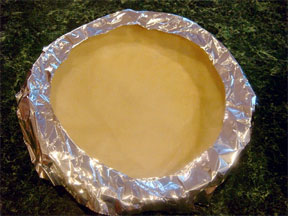
One of the original pie crust saves was tin foil. More specifically, this tin foil was cut up in little strips and then added to your pie crust as you notice it getting overly brown. I have used this method, and it does work. It can get a little tedious however, especially if you are baking more than one pie at a time. Tedious or not, it does work. It's a tried and true method that has been passed down from grandmas and mommas and bakers over the years. It is simple, but it takes time to wrap all those little foil buddies around the exposed pie crust.
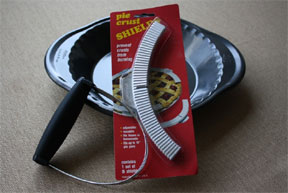
The second method is using a pie shield. They make and sell pie shields that actually fit around the edges of your pie, acting just as the tin foil in our first method. The good news with pie shields is that you don't have to take the time cutting out the strips and sticking on the crust. These little babies will fit on any conventional size pie crust, whether you make it deep dish or regular. (Rumor is you can even use these on quishes!) Mini size pies can also be protected by using shields make specifically for mini pies, though these may be a bit harder to find, and may require an online shopping expedition. Pie crust shields are now made in both aluminum and silicon. I don't personally have a preference between the two as of yet. These come in a one size fits all and adjustable models.
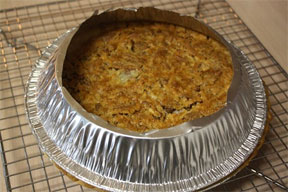
Here is a cheapie tip that could save you if you find yourself victim of the burned edge. Using a disposable aluminum pie tin that is the same size as your pie, carefully cut out the middle, making a circle cut out of the bottom of the tin. Set the cut tin, inverted, onto the cooking pie, to cover the edge, but still allow the center of the pie to continue to cook. Here's a cheater picture to help you along.
I hope these options can help you keep your pie edges beautiful, whichever you choose, just remember, it's the inside that counts!
Search DVO for new pie recipes for your upcoming holidays!
Sources:
https://www.kingarthurflour.com/tips/pie/images/pieHeader.jpg
https://www.google.com/imgres?um=1&hl=en&biw=1441&bih=710&tbm=isch&tbnid=N6IZpfpGE8PGgM:&imgrefurl=https://noemptychairs.me/recipes/how-to/how-to-make-your-own-pie-crust-shield/&docid=Z4s1bdJr9F910M&imgurl=https://noemptychairs.files.wordpress.com/2010/06/dsc053521.jpg&w=640&h=480&ei=PNaEUODcIdDRiAK-oYHoCQ&zoom=1&iact=rc&dur=248&sig=108377090597038664523&page=1&tbnh=133&tbnw=187&start=0&ndsp=19&ved=1t:429,r:0,s:0,i:75&tx=139&ty=75
https://www.robynwebb.com/fabulousfoodfinds/wp-content/uploads/2010/08/029.JPG
https://www.kitchenkneads.com/product_images/180_L_pieCrustShield_L.jpg
https://www.mommyskitchen.net/2010/05/coconut-pecan-pie-for-potluck-sunday.html