Kitchens Need STREAMLINING, Not Just Organizing!
Here’s a hot kitchen tip! You’ll have more fun cooking, experience quicker and easier clean-up (with more help from family members no less), and have more time and energy for the very reason you’re in this room (to cook, bake, eat, socialize, etc.), if you’ll remove the clutter (my term for this process is “streamlining”) and create “centered” work stations.
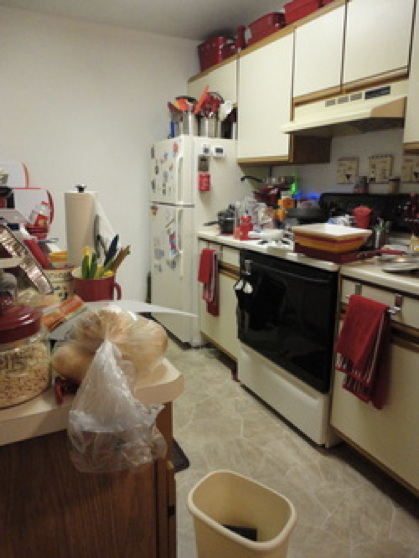
Here’s why: The kitchen is a very busy area. It gets messy quickly, which is can be stressful and demoralizing. The bottom line on why the kitchen should be clutter-free: People + kitchen activities + overload (those things you don’t like, use, need, want, or have room for) = mess, lack of control, and fatigue.
Don’t make the mistake of thinking you can solve your problem by organizing a drawer or cupboard here and there. All you’ll be doing is shuffling stuff (which likely includes things you don’t like, use, need, want, or have room for) around. Organizing before streamlining only delays the inevitable (you’ll find yourself in the same mess in a few weeks); it’s putting the cart before the horse.
And don’t make the mistake of thinking only large kitchens can exist uncluttered. I raised 7 children in a kitchen that wasn’t much bigger than a phone booth. I just had to live the Law of Household Physics: space is fixed, stuff is variable; a fixed space can hold only so much before you lose control of that space. In other words, you can’t squeeze 3-square-feet of stuff into a 2- foot-square space and expect that space to serve you. Face the reality that some things must go.
Now, with that understanding, here’s how to create a streamlined and centered kitchen in six steps:
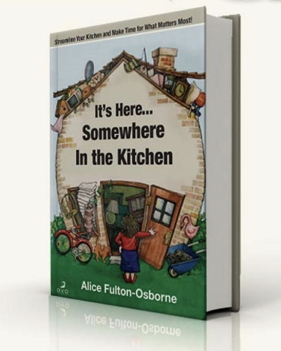
Finally, if you’d like to see me actually implement this process in a real-life kitchen, and also receive other kitchen organizing tips, import the video clips from my fun-to-watch DVD, It’s Here…Somewhere in the Kitchen (regularly $19.95, but available now for $14.95) into Cook'n today!
Here’s why: The kitchen is a very busy area. It gets messy quickly, which is can be stressful and demoralizing. The bottom line on why the kitchen should be clutter-free: People + kitchen activities + overload (those things you don’t like, use, need, want, or have room for) = mess, lack of control, and fatigue.
Don’t make the mistake of thinking you can solve your problem by organizing a drawer or cupboard here and there. All you’ll be doing is shuffling stuff (which likely includes things you don’t like, use, need, want, or have room for) around. Organizing before streamlining only delays the inevitable (you’ll find yourself in the same mess in a few weeks); it’s putting the cart before the horse.
And don’t make the mistake of thinking only large kitchens can exist uncluttered. I raised 7 children in a kitchen that wasn’t much bigger than a phone booth. I just had to live the Law of Household Physics: space is fixed, stuff is variable; a fixed space can hold only so much before you lose control of that space. In other words, you can’t squeeze 3-square-feet of stuff into a 2- foot-square space and expect that space to serve you. Face the reality that some things must go.
Now, with that understanding, here’s how to create a streamlined and centered kitchen in six steps:
-
List your “center” choices. Think about what you need to do and like to do in your kitchen. Do you love to bake? Then you need a “baking center.” Do you and/or family take lunch to work and/or school? Then you need a “lunch center.” Do you feed your pet in or near the kitchen? Then you need a “pet center.”
You get the idea. The activities you need to do and like to do in your kitchen define your “centers.” Typical centers are: tableware, cooking, baking, cleanup, pantry, information, lunch, and microwave. Customize your kitchen by adding centers germane to your lifestyle, interests, and family needs. - Empty the entire kitchen. Yes, the ENTIRE kitchen. Chances are slim you’ll put things back where they came from, and you’ll definitely put back much less. Sort through everything; look for keepers (only things you like, use, need, want, and have room for) and discard the rest (“discard” meaning things go to either trash, charity, friends/family/neighbors, garage sale, etc.). Clear off the fridge’s top and front and empty the dishwasher (even if the dishes are dirty—or quickly wash them). The goal: you want EVERYTHING out so you can see what you’re working with. When emptying, don’t get hung up on where to put stuff or how to sit and stack it. Just empty spaces as quickly as possible.
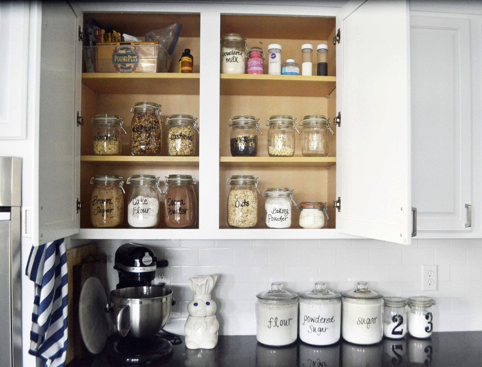
- Clean the insides of cupboards and drawers; lay new shelf/drawer paper. This is also a good time to install quarter-inch round strips at the back of cupboards (as a way to stand plates and trays, which can save space).
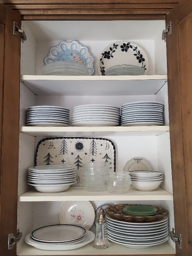
- Choose “center” locations, using your list as your guide. Think “outside the box” while doing this. For instance: If you have grade-schoolers and you’d like more mealtime help from them, why not stack table settings in an under-counter cupboard closest to the table so they can get to them easily and help set the table? If there’s a toddler in the house that could wreck dish havoc, just install a kinder-lock on the cupboard door.
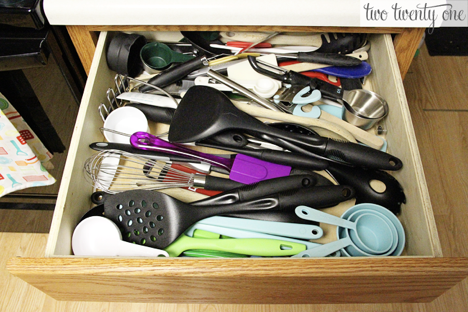
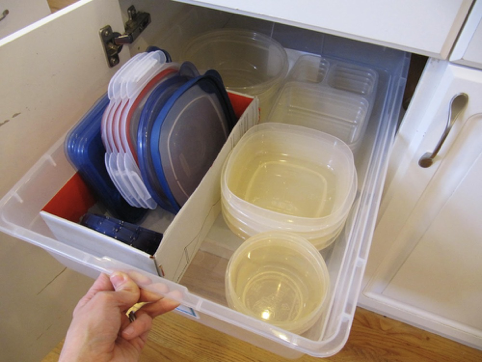
- Streamline the contents. Go from stack to stack, pile to pile and touch each item and ask yourself if you still like it, use it, need it, want it, or have room for it. If you answer “no” to any of these questions, the item goes either to charity, trash, a garage sale, consignment, a women’s shelter, your 5th-wheeler, a family member, a neighbor, or an apartment box for the day your children move out.
Also, watch for things that you do need, like, want, or use, that belong in another part of your home. They go into a “someplace else” box and will be dealt with as you streamline the rest of your home. Put this box in an out-of-the-way location—a temporary spot; you really will be able to put everything in this box “away” (because “away” will no longer be filled with things you don’t like, use, need, want, or have room for!). - Load centers with appropriate contents. Quality-over-quantity is the goal and “less is best” is the philosophy. Avoid duplicates of anything and place high value on multi-purpose things. Why give precious space to a hotdog cooker, when a microwave, saucepan, or grill will do the same job?
You may need to label centers for a short while, until family gets used to where things are—you always want everyone to PUT THINGS BACK EXACTLY WHERE THEY FOUND THEM. Finally, be sure to give your new arrangement at least 21 days before you switch things around. I want you to experience less muss and less fuss—to find out for yourself how much more fun and how much easier it is to cook and otherwise work in a clutter-free and centered kitchen!
Finally, if you’d like to see me actually implement this process in a real-life kitchen, and also receive other kitchen organizing tips, import the video clips from my fun-to-watch DVD, It’s Here…Somewhere in the Kitchen (regularly $19.95, but available now for $14.95) into Cook'n today!
Sources:
- www.organizeyourlife.org
- www.modernhoney.com
- www.theorganisedyou.com
- www.pinterest.com
- www.dvo.com
 Alice Osborne
Weekly Newsletter Contributor since 2006
Email the author! alice@dvo.com