One of the WORST "Food-Like Substances" Ever Created!
Call me a spoil sport, a wet blanket, a rain-on-the-parader, a bore. But I think Pop Tarts® are one of the worst “food-like substances” (to use Michael Pollan’s term, who wrote IN DEFENSE OF FOOD), ever created.
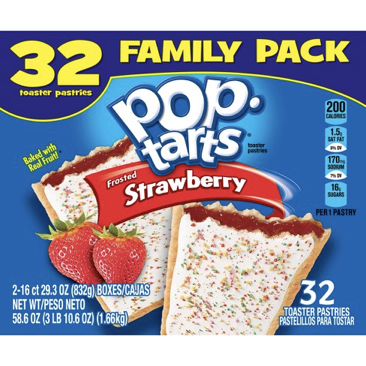
Yes, I know…the first time you bit into a Pop-Tart® (you were probably just a young child at the time), that single bite likely rocked your world. The taste of the biscuity pastry with a sweet frosting and delicious filling—it all probably left an indelible impression on your taste buds and changed the meaning of breakfast itself. Right? At least that’s what I hear from today’s youth.

And by the way: A fun fact to know and tell at the dinner table? Their name was inspired by the art world at the time. Andy Warhol’s POP ART was all the rage in the early 60’s, when this food-like substance was created, so Pop Tart® seemed hip and a good label. And it caught on.
But back to why they’re the worst:
That’s pretty much it in a nutshell. Yet I have to say, while the end product is just awful, the overall idea is rather cool, don’t you think? So I wondered, what if you could make your own? A better version that would not only taste marvelous but not be so noxious, health-wise.
Well that’s where Melissa K. Norris and her really helpful site by the identical name, comes in. She wondered the same thing. She experimented with the concept and found success. She shares all the HOW-TOs on her site.
She says, “The beautiful thing about these homemade pop tarts is you can use any flavor filling you want. A thick jam, fruit butter, or pie filling works best.” And all you need for the project is a rolling pin, a baking sheet, a fork to crimp edges, a sharp knife to slit top crusts, and a brush for applying egg wash.
Of course, these won’t last all that long (for two reasons, no preservatives and they’re so delicious they’ll be eaten quickly). But they can be frozen. After baked and cooled, they’ll be great for up to 3 months if wrapped well.
I’ll close my rant with her recipe, and with an apology if I’ve offended any die-hard Pop Tart® lovers out there. Just smile and nod and enjoy your Pop Tart®.


PASTRY DOUGH
4 cups flour (spoon & level into cup to measure)
1 3/4 cups lard, coconut oil, OR butter
1 tablespoon sugar
2 teaspoons salt
1 tablespoon (white vinegar will work)
1 egg
1/2 cup cold water
FILLING
3/4 cup jam, jelly, pie filling, fruit butter OR applesauce (1 heaping tablespoon for each tart)
WASH
1 large egg
1 tablespoon water
TOP SPRINKLE
1 tablespoon sugar
Directions:
Add Recipe to Cook'n
blog comments powered by Disqus
Yes, I know…the first time you bit into a Pop-Tart® (you were probably just a young child at the time), that single bite likely rocked your world. The taste of the biscuity pastry with a sweet frosting and delicious filling—it all probably left an indelible impression on your taste buds and changed the meaning of breakfast itself. Right? At least that’s what I hear from today’s youth.
And by the way: A fun fact to know and tell at the dinner table? Their name was inspired by the art world at the time. Andy Warhol’s POP ART was all the rage in the early 60’s, when this food-like substance was created, so Pop Tart® seemed hip and a good label. And it caught on.
But back to why they’re the worst:
- They offer NO nutritional value, loads of calories (empty calories)
- They’re full of preservatives, chemicals, and other mystery ingredients
- They’re made with high fructose corn syrup (boo, hiss and boo, hiss again)
- They’re high in sodium
- They’re made with artificial colorings and flavorings
- They’re made with white flour (which turns to paste in the intestinal tract—fun)
That’s pretty much it in a nutshell. Yet I have to say, while the end product is just awful, the overall idea is rather cool, don’t you think? So I wondered, what if you could make your own? A better version that would not only taste marvelous but not be so noxious, health-wise.
Well that’s where Melissa K. Norris and her really helpful site by the identical name, comes in. She wondered the same thing. She experimented with the concept and found success. She shares all the HOW-TOs on her site.
She says, “The beautiful thing about these homemade pop tarts is you can use any flavor filling you want. A thick jam, fruit butter, or pie filling works best.” And all you need for the project is a rolling pin, a baking sheet, a fork to crimp edges, a sharp knife to slit top crusts, and a brush for applying egg wash.
Of course, these won’t last all that long (for two reasons, no preservatives and they’re so delicious they’ll be eaten quickly). But they can be frozen. After baked and cooled, they’ll be great for up to 3 months if wrapped well.
I’ll close my rant with her recipe, and with an apology if I’ve offended any die-hard Pop Tart® lovers out there. Just smile and nod and enjoy your Pop Tart®.
Melissa's Homemade Pop Tarts
Ingredients:
PASTRY DOUGH
4 cups flour (spoon & level into cup to measure)
1 3/4 cups lard, coconut oil, OR butter
1 tablespoon sugar
2 teaspoons salt
1 tablespoon (white vinegar will work)
1 egg
1/2 cup cold water
FILLING
3/4 cup jam, jelly, pie filling, fruit butter OR applesauce (1 heaping tablespoon for each tart)
WASH
1 large egg
1 tablespoon water
TOP SPRINKLE
1 tablespoon sugar
Directions:
1. Mix flour, sugar, and salt. Cut in lard, butter, or coconut oil. Note: In order to achieve a flaky crust, your lard, butter, or coconut oil should be COLD. It’s the pieces of solid fat distributed throughout the flour which melt upon baking that create the flakiness. You can freeze your butter or lard before cutting it in. (The large holes of a cheese grater work well with frozen butter.)
2. Fat is fully cut in when the flour is crumbly pea-size pieces. Add in liquids (your egg is a liquid in this recipe) until the dough just holds together. You don’t want to over-mix it.
3. Cover dough with plastic wrap and chill in the fridge for 30 minutes.
4. Preheat oven to 375°F. Separate pie dough into four equal balls; return 3 balls to the fridge.
5. Sprinkle flour on the counter (no need for parchment paper with this dough). Roll dough out to 1/8-inch thick, into a 9 x 12-inch rectangle. Cut out either squares or 3 x 4-inch rectangles.
6. Place cut dough onto ungreased cookie sheet. Put this in the fridge as you roll out another ball for the tart tops.
7. Remove baking sheet of tart bottoms from fridge. Place a good-sized tablespoon of fruit filling in the center of each tart. Place top piece of dough over the filling. With the tip of a sharp knife, cut three slits in the center. Crimp and seal edges of each tart, using fork tines.
8. Once all dough is rolled and tarts are filled, topped and sealed, return them to the fridge.
9. Whisk egg and water until well blended.
10. Remove tarts from fridge and brush them with egg wash. Sprinkle with sugar. Place in preheated oven and bake for 28 to 32 minutes.
NOTES:
Pastry dough can be made ahead kept in fridge for up to 3 days.
Freeze tarts (allow them to cool fully after baking, then wrap well or place in a sealed air-tight container) for up to 3 months.
Recipe formatted with the Cook'n Recipe Software from DVO Enterprises.
Sources:
- www.star991.com
- www.target.com
- www.meijer.com
- www.walmart.com
- www.finecooking.com
 Alice Osborne
Weekly Newsletter Contributor since 2006
Email the author! alice@dvo.com