Hot Cocoa Bombs Are the BOMB!
Maybe you’ve already seen this idea—it’s all over social media right now. But for those of you who for one reason or another don’t spend time on social media, I want to share this idea. (I found it in a recent FOOD STORAGE MOMS newsletter; thank you Linda Loosli.)
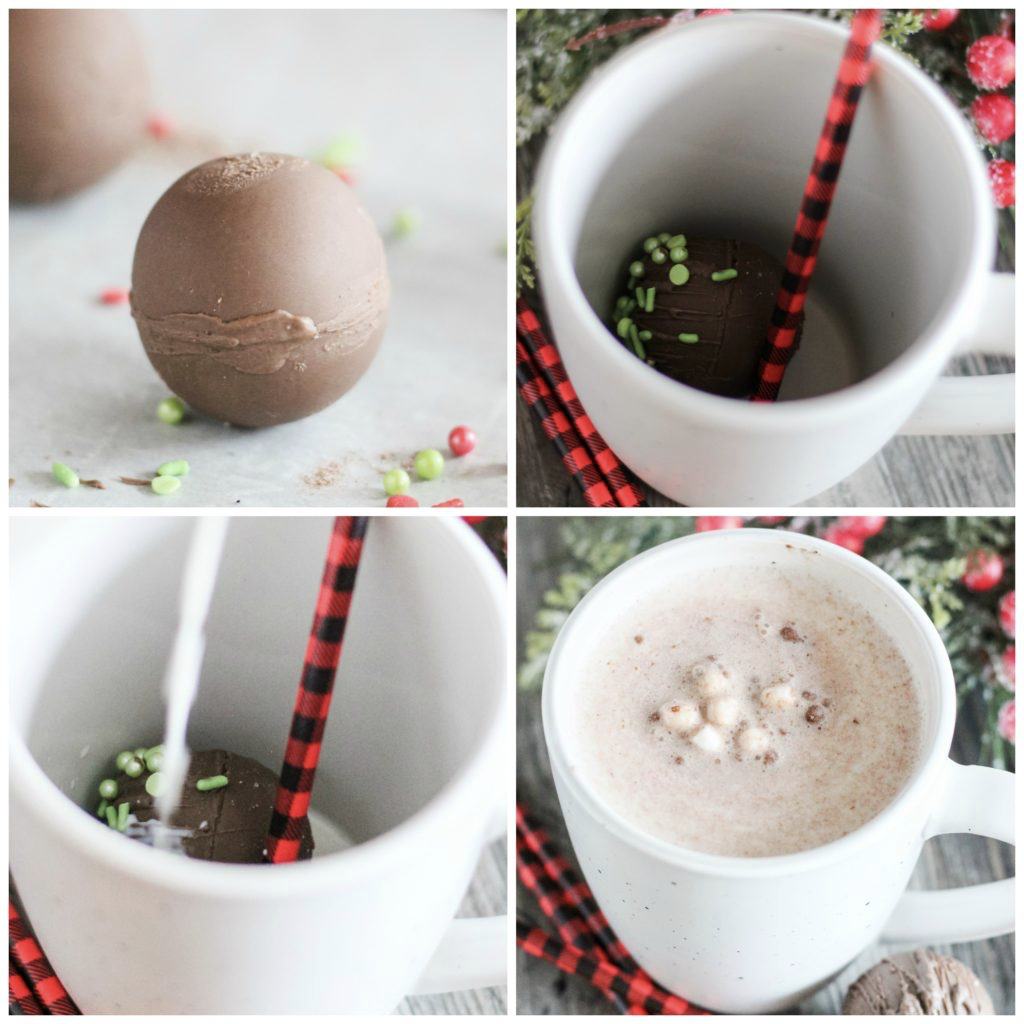
These are not only a lot of fun to make, they’re delicious and would make an awesome gift. I’m talking about HOT COCOA BOMBS, and folks, they’re so good, they are the BOMB . It’s fascinating to plunk them into hot milk and watch them dissolve into decadent hot chocolate.
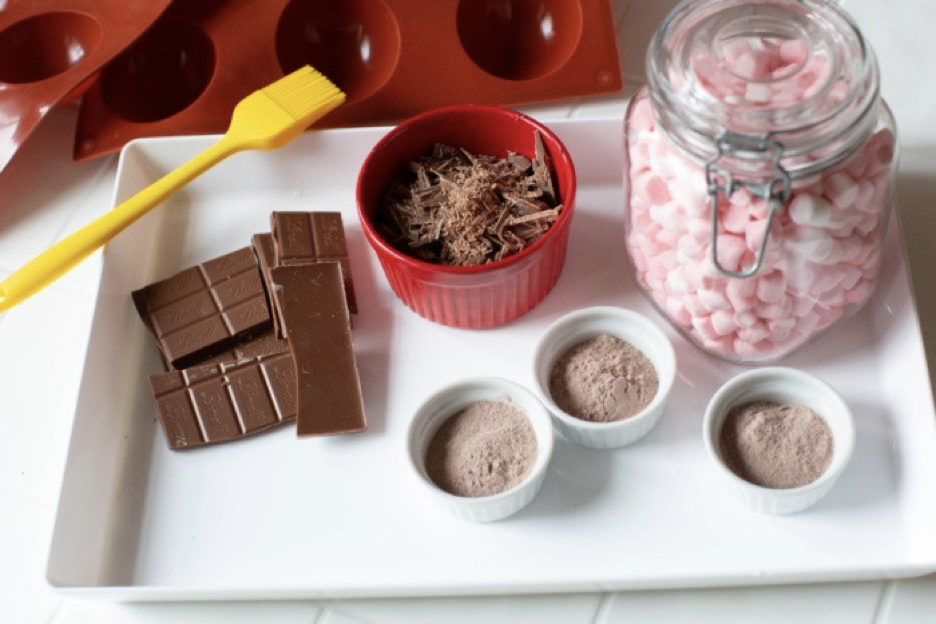
Besides being yummy, they’re easy to make. With some supervision, even your kiddos can make them. As far as equipment goes, you need a couple large-ish silicone molds, a heavy-bottomed pot (or a double boiler), a basting brush, a small plastic bag with a little hole cut into a corner (or a piping bag), and disposable gloves to prevent fingerprints on the bombs.
This is basically an 8-step process. There’s only one caution, and that is be sure to work quickly. Have everything prepped ahead of time, all equipment gathered, and read through the recipe and directions to you fully understand what you’re doing from step to step.
Once made, your bombs can be stored in an airtight container in your pantry or on the countertop (as long as your home isn’t too hot). If you decide you’d like to freeze them, be sure to individually double-wrap them to ensure they retain their freshness. Keep in mind, though, that chocolate tends to turn a little white-ish when frozen. This is known as chocolate blush, and doesn’t affect the taste whatsoever.
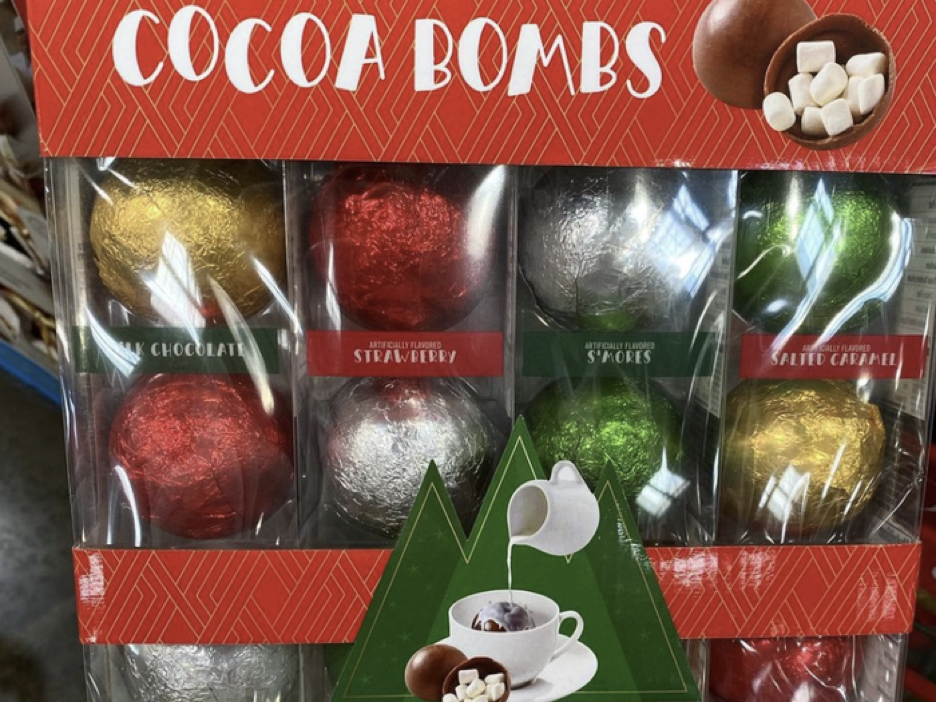
One last thought before we get to Linda’s recipe: Since I received her newsletter, I did a little exploring and all kinds of tutorial on youtube (a blessing for those that are visual learners). I also found that you can actually buy these (at Costco and other places). Who knew? But like anything homemade, they’re going to be fresher and without any preservatives, enhancers, or mystery ingredients. This was a fun project and well worth the time and effort it took. I can see that the more I do this, the easier it’ll be to “git ‘er done.”
I’ll close with Linda’s recipe, and wish you delicious sipping!
6 or 7 milk chocolate candy bars
6 servings hot cocoa or chocolate mix
1 bag peppermint miniature marshmallows
Crushed peppermint (to gently roll the hot cocoa bombs in)
Sprinkles or Chocolate Shot (to gently roll the hot cocoa bombs in)
Directions:
Add Recipe to Cook'n
blog comments powered by Disqus
These are not only a lot of fun to make, they’re delicious and would make an awesome gift. I’m talking about HOT COCOA BOMBS, and folks, they’re so good, they are the BOMB . It’s fascinating to plunk them into hot milk and watch them dissolve into decadent hot chocolate.
Besides being yummy, they’re easy to make. With some supervision, even your kiddos can make them. As far as equipment goes, you need a couple large-ish silicone molds, a heavy-bottomed pot (or a double boiler), a basting brush, a small plastic bag with a little hole cut into a corner (or a piping bag), and disposable gloves to prevent fingerprints on the bombs.
This is basically an 8-step process. There’s only one caution, and that is be sure to work quickly. Have everything prepped ahead of time, all equipment gathered, and read through the recipe and directions to you fully understand what you’re doing from step to step.
Once made, your bombs can be stored in an airtight container in your pantry or on the countertop (as long as your home isn’t too hot). If you decide you’d like to freeze them, be sure to individually double-wrap them to ensure they retain their freshness. Keep in mind, though, that chocolate tends to turn a little white-ish when frozen. This is known as chocolate blush, and doesn’t affect the taste whatsoever.
One last thought before we get to Linda’s recipe: Since I received her newsletter, I did a little exploring and all kinds of tutorial on youtube (a blessing for those that are visual learners). I also found that you can actually buy these (at Costco and other places). Who knew? But like anything homemade, they’re going to be fresher and without any preservatives, enhancers, or mystery ingredients. This was a fun project and well worth the time and effort it took. I can see that the more I do this, the easier it’ll be to “git ‘er done.”
I’ll close with Linda’s recipe, and wish you delicious sipping!
Hot Cocoa Bombs
Yield: 6 servings
Ingredients:
6 or 7 milk chocolate candy bars
6 servings hot cocoa or chocolate mix
1 bag peppermint miniature marshmallows
Crushed peppermint (to gently roll the hot cocoa bombs in)
Sprinkles or Chocolate Shot (to gently roll the hot cocoa bombs in)
Directions:
STEP ONE: Preheat the pot you will be using to melt the chocolate (or put water in your double boiler) on low heat. A good method is to heat the pot while you’re chopping the chocolate.
STEP TWO: Chop (or grate) the chocolate into fine slivers. Remove the pot from the heat, add the prepped chocolate.
STEP THREE: Return the chocolate-filled pot to the heat and gently stir with a silicone spatula. You’ll find if you’re patient, using low heat, you can completely melt the chocolate this way with no risk of burning it.
STEP FOUR: Drop a little of the melted chocolate into the molds.
STEP FIVE: With your pastry brush (silicone is best for this job, but use whatever brush you have), paint the dollop of chocolate over the sides of each mold, creating tiny chocolate dishes. Chill in the refrigerator for 5 minutes. Remove the mold from the fridge and add another layer of chocolate coating. Make sure your chocolate isn’t too hot (you don’t want to melt the layers already in the cups). Refrigerate again. Repeat until you’ve added 3-4 layers of chocolate. Cool in the refrigerator.
STEP SIX: Gently remove the chocolate dishes from the mold, being gentle so no dishes are cracked. Place these little chocolate dishes onto a cold marble slab or onto your mold, turned upside down (so don’t start to melt).
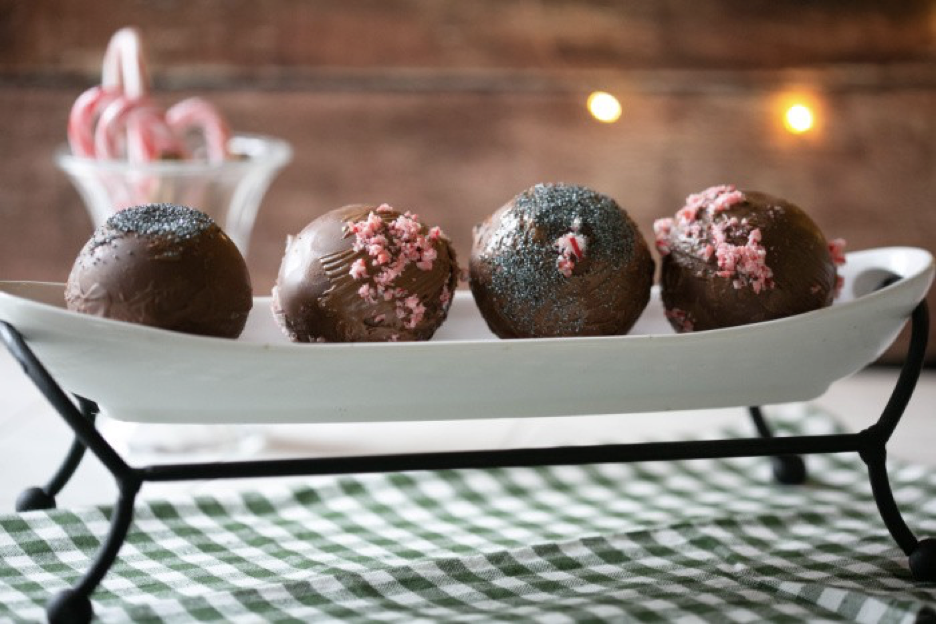
STEP SEVEN: Into half of the little dishes, place 2 tablespoons of hot chocolate mix, a few mini- marshmallows, and crushed peppermint (the candy is optional). Using a piping bag or plastic bag, put a line of chocolate around the rim of the filled dishes. Gently place an empty chocolate dish atop a filled one and pipe or spread more chocolate around the edge of what is now a ball, to seal. Roll each ball in sprinkles or crushed peppermint.
STEP EIGHT: Place in a container. They don’t need refrigeration, unless your kitchen is overly warm.
To use, all you do is add one hot cocoa bomb to 8- to 10-ounces of hot milk (simmering, but not boiling. Pour the milk over the bomb and watch how it melts; the marshmallows will pop out of the bomb. Stir and enjoy!
STEP TWO: Chop (or grate) the chocolate into fine slivers. Remove the pot from the heat, add the prepped chocolate.
STEP THREE: Return the chocolate-filled pot to the heat and gently stir with a silicone spatula. You’ll find if you’re patient, using low heat, you can completely melt the chocolate this way with no risk of burning it.
STEP FOUR: Drop a little of the melted chocolate into the molds.
STEP FIVE: With your pastry brush (silicone is best for this job, but use whatever brush you have), paint the dollop of chocolate over the sides of each mold, creating tiny chocolate dishes. Chill in the refrigerator for 5 minutes. Remove the mold from the fridge and add another layer of chocolate coating. Make sure your chocolate isn’t too hot (you don’t want to melt the layers already in the cups). Refrigerate again. Repeat until you’ve added 3-4 layers of chocolate. Cool in the refrigerator.
STEP SIX: Gently remove the chocolate dishes from the mold, being gentle so no dishes are cracked. Place these little chocolate dishes onto a cold marble slab or onto your mold, turned upside down (so don’t start to melt).
STEP SEVEN: Into half of the little dishes, place 2 tablespoons of hot chocolate mix, a few mini- marshmallows, and crushed peppermint (the candy is optional). Using a piping bag or plastic bag, put a line of chocolate around the rim of the filled dishes. Gently place an empty chocolate dish atop a filled one and pipe or spread more chocolate around the edge of what is now a ball, to seal. Roll each ball in sprinkles or crushed peppermint.
STEP EIGHT: Place in a container. They don’t need refrigeration, unless your kitchen is overly warm.
To use, all you do is add one hot cocoa bomb to 8- to 10-ounces of hot milk (simmering, but not boiling. Pour the milk over the bomb and watch how it melts; the marshmallows will pop out of the bomb. Stir and enjoy!
Recipe formatted with the Cook'n Recipe Software from DVO Enterprises.
Sources:
- www.4sonsrus.com
- www.foodstoragemoms.com
- www.insider.com
 Alice Osborne
Weekly Newsletter Contributor since 2006
Email the author! alice@dvo.com