Noodles from Scratch? Incredibly Easy and Incredibly Tasty!
Our Cook’n Newsletter theme for June is everything pasta (Chinese or Italian, it doesn’t matter). So I thought I’d kick the topic off with a very helpful tutorial on making homemade pasta (without a machine) from the folks at ’s Test Kitchen (as found in their beautiful magazine, Cook’s Illustrated).
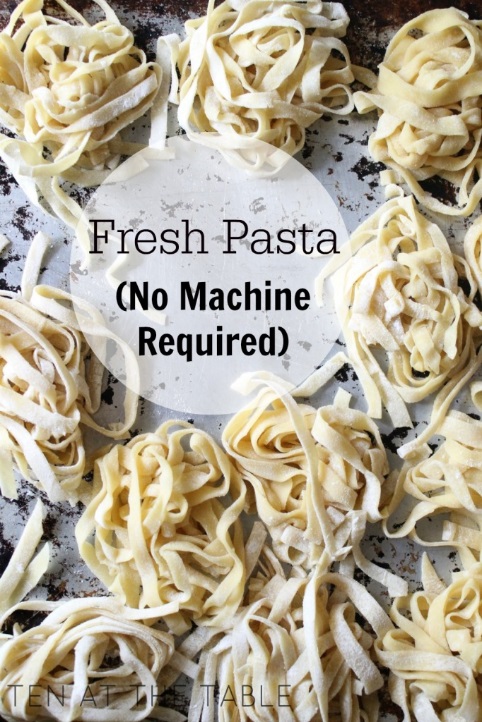
The idea of making fresh pasta may sound intimidating, but the Test Kitchen folks assure us that it’s actually incredibly easy. Their recipe for fresh pasta doesn't require any specialized equipment, and it only requires four everyday ingredients (flour, eggs, olive oil, salt).
This said, is there any really good reason why you’d want to bother making your own pasta, aside from the easiness of it and the adventure of it all? “Yes, yes, yes!” say professional chefs and serious home cooks. Using fresh pasta makes a world of difference when it comes to turning out an all-star dish. There’s just no comparison, taste- and texture-wise.
OK then, let’s take a serious look. Here’s how the Test Kitchen experts do it:
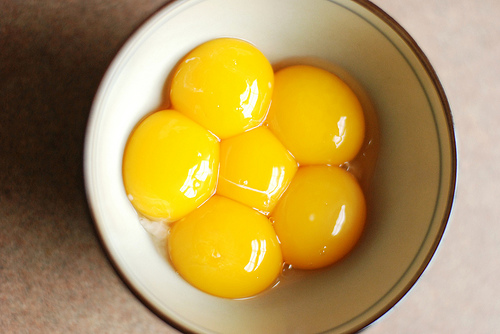
“For a pasta dough that could be easily rolled out by hand (but still cook up into delicate, springy noodles), we create a super-malleable dough that doesn’t snap back when you roll it. A generous splash of olive oil coats the flour proteins and limits their ability to form gluten so the dough stays more elastic. We also mixed in six extra egg yolks. Yolks are loaded with fat and emulsifiers that also limit gluten development—but because their proteins coagulate when heated, adding structure, they ensure that the pasta is strong enough to stay intact when boiled.
“Additionally, we incorporated an extended resting period to allow the gluten network to relax and developed a simple, effective rolling technique (which we outline below).
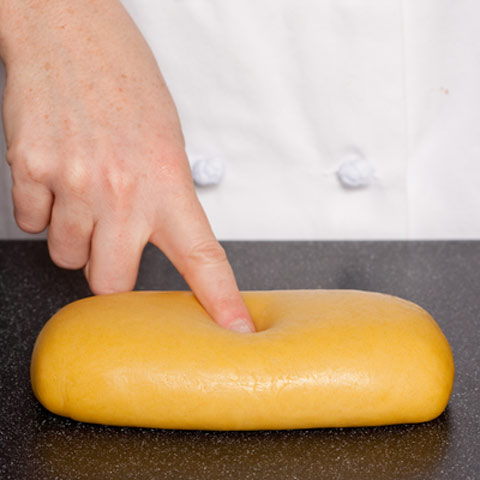
“What’s the trick to turning a lump of pasta dough into long, silky strands—all without a pasta roller? Starting with a soft, malleable dough is half the battle. You should be able to easily make an indent in the dough as the picture shows. After that, all there's left is dividing the dough into small, manageable pieces and working with them one at a time. Here's how:
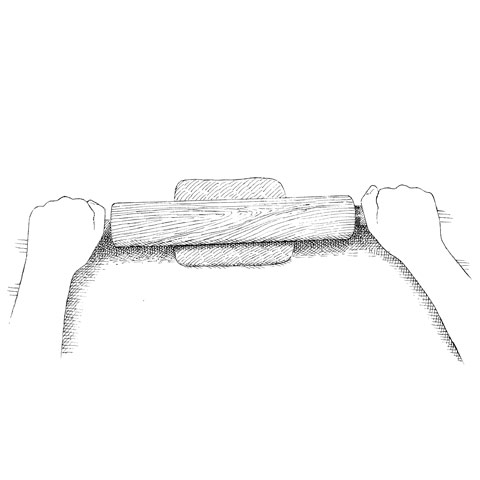
1. WORK WITH SMALL PIECES
“Shape the dough into a 6-inch cylinder; wrap it in plastic wrap and let it rest for at least 1 hour. Divide it into 6 equal pieces. Reserve 1 piece; rewrap the remaining 5.
“Working with the reserved piece, dust both sides with flour, then press the cut side down into a 3-inch square. With a rolling pin, roll the dough into a 6-inch square, then dust both sides again with flour.
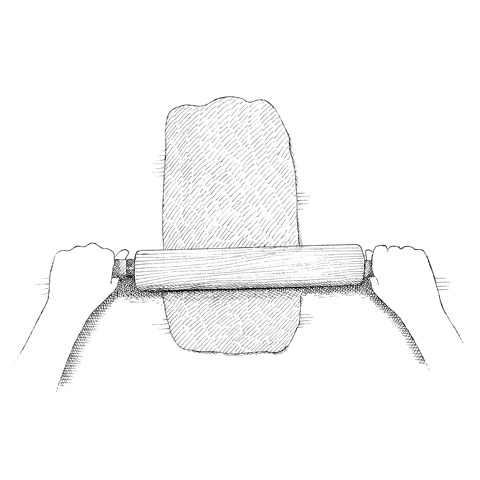
3. ROLL FROM CENTER, AT A TIME
”Roll the dough to 6 by 12 inches, rolling from the center of dough one way at a time, then dust it with flour. Continue rolling until the dough is 6 by 20 inches, lifting it frequently to release it from the counter. Transfer the dough to a kitchen towel and air-dry for about 15 minutes.
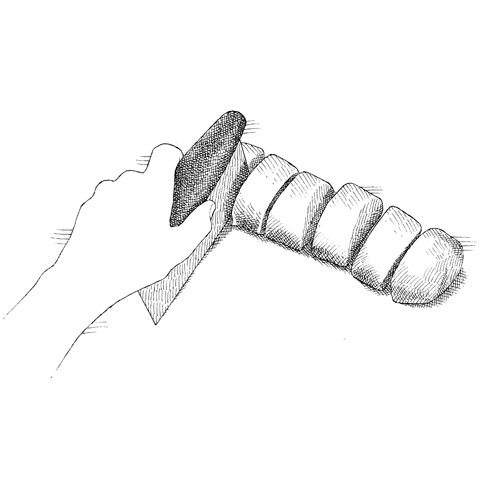
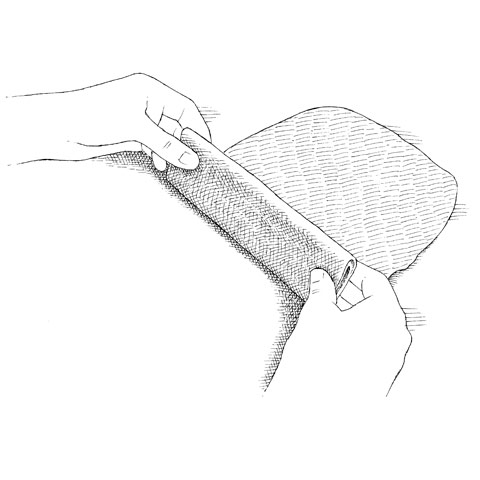
4. FOLD INTO FLAT ROLL
“Starting with the short end, gently fold the dried sheet at 2-inch intervals to create a flat, rectangular roll.
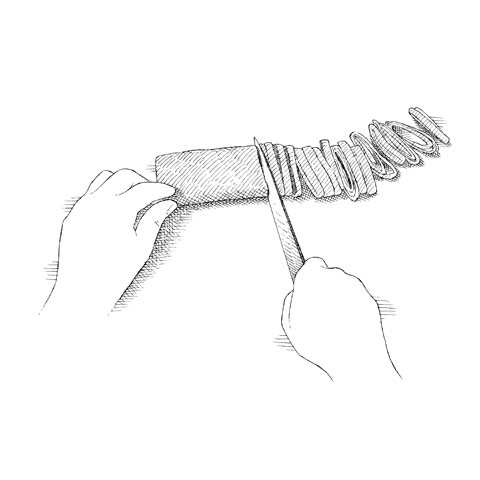
5. CUT INTO STRIPS
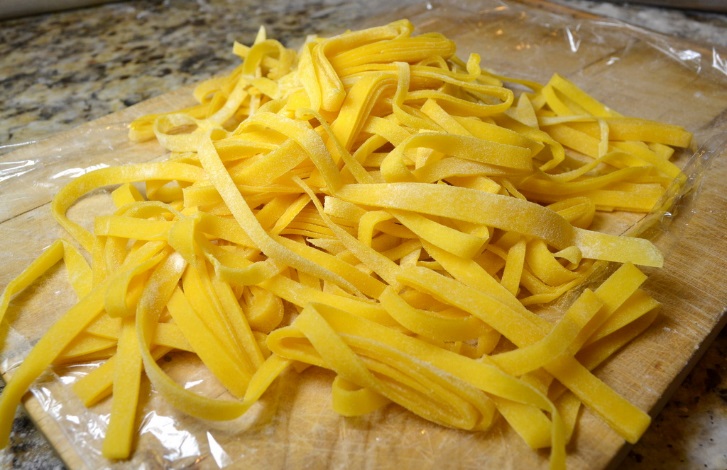
“With a sharp knife, cut the dough into 3/16-inch-thick noodles.
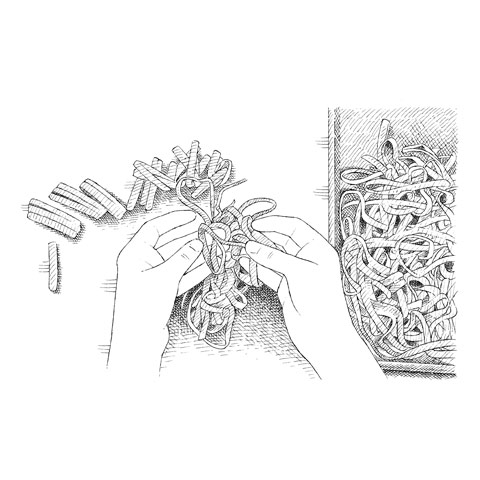
6. UNFURL
”Use your fingers to unfurl pasta, then transfer to a floured baking sheet.
COOK’S Illustrated HOMEMADE PASTA
2 cups all-purpose flour
2 large eggs plus 6 large yolks
2 tablespoons extra virgin olive oil
1 tablespoon salt
Your favorite sauce
1. Process flour, eggs and yolks, and oil in food processor until mixture forms cohesive dough that feels soft and is barely tacky to touch, about 45 seconds. (If dough sticks to fingers, add up to 1/4 cup flour, 1 tablespoon at a time, until barely tacky. If dough doesn’t become cohesive, add up to 1 tablespoon water, 1 teaspoon at a time, until it just comes together; process 30 seconds longer.)
2. Turn dough ball onto dry surface and knead until smooth, 1 to 2 minutes. Shape dough into 6-inch-long cylinder. Wrap with plastic wrap and set aside at room temperature to rest for at least 1 hour and up to 4 hours.
3. Cut cylinder crosswise into 6 equal pieces. Working with 1 piece of dough (rewrap remaining dough), dust both sides with flour, place cut side down on clean work surface, and press into 3-inch square. Using heavy rolling pin, roll into 6-inch square. Dust both sides of dough lightly with flour. Starting at center of square, roll dough away from you in 1 motion. Return rolling pin to center of dough and roll toward you in 1 motion. Repeat steps of rolling until dough sticks to counter and measures roughly 12 inches long. Lightly dust both sides of dough with flour and continue rolling dough until it measures roughly 20 inches long and 6 inches wide, frequently lifting dough to release it from counter. (You should be able to easily see outline of your fingers through dough.) If dough firmly sticks to counter and wrinkles when rolled out, dust dough lightly with flour.
4. Transfer pasta sheet to kitchen towel and let stand, uncovered, until firm around edges, about 15 minutes; meanwhile, roll out remaining dough. Starting with 1 short end, gently fold pasta sheet at 2-inch intervals until sheet has been folded into flat, rectangular roll. With sharp chef’s knife, slice crosswise into 3/16-inch-thick noodles. Use fingers to unfurl pasta and transfer to baking sheet. Repeat folding and cutting remaining sheets of dough. Cook noodles within 1 hour.
5. Bring 4 quarts water to boil in large Dutch oven. Add salt and pasta and cook until tender but still al dente, about 3 minutes. Reserve 1 cup pasta cooking water. Drain pasta and toss with sauce; serve immediately.
To Make Ahead: Follow recipe through step 4, transfer baking sheet of pasta to freezer, and freeze until pasta is firm. Transfer to zipper-lock bag and store for up to 2 weeks. Cook frozen pasta straight from freezer as directed in step 5.
- www.leitesculinaria.com
- www.tenatthetable.com
- www.myyearwithchris.wordpress.com
- www.omnomicon.com
- www.cooksillustrated.com
 Alice Osborne
Weekly Newsletter Contributor since 2006
Email the author! alice@dvo.com