Decorating Fun with Your Peeps
Heaven knows we all get enough of those lovely colorful bunny-shaped marshmallows, also known as Peeps, around Easter time. Well, I don’t know about you, but I only need to eat about one or two of them and I am done. So what can you do with a bunch of Peeps?
Here some ideas for ways to decorate with Peeps for Easter, (I’m going to incorporate some of these ideas to decorate for our church Easter breakfast) or ways to use up extras after Easter is over. I feel like these would be really fun crafts to do with your kids even after Easter is over. They won’t care that the holiday is over at all!
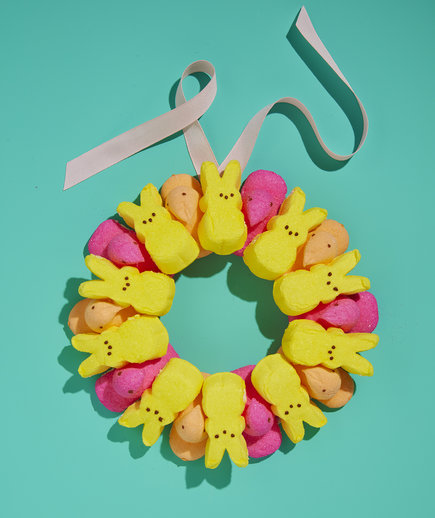
Peeps Wreath
What You’ll Need:
- Peeps Chicks and Bunnies, in various colors
- ¼-inch thick foam board
- Craft knife
- Craft glue
- Ribbon
- Straight pins
How-to:
1. To prep for this project, unwrap peeps two days prior to building the wreath—they will stiffen and become easier to work with.
2. Using a large bowl or dish, trace a circle (about 8 inches in diameter) onto the foam board.
3. Trace a 6-inch circle inside of the original circle.
4. Cut out each traced circle with a craft knife to create a 2-inch wide wreath form.
5. Glue a ribbon to the back of the wreath form for hanging. Let dry about 1 hour.
6. Arrange Peeps on your wreath form, alternating chicks and bunnies. Once you’re happy with your design, glue peeps in place and let dry at least 2 hours.
7. Once dry, poke straight pins through the back of the foam wreath form, into Peeps, for extra reinforcement.
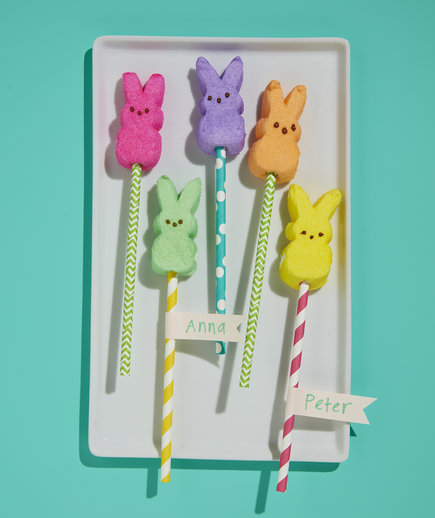
Peeps Place Cards
What You’ll Need:
- Decorative paper straws
- Peeps Bunnies, in various colors
- Scissors
- White cardstock
- Thin permanent marker
- Double stick tape
- Clear cellophane bags (optional)
How-to:
1. Insert straw into the bottom of each Peep.
2. Using scissors, trim strips of cardstock to about ¾-inches-by-4-inches.
3. Write each name in the middle of each strip of paper.
4. Wrap the left side of each strip of paper around the straw, using double stick tape to secure.
5. Package in clear cellophane bags, if desired.
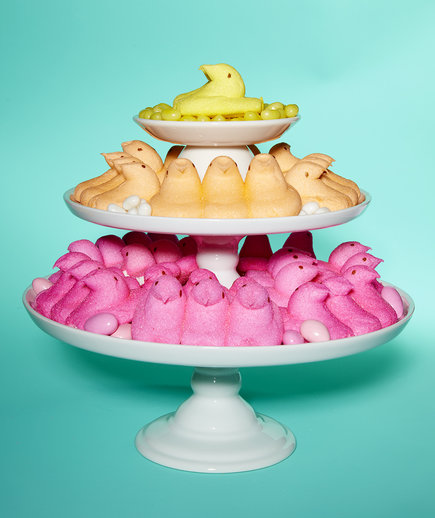
Peeps Centerpiece
What You’ll Need:
- 3 cake stands, in varying sizes
- Peeps Chicks, in various colors
- Coordinating candy (like jelly beans and Jordan almonds)
How-to:
1. Stack cake stands (if you don't have a full range of sizes, try stacking a plate on top of a bowl or mug and securing with sticky tack).
2. Fill each layer with Peeps and fill any gaps with coordinating candy to create a rainbow or ombre effect.
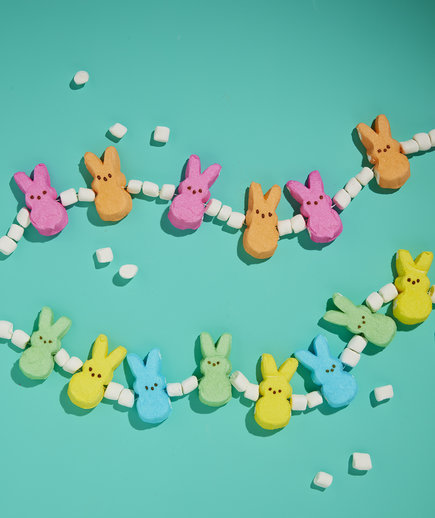
Peeps Garland
What You’ll Need:
- Dental floss
- Needle
- Peeps Bunnies, in various colors
- Mini marshmallows
- Cooking oil
How-to:
1. Thread a length of floss (measure your space before you begin to ensure you're using enough floss) through the needle.
2. Using your fingers, coat the floss and the needle with cooking oil.
3. Thread the needle and floss through Peeps and marshmallows, alternating as desired.
Tip: Thread the needle through the top half of each Peep to keep it upright as it hangs.
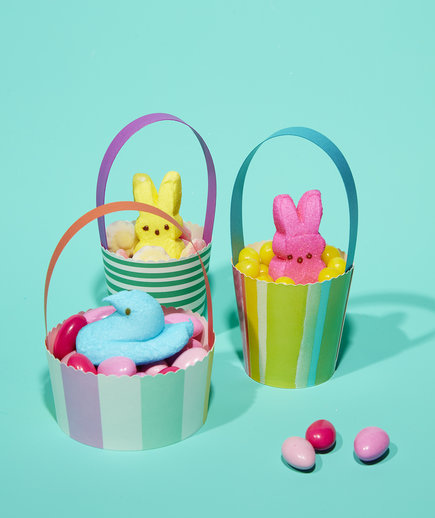
Peeps Candy Baskets
What You’ll Need:
- Decorative paper cups
- Scissors
- Scalloped scissors
- Cardstock, in coordinating colors
- Craft glue
- Candy
- Peeps Chicks or Bunnies, in various colors
How-to:
1. Using regular scissors, trim paper cups down about halfway. Then trim the edge with scalloped (or other decorative) scissors.
2. Using regular scissors, cut ¾-inch-by-8½-inch strips of cardstock for handles.
3. Attach each handle to the inside of a cup, using a small dot of glue on each side.
4. Let dry about 1 hour, and then fill with candy. Nestle a Peep in the center.
 Mary Richardson
Weekly Newsletter Contributor since 2014
Email the author! mary@dvo.com