Easy No-Carve Pumpkin Decorating
There is no activity I have loved doing more with my family even when I was a little child than carving pumpkins for Halloween with my family. It is something my husband and I did together even in the 3 or 4 years of Halloweens we had together before we had kids to carve with. Even though it’s an activity I love so much, I’ve never made it a priority to try extravagant carving patterns or anything like that. We usually just buy a kit with the patterns from Walmart or something and go from there—but we don’t mind. We have a lot of fun and that’s all that matters :)
One of the only cons about carving pumpkins (besides the messy process of getting all the insides out) is the deterioration factor. Of course all pumpkins go bad after a week or two so you usually have to time your carving for just a couple days before Halloween. If you happen to live somewhere kind of warm, however, they can get old and mushy after only a day or two! :( No bueno. That happened to us last year here in California. The previous year in Iowa it was freezing cold outside so they lasted perfectly for at least 3 weeks. But I kid you not—we carved our pumpkins and sat them outside and they were caved in and grew mold within 2 days so I had to throw them out. I was so sad.
Because of this, I have now started a new tradition of getting a few pumpkins to decorate without cutting into them so they will last me the whole month (or more) of looking festive without the mold Then we do one night of pumpkin carving right before Halloween and I don’t worry too much about the outcome and how long they’ll last. There are so many fantastic and creative ideas out there for decorating pumpkins and here are a few of my favorites I have rounded up. These are all pretty easy too!
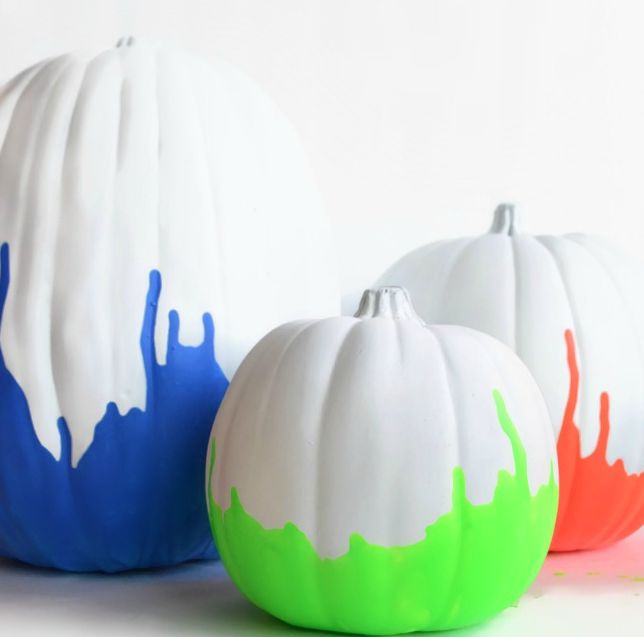
These brightly dipped creations give off a seriously cool 80’s vibe. Begin by painting your pumpkin white and then dip it into a thick pool of neon acrylic paint. Hold it upside down until you get the drip effect you want. This would also of course be cool with any color of paint (I’m thinking gold would be gorgeous!)
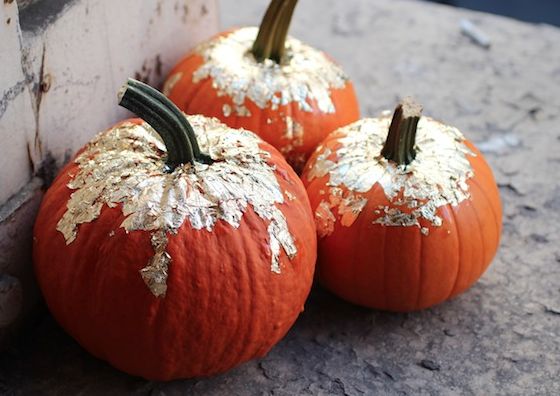
Applying fine layers of gold leaf to the surface of your pumpkin is an easy way to make a big impact. Spray adhesive, available at your local craft store, will adhere the gold to the surface.
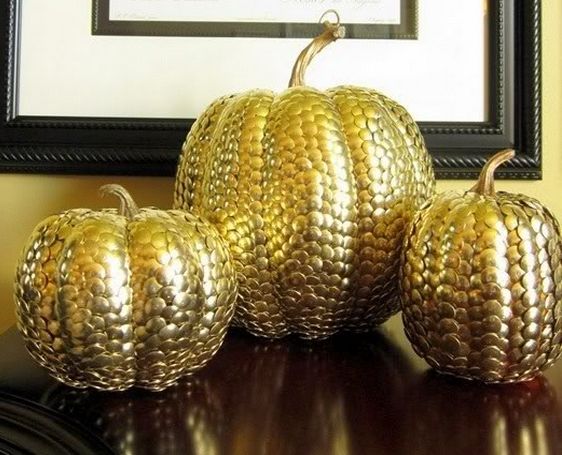
Covering your pumpkin in gold thumbtacks might be a time-consuming task, but your gilded creation will definitely be a hit. Her advice: Pick a pattern, such as top-down, and stick to it.
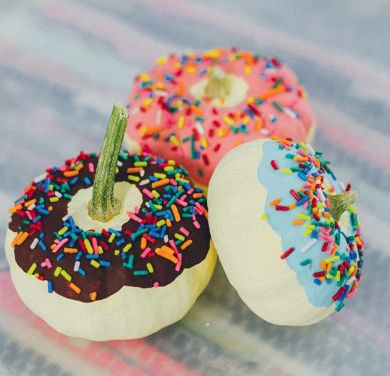
Or for something a little more whimsical, how about this donut pumpkin? These practically look good enough to eat! Begin by “frosting” your pumpkin with a painted border around the stem. Once it’s dry, you can either glue real sprinkles to the frosting or paint them on in different colors.
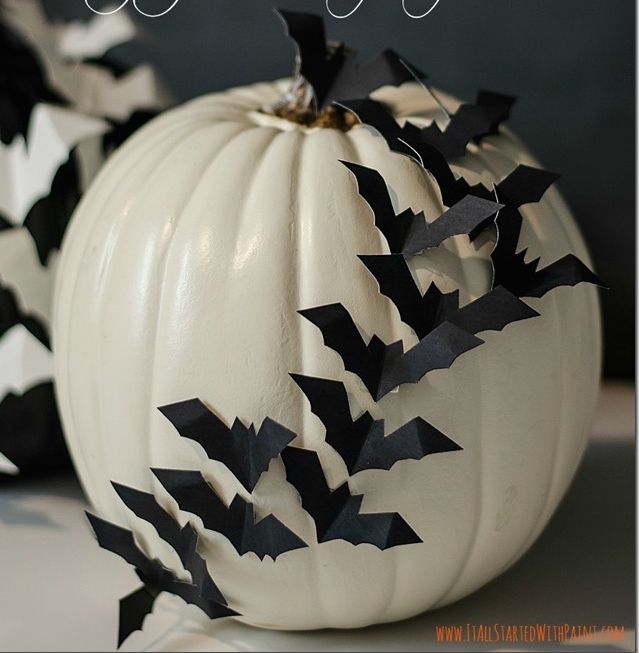
I absolutely love the monochromatic and clean look to this pumpkin. To begin, paint your pumpkin white with acrylic paint. Then make black paper cutouts of a bat. After the paint is dry, attach the cutouts to the pumpkin with tiny stickpins.
Do you guys decorate or paint your pumpkins as opposed to carving them? I’d love to know in the comments below! :)
- www.betweennapsontheporch.net
- www.madiganmade.com
- www.eightine.tumblr.com
 Mary Richardson
Weekly Newsletter Contributor since 2014
Email the author! mary@dvo.com