No More Stone-like Scones!
The Mirriam-Webster dictionary says a scone is “a rich quick bread cut into usually triangular shapes and cooked on a griddle or baked on a baking sheet.”
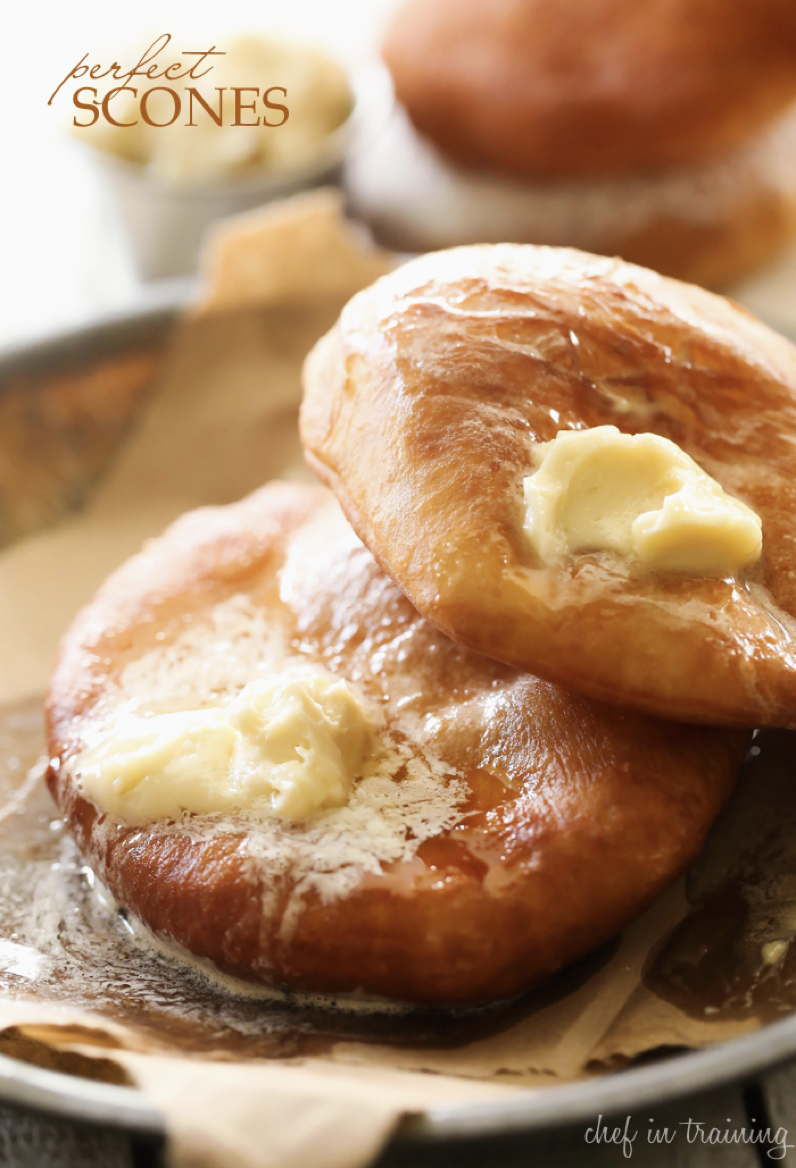
As time has gone by, all sorts of variations on the scone idea have evolved. In the British Isles, regional variations have interesting names such as Singing Hinnies, Fat Rascals, and Rock Cakes. In Utah and south-eastern Idaho, the things they call scones are most “unsconelike.” They are a fried, puffy yeast dough and are typically served with honey and butter, or sometimes covered in powdered sugar. At county and state fairs they’re called “Elephant Ears” because of their huge size. I’ve even seen smaller fried dough scones use as the buns for Sloppy Joes.
Talking about it brings back memories of the “unsconelike” scones I enjoyed during my years at Ricks College, Rexburg, Idaho. We’d travel 20 minutes to a neighboring town, Rigby, just to go to Walker’s Restaurant for their fried “scones” that we drenched in the above-mentioned honey and real butter. I’m drooling and yearning for them as we speak. (Do you have a food memory that brings on this reaction?)
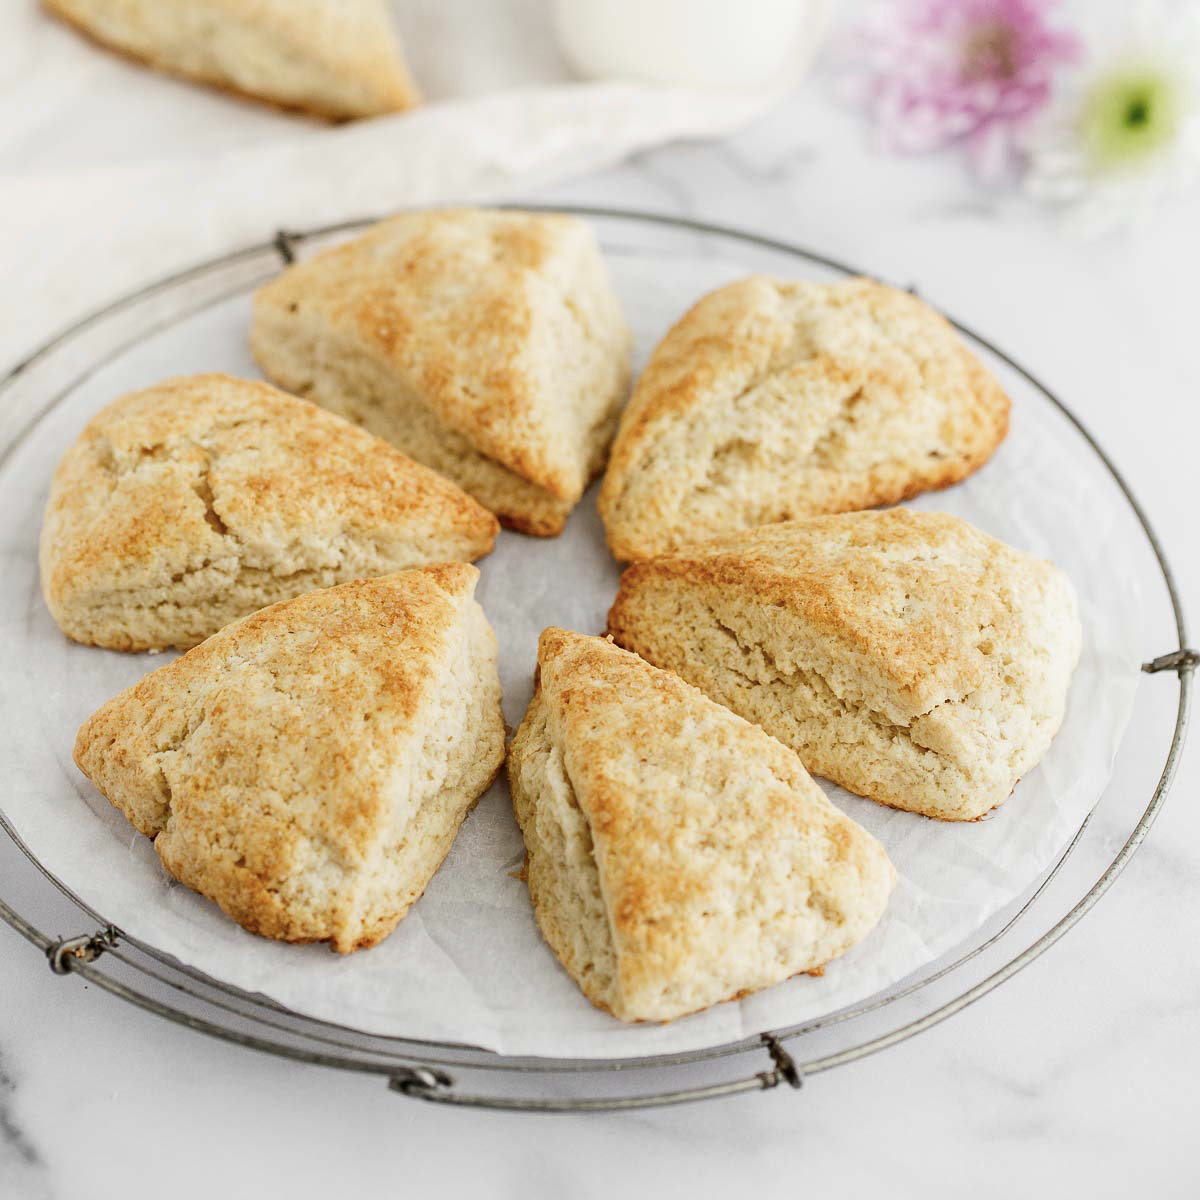
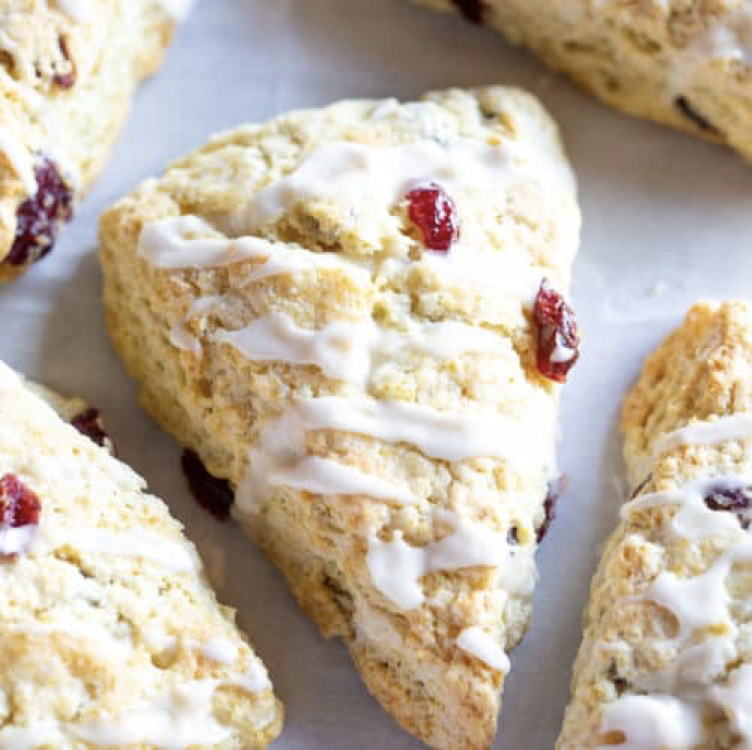
But back to the point—a TRUE (aka traditional) scone hearkens to the dictionary definition—a light, fluffy baked sweet bread. And because it’s baked and not fried, it’s not easy to reach perfection with it. (After all, anything fried turns out pretty dang good, right? Where’s the challenge in that?) A true scone should be neither too dry nor too moist. A true is not too dense nor too light and fluffy. See what I mean?
But even with these qualifications established, the bottom line really comes to personal preference. The best scones are the ones YOU like to eat. That said, though, we still want to get it right, if we possibly can. So here are a few tips (plus a recipe) on how to create delicious scones that, chances are, you will like to eat (and hopefully end up with the right balance between dry and moist, dense and fluffy).
First of all, after you’ve mixed your dry ingredients together, you want to be sure your butter is well-chilled before cutting it in. CHILLED butter is crucial. Work this only to the place where it resembles coarse meal. This helps produce a flaky texture. And this step is commonly where folks stumble—they overwork the dough.
Next, when adding the liquid ingredients, you want to lightly stir until combined. Lightly is the key word here. NEVER over-mix or over-knead—tough, stone-like scones will result. You want to avoid avoid avoid gluten formation. Keep the gluten at bay and the end product will be tender, with that perfect balance between dry and moist and dense and fluffy.

Finally, be sure to use fresh, double-acting baking powder. Baking powder loses its potency if stored past its expiration date, so always check your container. Scones are heavily dependent on the quality of the baking powder used.
And of course, be very careful with your oven temperature and baking time. Because oven temperatures vary, watch carefully. Just as in baking cookies, cakes, breads, etc., over-baking ruins the whole deal. No new news, I know.
2 cups flour
1/3 cup sugar
2 teaspoons baking powder
1/2 teaspoon salt
1/2 cup unsalted butter CHILLED
2 large eggs
1/4 cup orange juice
1 teaspoon vanilla extract
1 tablespoon orange zest
3/4 cup miniature semi-sweet chocolate chips
1 egg white mixed with ½ teaspoon water (for glaze)
sugar (for sprinkling over glaze)
Directions:
Add Recipe to Cook'n
As time has gone by, all sorts of variations on the scone idea have evolved. In the British Isles, regional variations have interesting names such as Singing Hinnies, Fat Rascals, and Rock Cakes. In Utah and south-eastern Idaho, the things they call scones are most “unsconelike.” They are a fried, puffy yeast dough and are typically served with honey and butter, or sometimes covered in powdered sugar. At county and state fairs they’re called “Elephant Ears” because of their huge size. I’ve even seen smaller fried dough scones use as the buns for Sloppy Joes.
Talking about it brings back memories of the “unsconelike” scones I enjoyed during my years at Ricks College, Rexburg, Idaho. We’d travel 20 minutes to a neighboring town, Rigby, just to go to Walker’s Restaurant for their fried “scones” that we drenched in the above-mentioned honey and real butter. I’m drooling and yearning for them as we speak. (Do you have a food memory that brings on this reaction?)
But back to the point—a TRUE (aka traditional) scone hearkens to the dictionary definition—a light, fluffy baked sweet bread. And because it’s baked and not fried, it’s not easy to reach perfection with it. (After all, anything fried turns out pretty dang good, right? Where’s the challenge in that?) A true scone should be neither too dry nor too moist. A true is not too dense nor too light and fluffy. See what I mean?
But even with these qualifications established, the bottom line really comes to personal preference. The best scones are the ones YOU like to eat. That said, though, we still want to get it right, if we possibly can. So here are a few tips (plus a recipe) on how to create delicious scones that, chances are, you will like to eat (and hopefully end up with the right balance between dry and moist, dense and fluffy).
First of all, after you’ve mixed your dry ingredients together, you want to be sure your butter is well-chilled before cutting it in. CHILLED butter is crucial. Work this only to the place where it resembles coarse meal. This helps produce a flaky texture. And this step is commonly where folks stumble—they overwork the dough.
Next, when adding the liquid ingredients, you want to lightly stir until combined. Lightly is the key word here. NEVER over-mix or over-knead—tough, stone-like scones will result. You want to avoid avoid avoid gluten formation. Keep the gluten at bay and the end product will be tender, with that perfect balance between dry and moist and dense and fluffy.
Finally, be sure to use fresh, double-acting baking powder. Baking powder loses its potency if stored past its expiration date, so always check your container. Scones are heavily dependent on the quality of the baking powder used.
And of course, be very careful with your oven temperature and baking time. Because oven temperatures vary, watch carefully. Just as in baking cookies, cakes, breads, etc., over-baking ruins the whole deal. No new news, I know.
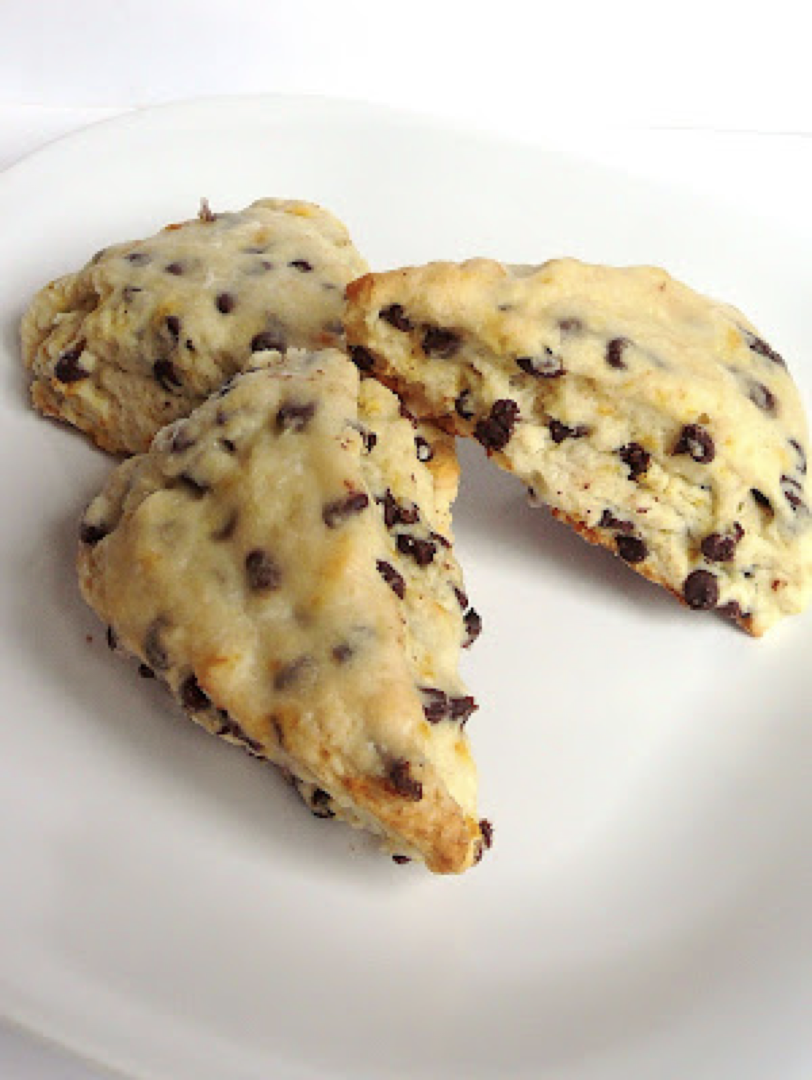
Chocolate Chip Orange Scones
Yield: 8 Scones
Ingredients:
2 cups flour
1/3 cup sugar
2 teaspoons baking powder
1/2 teaspoon salt
1/2 cup unsalted butter CHILLED
2 large eggs
1/4 cup orange juice
1 teaspoon vanilla extract
1 tablespoon orange zest
3/4 cup miniature semi-sweet chocolate chips
1 egg white mixed with ½ teaspoon water (for glaze)
sugar (for sprinkling over glaze)
Directions:
Preheat oven to 425 degrees. Grease a 9-inch-diameter circle in the center of a baking sheet. In large bowl, stir together flour, sugar, baking powder, and salt. Cut butter into ½-inch cubes and distribute them over the flour mixture.
With pastry blender, cut in butter until mixture resembles coarse crumbs. In small bowl, stir together eggs, orange juice, vanilla, and orange zest. Add egg mixture to flour mixture and lightly stir to combine (the dough will be sticky). With lightly floured hands, knead in chocolate chips until evenly distributed.
With lightly floured hands, pat dough into an 8-inch-diameter circle in the center of prepared baking sheet. With knife or bench scraper, cut into 8 wedges. Brush egg white mixture over top and sides of dough and sprinkle with sugar. Bake for 20 to 25 min. Serve warm with favorite jam, a dollop of sweetened whipped cream, or everyone’s favorite, honey and butter!
Recipe formatted with the Cook'n Recipe Software from DVO Enterprises.
Sources:
- www.livewellbakeoften.com
- www.chefintraining.com
- www.tastesbettermadefromscratch.com
- www.stocksy.com
- www.baked perfection.com
 Alice Osborne
Weekly Newsletter Contributor since 2006
Email the author! alice@dvo.com