Successful Egg-White-Whipping: Secrets to Know
Secrets to whipping egg whites? Really? I had no idea. All these years I’ve just been whipping them. Most of the time the process resulted in just what I wanted. Sometimes, though, they didn’t turn out that well. It seems there were a couple things (aka “secrets”) I didn’t know.
If, like me, you’ve had a hit or miss when making something calling for whipped egg whites—particularly lemon meringue pie—then read on to discover the secrets to successful egg-white-whipping.
Whipping egg whites is considered one of the miracles of baking. The cooking pros know, though, that this miracle is well in your control if you take it one step at a time:
1.First, start with a COLD EGG. They’re easiest to separate when they’re cold, so don’t remove them from the fridge until you’re immediately ready to use them.
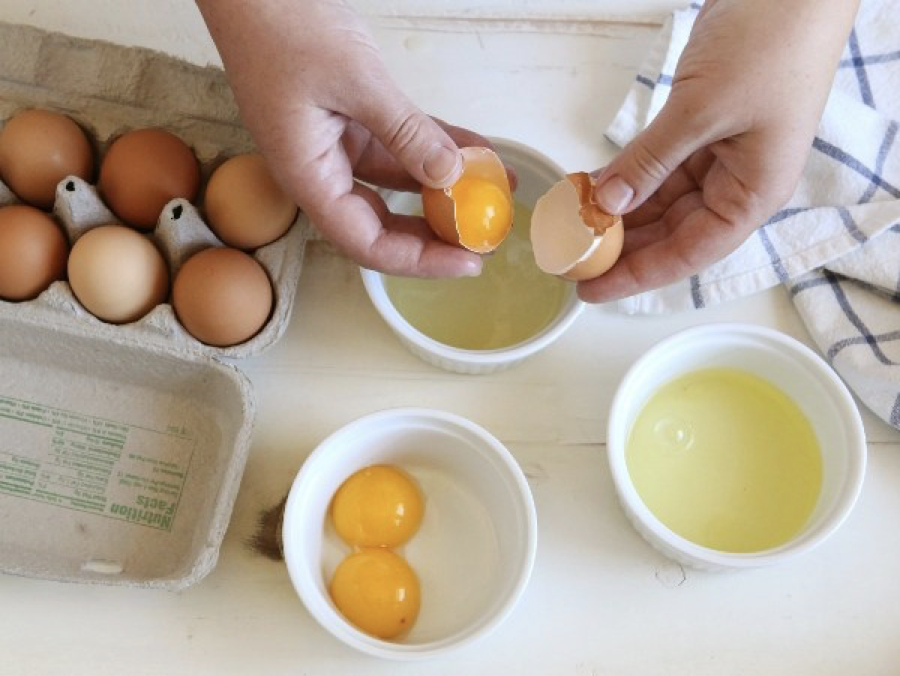
2.Second, crack flat. Edges of bowls are notorious for contributing to shells fragmenting. To avoid this, crack your egg either on your countertop or firmly on the inside of your bowl. Avoid the edges and rims. Then you can easily use the cleanly broken shell halves as your separating device.

3.Use the 3-bowl method for separating (as recommended by America’s Test Kitchen experts): Open cracked eggs over the first bowl and let the whites fall in. Drop yolks into the second bowl. Pour each white into a third “holding” bowl.
Why go to all this trouble? Because you can easily separate your first egg or eggs successfully and then on the last egg, whoops—a little yolk just happens to fall in and then contaminates all the whites. The 3-bowl method keeps any possible contamination to a bare minimum—it’s better to contaminate just one egg than several.
4.Fix any mistakes. Stray yolks can end up in whites. When this happens, use a shell fragment, and not a spoon, to remove it. The shell membrane is coated with the protein keratin, which attracts the protein in the yolks. If you use a metal spoon, the yolk will scoot out of your grasp, because it contains water and lipoproteins that don’t like metal.
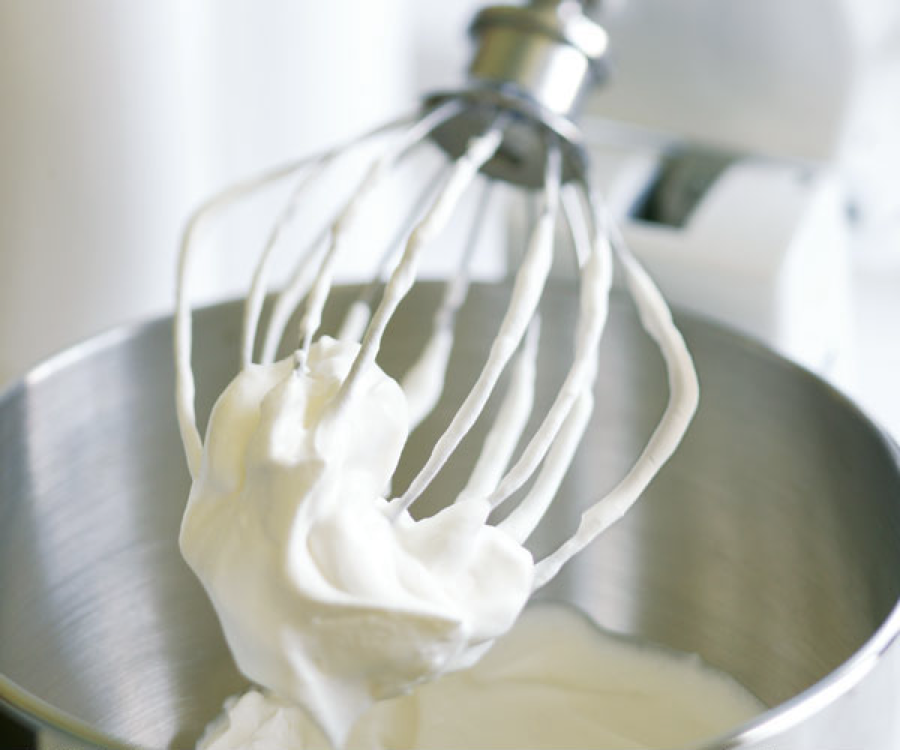
5.Whip whites in a clean, dry bowl, preferably stainless steel or copper, as plastic is porous and can retain traces of fat, while glass and ceramic bowls are slippery so it’s harder for whipped whites to billow up. (This tip was a real game-changer for me. I’d always whipped in my Pyrex bowl, but no more.)
6.Remember 2 things: 1) Fat is the enemy. Fat of any kind (egg yolk, oil, butter, etc.) prevents egg whites from whipping. 2) Cream of tartar is a friend. It’s sold in the spice aisle. It’s a white powder that is a dry acid. Acids helps egg whites whip to a larger and more stable volume. (Cream of tartar keeps indefinitely at room temperature, by the way.)
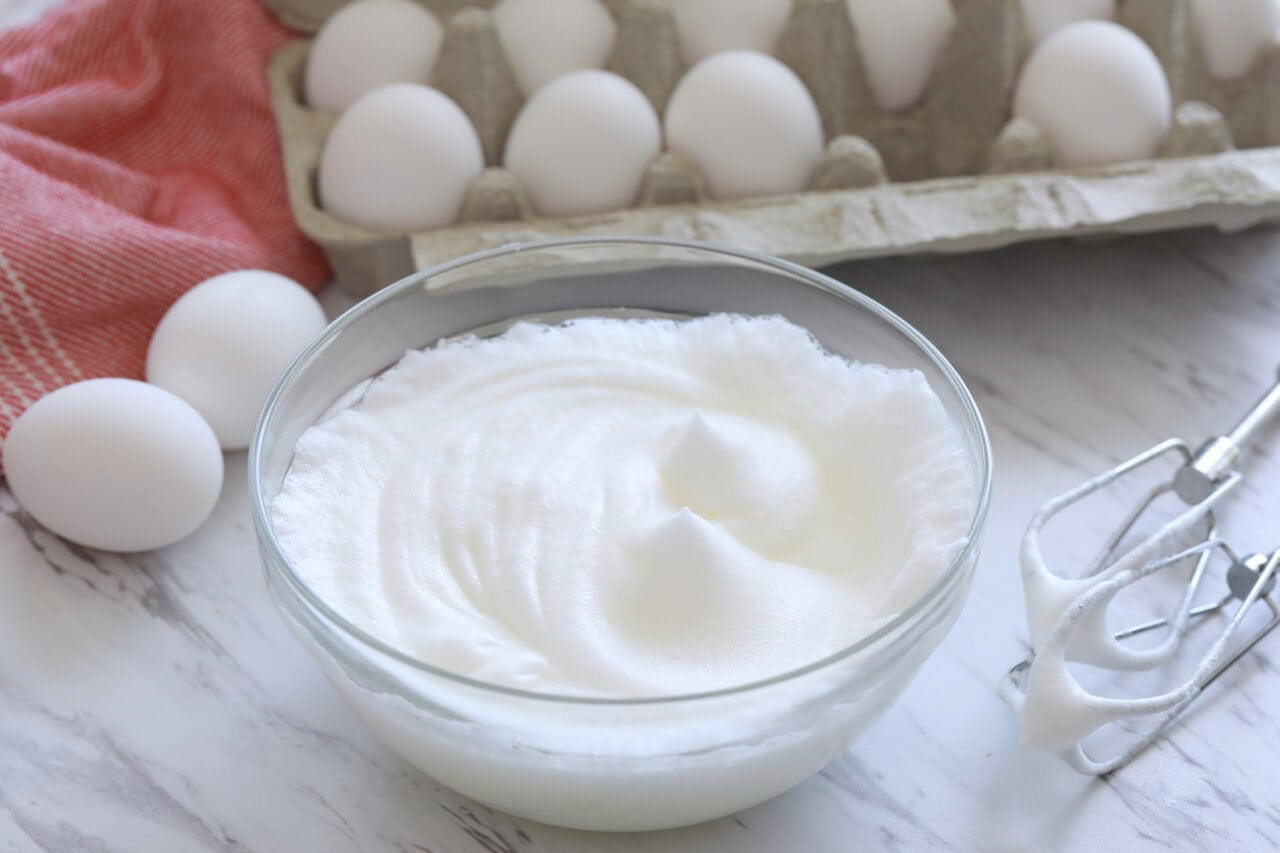
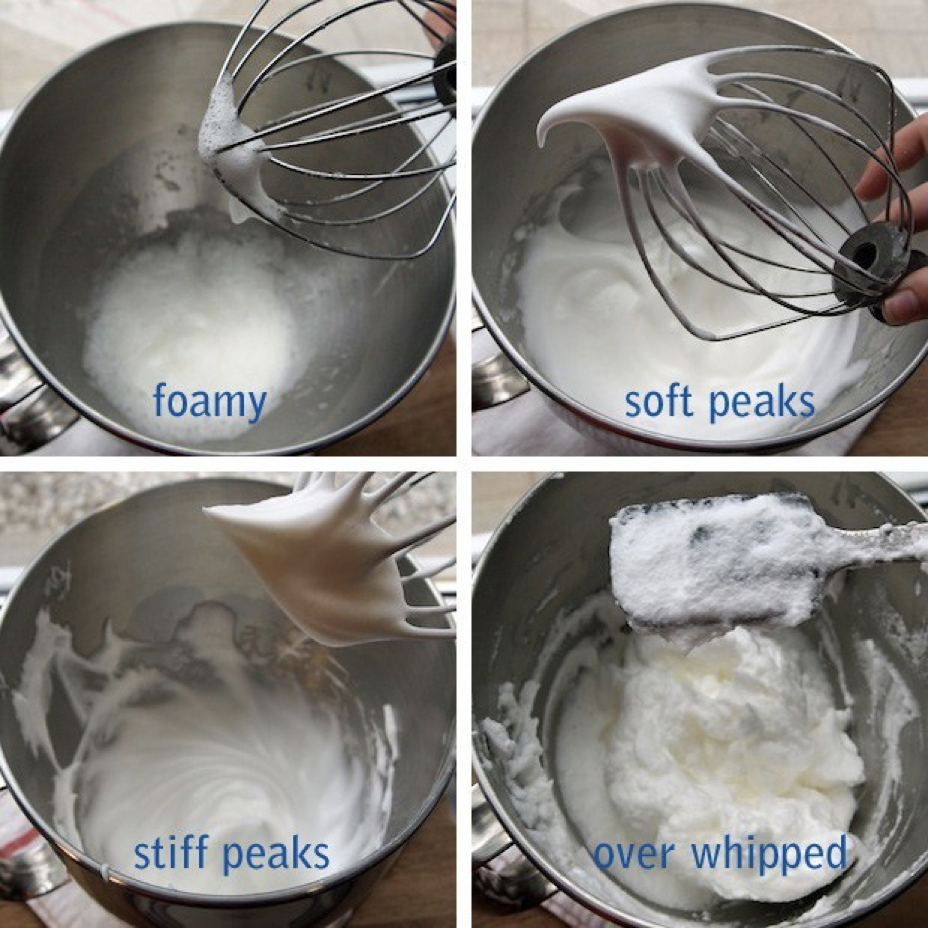
7.Know your peak differences: FOAMY, SOFT, STIFF, and OVER-BEATEN. Your recipe will tell you which peak you want. Over-beaten is the obvious one to avoid.
Now to put this new knowledge into practice, I’ll conclude with a delightful departure from your traditional lemon meringue pie. I found this delicious dessert on www.bbcgoodfood.com and it’s become a family favorite. This takes 15 minutes to prep and only 5 minutes to cook.

6 tablespoons dark chocolate 70%, grated
4 tablespoons plain, low-fat yogurt
2 large egg whites
2 teaspoons caster sugar
1 1/3 cup fresh or fozen berries (try blueberries, raspberries, even cherries, or a mix)
Directions:
Add Recipe to Cook'n
If, like me, you’ve had a hit or miss when making something calling for whipped egg whites—particularly lemon meringue pie—then read on to discover the secrets to successful egg-white-whipping.
Whipping egg whites is considered one of the miracles of baking. The cooking pros know, though, that this miracle is well in your control if you take it one step at a time:
1.First, start with a COLD EGG. They’re easiest to separate when they’re cold, so don’t remove them from the fridge until you’re immediately ready to use them.
2.Second, crack flat. Edges of bowls are notorious for contributing to shells fragmenting. To avoid this, crack your egg either on your countertop or firmly on the inside of your bowl. Avoid the edges and rims. Then you can easily use the cleanly broken shell halves as your separating device.
3.Use the 3-bowl method for separating (as recommended by America’s Test Kitchen experts): Open cracked eggs over the first bowl and let the whites fall in. Drop yolks into the second bowl. Pour each white into a third “holding” bowl.
Why go to all this trouble? Because you can easily separate your first egg or eggs successfully and then on the last egg, whoops—a little yolk just happens to fall in and then contaminates all the whites. The 3-bowl method keeps any possible contamination to a bare minimum—it’s better to contaminate just one egg than several.
4.Fix any mistakes. Stray yolks can end up in whites. When this happens, use a shell fragment, and not a spoon, to remove it. The shell membrane is coated with the protein keratin, which attracts the protein in the yolks. If you use a metal spoon, the yolk will scoot out of your grasp, because it contains water and lipoproteins that don’t like metal.
5.Whip whites in a clean, dry bowl, preferably stainless steel or copper, as plastic is porous and can retain traces of fat, while glass and ceramic bowls are slippery so it’s harder for whipped whites to billow up. (This tip was a real game-changer for me. I’d always whipped in my Pyrex bowl, but no more.)
6.Remember 2 things: 1) Fat is the enemy. Fat of any kind (egg yolk, oil, butter, etc.) prevents egg whites from whipping. 2) Cream of tartar is a friend. It’s sold in the spice aisle. It’s a white powder that is a dry acid. Acids helps egg whites whip to a larger and more stable volume. (Cream of tartar keeps indefinitely at room temperature, by the way.)
7.Know your peak differences: FOAMY, SOFT, STIFF, and OVER-BEATEN. Your recipe will tell you which peak you want. Over-beaten is the obvious one to avoid.
Now to put this new knowledge into practice, I’ll conclude with a delightful departure from your traditional lemon meringue pie. I found this delicious dessert on www.bbcgoodfood.com and it’s become a family favorite. This takes 15 minutes to prep and only 5 minutes to cook.
Chocolate and Berry Mousse Pots
Ingredients:
6 tablespoons dark chocolate 70%, grated
4 tablespoons plain, low-fat yogurt
2 large egg whites
2 teaspoons caster sugar
1 1/3 cup fresh or fozen berries (try blueberries, raspberries, even cherries, or a mix)
Directions:
1. Melt the chocolate in a heatproof bowl over a pan of simmering water, making sure the bowl doesn’t directly touch the water. Once melted, allow it to cool for 5-10 mins, then stir in the yogurt.
2. Beat the egg whites until stiff, then whisk in the sugar and beat until stiff again. Fold the whites into the chocolate mix – loosen the mixture first with a spoonful of egg white, then carefully fold in the rest, keeping as much air as possible.
3. Put berries into small glasses or ramekins, then divide mousse on top. Chill in the fridge until set.
*NOTES: Caster sugar is the term for very fine granulated sugar in the United Kingdom. British bakers and cooks value it for making meringues, custards, candies, mousses, and a number of baked goods. If using frozen berries, let thaw and drain as much as possible.
Recipe formatted with the Cook'n Recipe Software from DVO Enterprises.
Sources:
www.biggerbolderbaking.com
www.rd.com
www.completelydelicious.com
www.finecooking.com
www.fountainavenuekitchen.com
www.bbcgoodfood.com
 Alice Osborne
Weekly Newsletter Contributor since 2006
Email the author! alice@dvo.com