No Joke--These Dishes Taste Better Burnt!
Last night as I made my favorite side dish my mom made growing up I knew the exact moment they were cooked perfectly and it might not be what you think. There is a distinct aroma the instant they start to kind of burn on the bottom and that is when they taste the very best! That smell where you know the smoke alarm could go off if you left them on for another minute--that was my go-to indicator that told me they were PERFECT! One of my favorite aspects of this dish is that they are simply canned green beans, but with the right techniques, they taste like million bucks. We had a huge garden growing up and green beans were the best crop. My parents canned tons of jars every year (and still do) so we had her famous green beans as a side dish probably once a week.
I’ll share my mom’s awesome recipe for these green beans at the bottom of this article, but this really got me thinking last night--what other dishes are out there that actually taste better when they are a little burnt? Here are a few other foods that I think taste even better burnt:
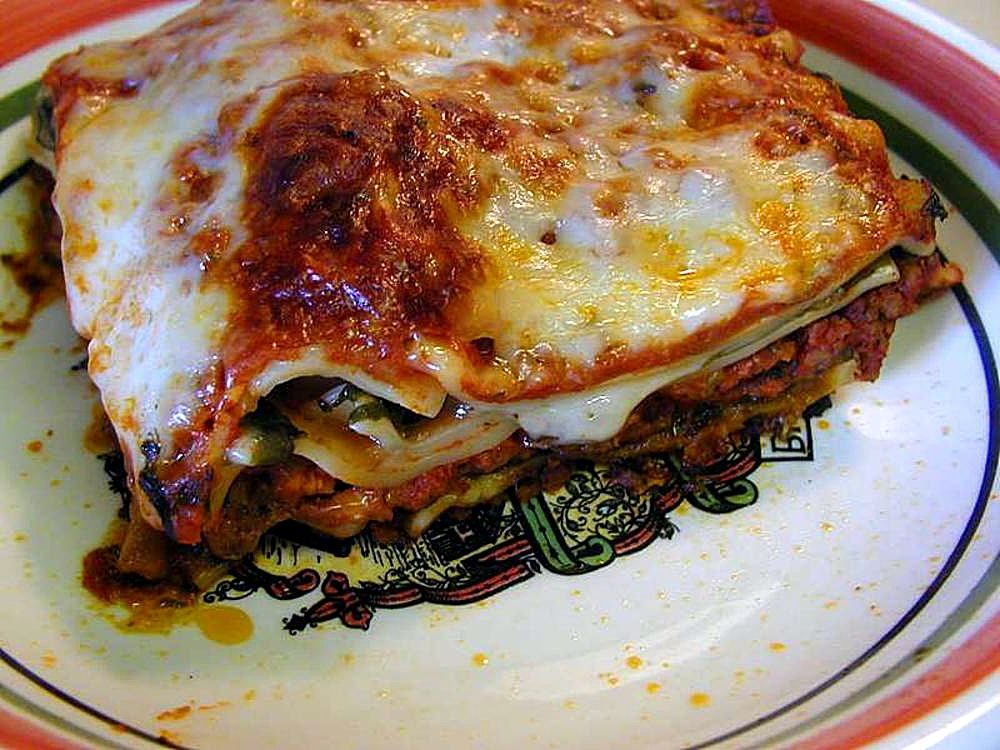
1. Lasagna. Who doesn’t love those crusty corner pieces of the pan of lasagna? Those four corner pieces are the most prized pieces of real estate and for good reason too! Sometimes the edges of those curly noodles curl up and get extra toasty--in this area you also get the most cheese that has oozed out and then gets toasty, it’s delicious! I purposefully like to leave my lasagna in just a bit too long to try and “burn” the bottom of the pan a bit too to give it more of the flavor that I love.
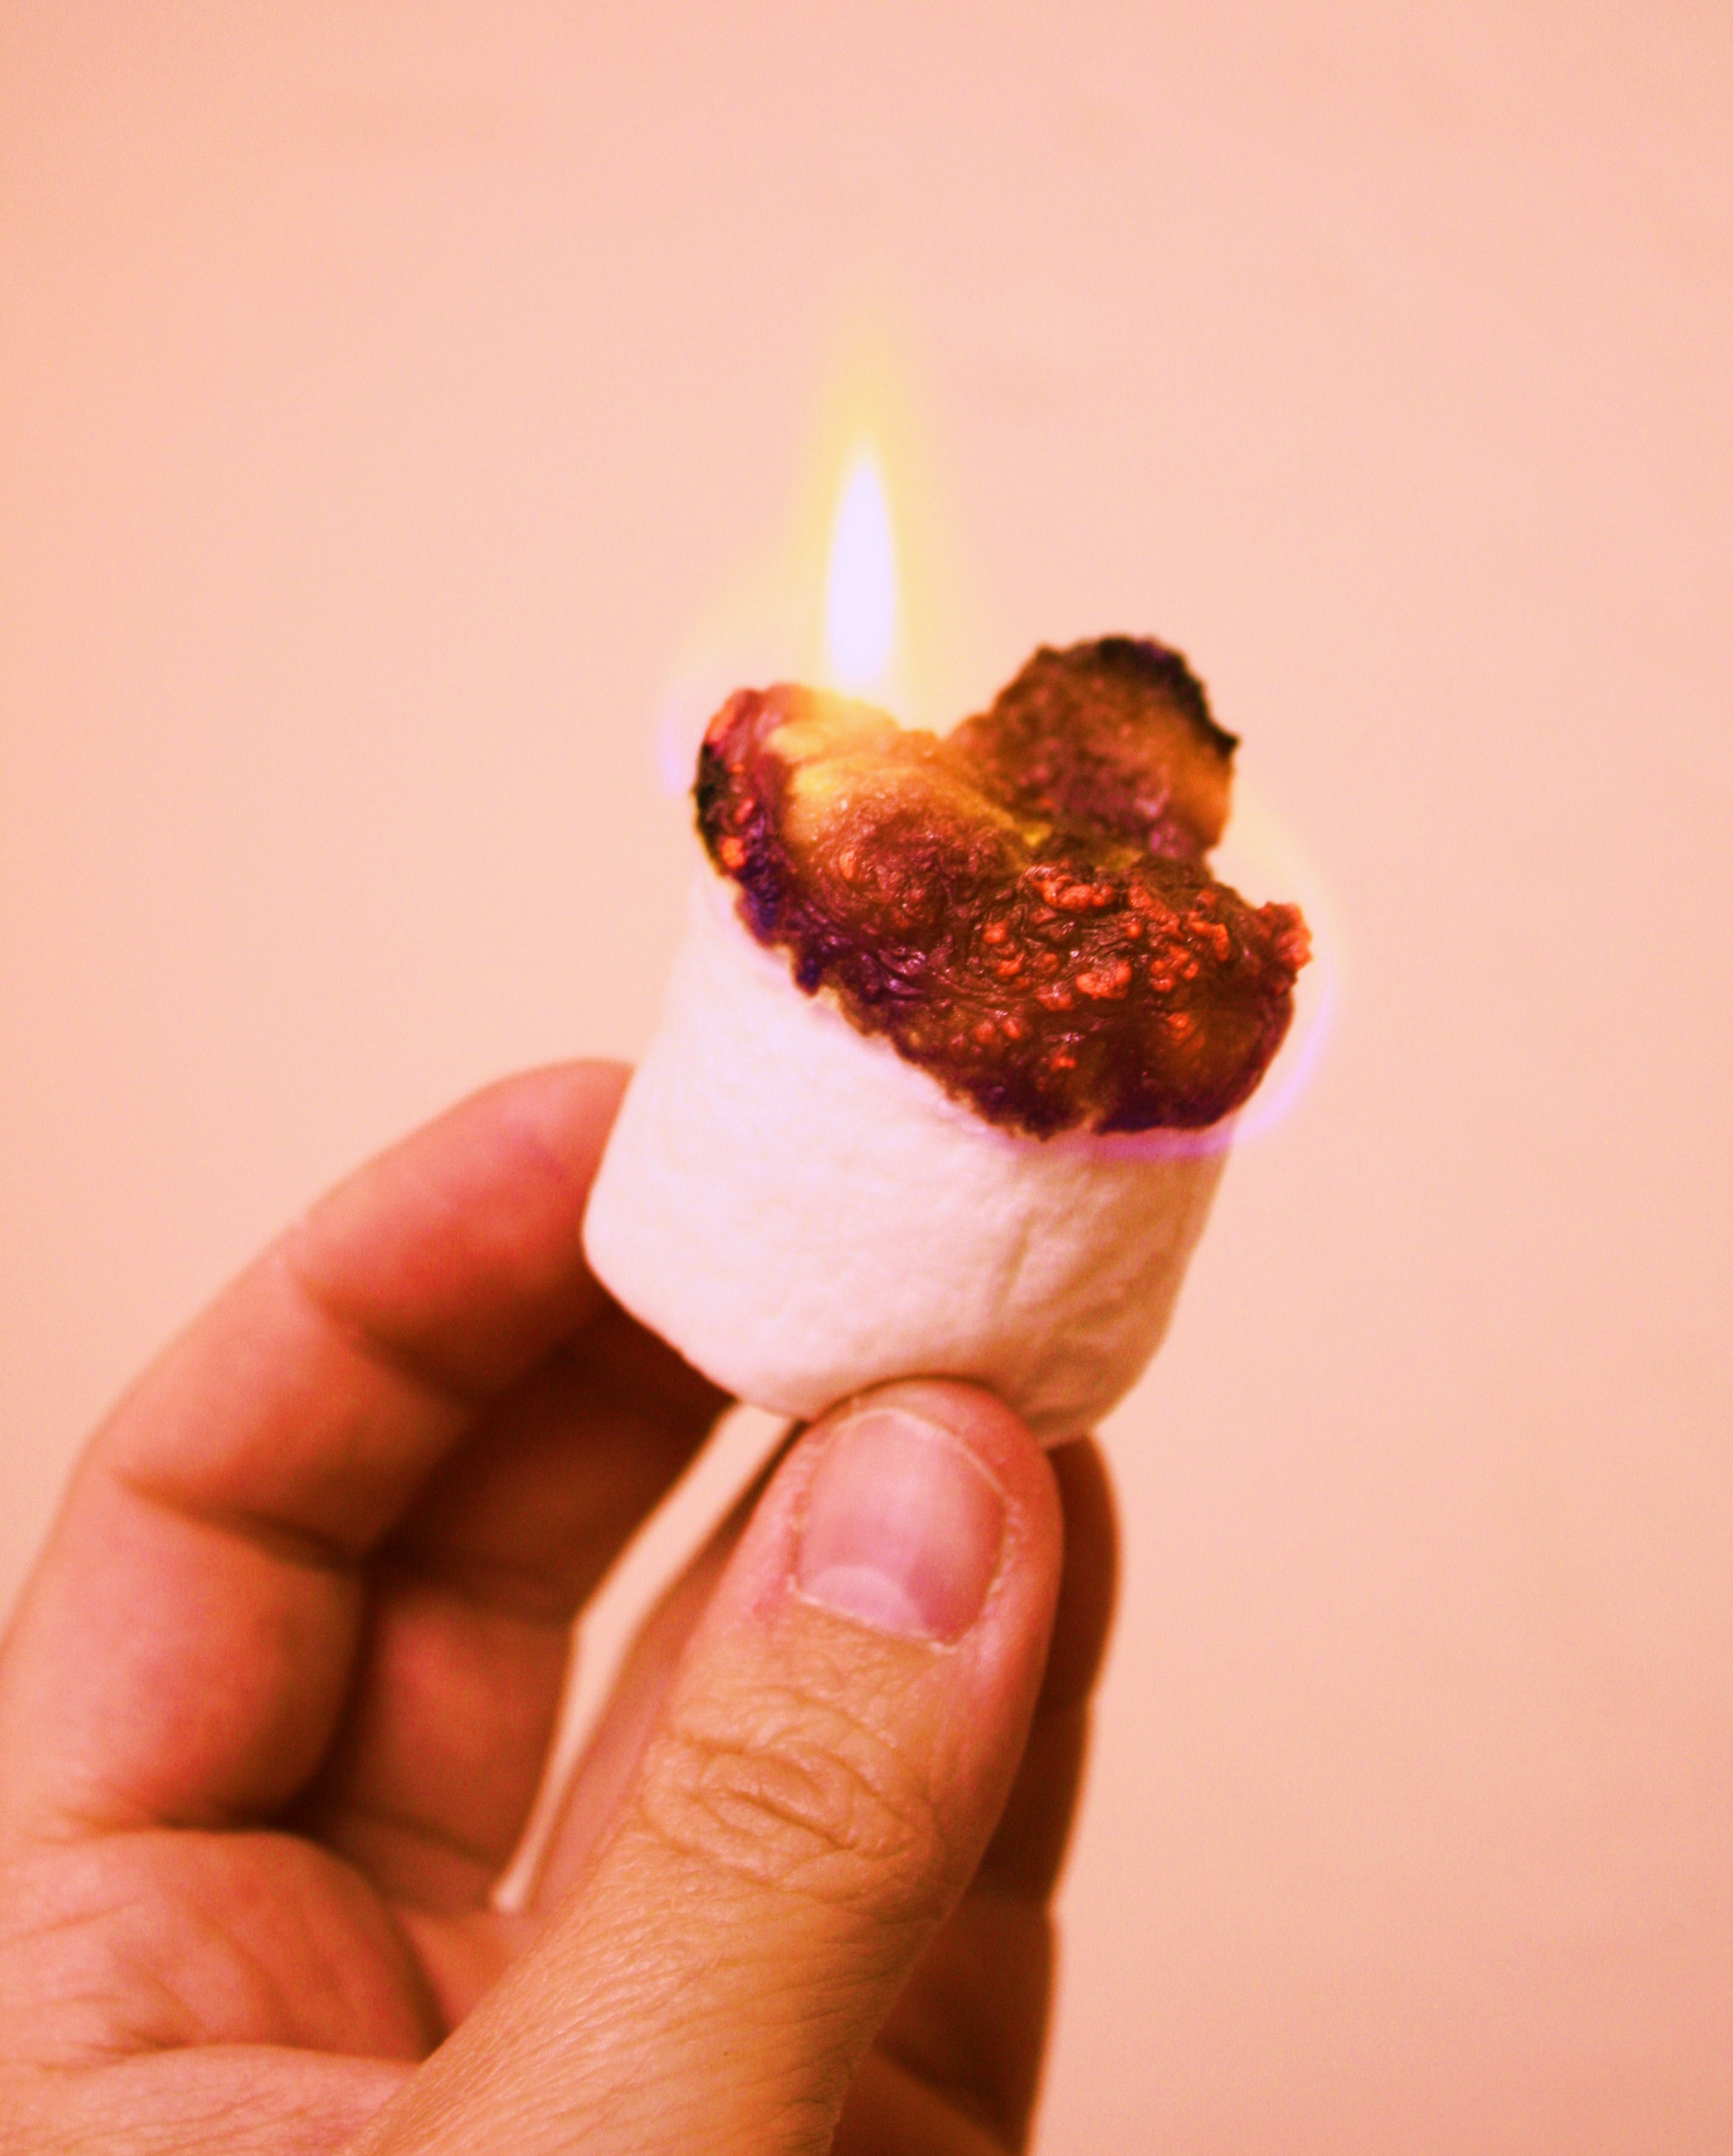
2. Marshmallows. Marshmallows are probably the most common burnt food that we all love. Most people have pretty strong opinions about their desired level of char for roasted marshmallows. You’ve got your people who toast it quite a ways away from the flame to roast it low and slow and never light it one fire--the goal is that golden brown even exterior; then you’ve got some who get right to business and light it on fire, blow it out, voila!--a perfect “roasted” marshmallow.
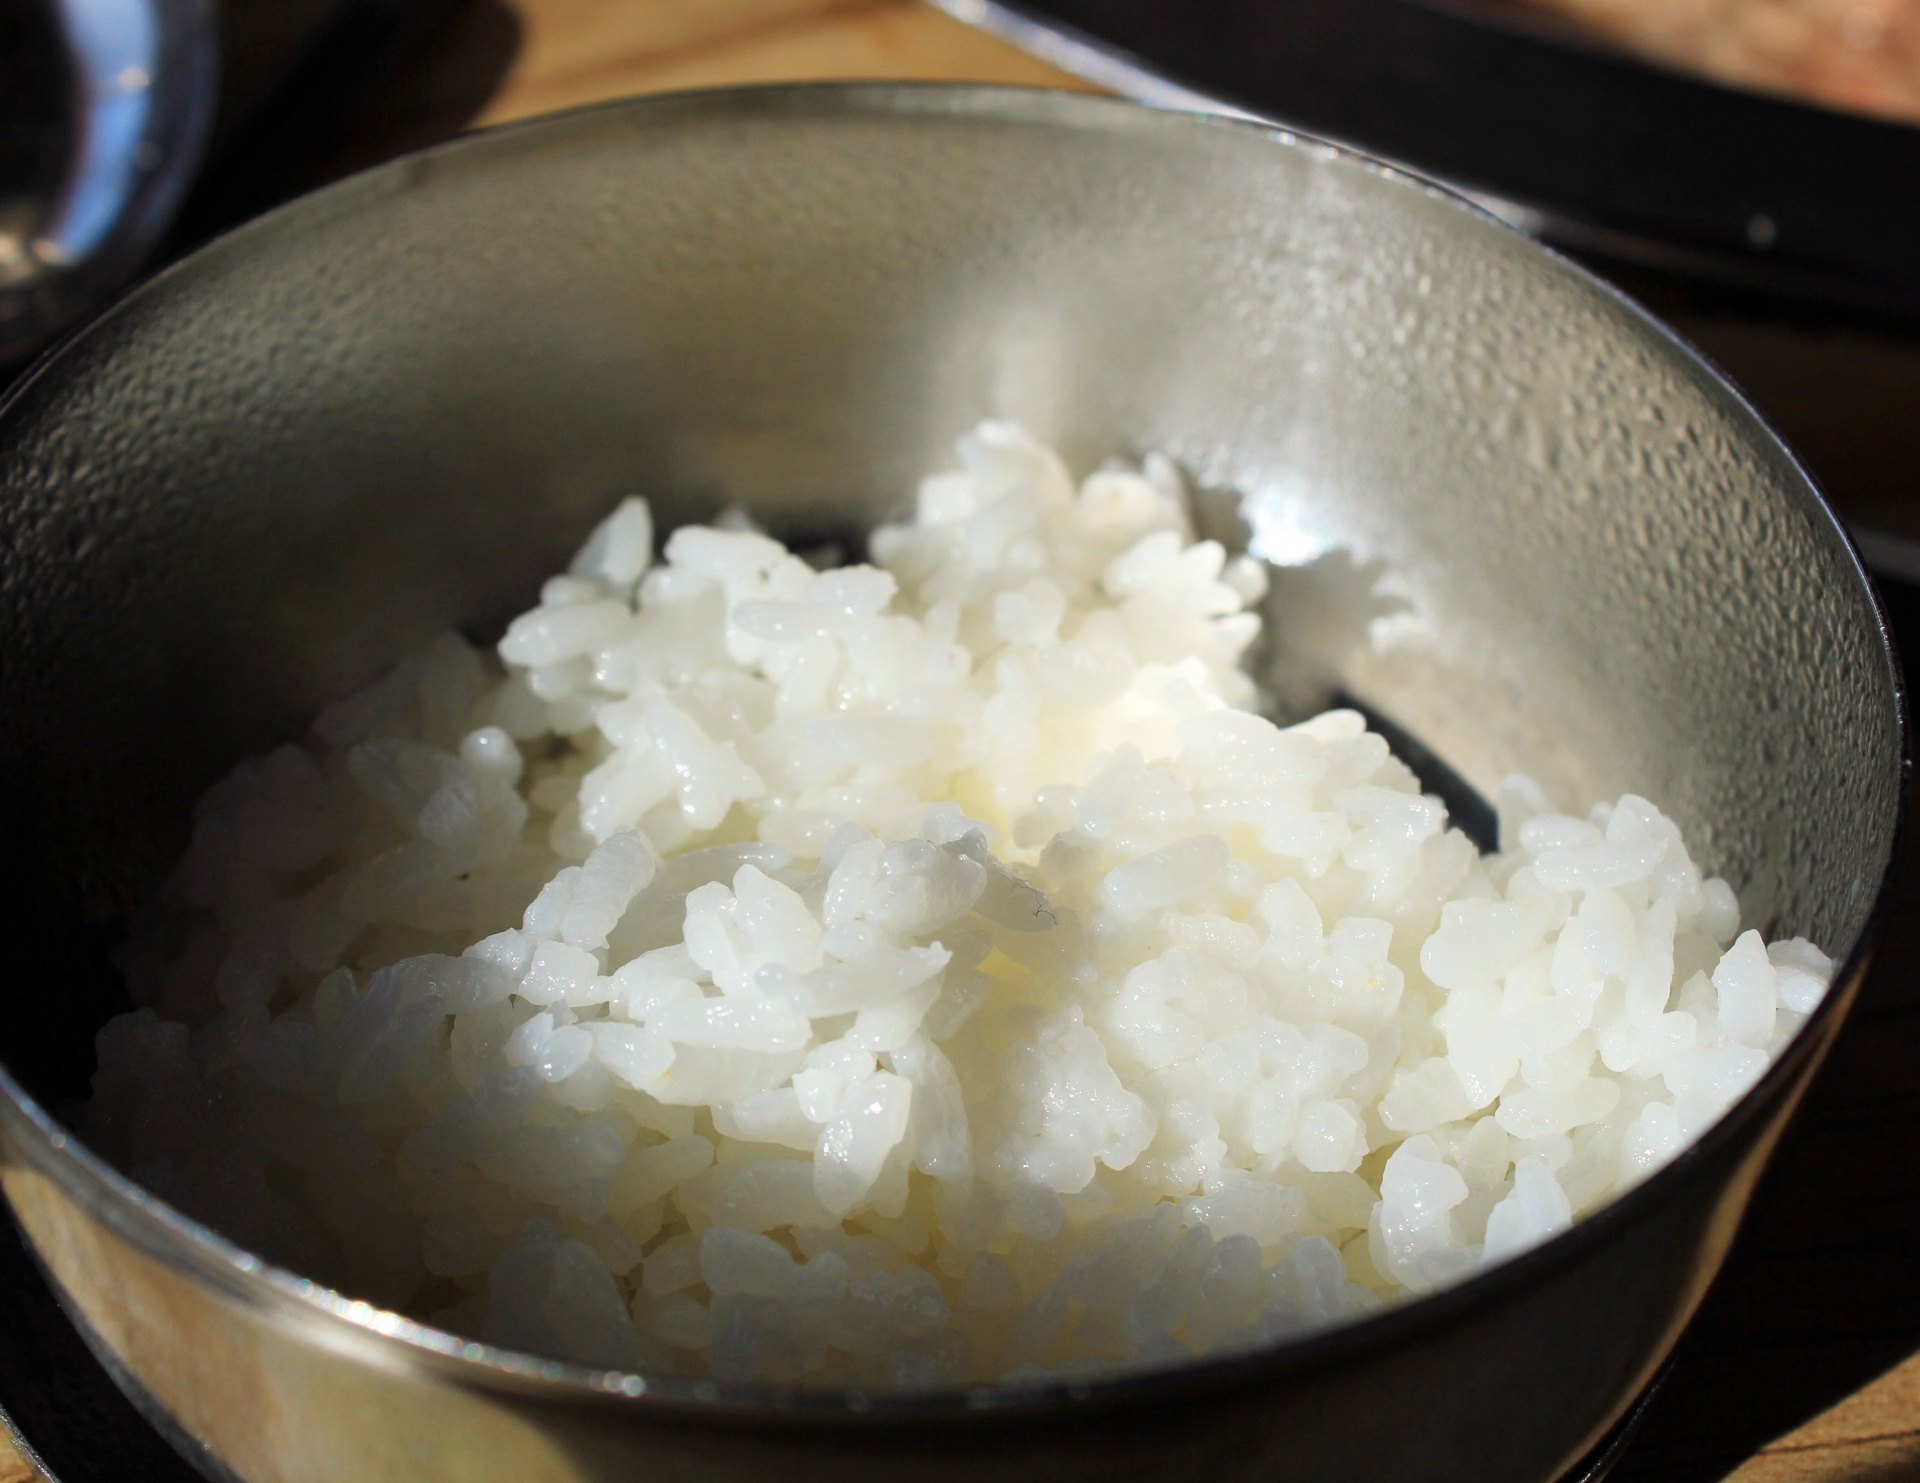
3. Rice. The best part of a pot of rice is the crusty bit at the bottom of the pan, if you leave it on just a little longer than recommended. I don’t know anyone who doesn’t love that. I especially love the crusty rice in a chicken and rice casserole. It’s not cooked yet until it’s burned, in this case :)
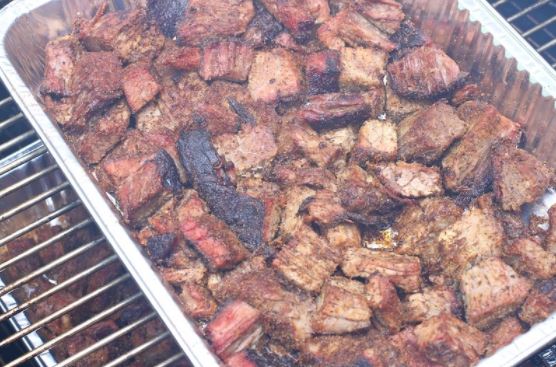
4. BBQ. I love when ribs or brisket have the charred, smoky burned flavor, which is probably why I always order the “burnt ends”, which are basically just the scraps of the brisket, cut off and smoked to crispy, almost bark-like perfection. Restaurants used to give these bits away for free, but quickly realized their mistake with how popular and delicious they are. Burnt ends are thought of as a delicacy in the BBQ world.
On another note, our master BBQ friend made us some delicious smoky, tender pork belly and sent us home with some leftovers (talk about a great friend!). I would never admit it to him but I liked it even better the next day after I charred it like crazy to have an almost bark-like exterior in my air fryer. The brown sugar rub really helped get it to that sweet, crusty perfect exterior.
5. Grilled Cheese. You know those crusty edges of the sandwich where the cheese melts out and gets kind of crusty and burned? Those are my favorite parts of the sandwich. You can achieve this on purpose by burning some cheese on purpose on the exterior of the sandwich by laying down a little pile of cheese on the hot pan before you add the buttered bread to get more of the crispy, charred crust you didn’t even know you needed.
6. Pizza crust. I get extra excited when I pick up a pizza and notice some really dark charred spots--those are extra flavorful to me. My favorite example of this is the underrated cheese pizza from Costco, which tastes the very best when there are some almost black parts of the crust and cheese. Perfecto!
Those are some of my favorite foods that I love a little on the burnt side of things. Do you have any you would add or take away from the list? I’d love to know your thoughts in the comments below.
Terry’s Transformed Canned Green Beans
2 (14.5 oz) cans green beans (one can drained, one can not drained) 1-2 Tbsp dried onion flakes 4 tablespoons butter Salt and pepper to taste Add one full can of green beans (without draining) to a frying pan. Drain the other can of beans and add to pan. Sprinkle 1-2 tablespoons of dried onion flakes over beans. Add 4 (1 tablespoon each) dabs butter to beans. Season with salt and pepper to taste. Cover pan with lid and turn on medium high--cook until water is almost completely gone and beans are very soft and buttery. If you keep a close eye you can cook for a minute or two when all the water is gone to brown the bottom of the beans to give them extra flavor. Serve immediately.
*Author’s Note: You can totally adjust the amount with the same general ratios of green beans and water: one can green beans with water and one can drained. If you are doing only one can of beans, drain about half of the water, etc. Add the amount of dried onions, salt and pepper you like to taste.
2 (14 1/2-ounce) cans green beans (one can drained, one can not drained)
1 - 2 tablespoons dried minced onion
4 tablespoons butter
salt and pepper to taste
Directions:
I’ll share my mom’s awesome recipe for these green beans at the bottom of this article, but this really got me thinking last night--what other dishes are out there that actually taste better when they are a little burnt? Here are a few other foods that I think taste even better burnt:
1. Lasagna. Who doesn’t love those crusty corner pieces of the pan of lasagna? Those four corner pieces are the most prized pieces of real estate and for good reason too! Sometimes the edges of those curly noodles curl up and get extra toasty--in this area you also get the most cheese that has oozed out and then gets toasty, it’s delicious! I purposefully like to leave my lasagna in just a bit too long to try and “burn” the bottom of the pan a bit too to give it more of the flavor that I love.
2. Marshmallows. Marshmallows are probably the most common burnt food that we all love. Most people have pretty strong opinions about their desired level of char for roasted marshmallows. You’ve got your people who toast it quite a ways away from the flame to roast it low and slow and never light it one fire--the goal is that golden brown even exterior; then you’ve got some who get right to business and light it on fire, blow it out, voila!--a perfect “roasted” marshmallow.
3. Rice. The best part of a pot of rice is the crusty bit at the bottom of the pan, if you leave it on just a little longer than recommended. I don’t know anyone who doesn’t love that. I especially love the crusty rice in a chicken and rice casserole. It’s not cooked yet until it’s burned, in this case :)
4. BBQ. I love when ribs or brisket have the charred, smoky burned flavor, which is probably why I always order the “burnt ends”, which are basically just the scraps of the brisket, cut off and smoked to crispy, almost bark-like perfection. Restaurants used to give these bits away for free, but quickly realized their mistake with how popular and delicious they are. Burnt ends are thought of as a delicacy in the BBQ world.
On another note, our master BBQ friend made us some delicious smoky, tender pork belly and sent us home with some leftovers (talk about a great friend!). I would never admit it to him but I liked it even better the next day after I charred it like crazy to have an almost bark-like exterior in my air fryer. The brown sugar rub really helped get it to that sweet, crusty perfect exterior.
5. Grilled Cheese. You know those crusty edges of the sandwich where the cheese melts out and gets kind of crusty and burned? Those are my favorite parts of the sandwich. You can achieve this on purpose by burning some cheese on purpose on the exterior of the sandwich by laying down a little pile of cheese on the hot pan before you add the buttered bread to get more of the crispy, charred crust you didn’t even know you needed.
6. Pizza crust. I get extra excited when I pick up a pizza and notice some really dark charred spots--those are extra flavorful to me. My favorite example of this is the underrated cheese pizza from Costco, which tastes the very best when there are some almost black parts of the crust and cheese. Perfecto!
Those are some of my favorite foods that I love a little on the burnt side of things. Do you have any you would add or take away from the list? I’d love to know your thoughts in the comments below.
Terry’s Transformed Canned Green Beans
2 (14.5 oz) cans green beans (one can drained, one can not drained) 1-2 Tbsp dried onion flakes 4 tablespoons butter Salt and pepper to taste Add one full can of green beans (without draining) to a frying pan. Drain the other can of beans and add to pan. Sprinkle 1-2 tablespoons of dried onion flakes over beans. Add 4 (1 tablespoon each) dabs butter to beans. Season with salt and pepper to taste. Cover pan with lid and turn on medium high--cook until water is almost completely gone and beans are very soft and buttery. If you keep a close eye you can cook for a minute or two when all the water is gone to brown the bottom of the beans to give them extra flavor. Serve immediately.
*Author’s Note: You can totally adjust the amount with the same general ratios of green beans and water: one can green beans with water and one can drained. If you are doing only one can of beans, drain about half of the water, etc. Add the amount of dried onions, salt and pepper you like to taste.
Terry’s Transformed Canned Green Beans
Serving size: 5
Calories per serving: 108
Ingredients:
Calories per serving: 108
2 (14 1/2-ounce) cans green beans (one can drained, one can not drained)
1 - 2 tablespoons dried minced onion
4 tablespoons butter
salt and pepper to taste
Directions:
Add one full can of green beans (without draining) to a frying pan. Drain the other can of beans and add to pan. Sprinkle 1-2 tablespoons of dried onion flakes over beans. Add 4 (1 tablespoon each) dabs butter to beans. Season with salt and pepper to taste. Cover pan with lid and turn on medium high--cook until water is almost completely gone and beans are very soft and buttery. If you keep a close eye you can cook for a minute or two when all the water is gone to brown the bottom of the beans to give them extra flavor. Serve immediately.
*Author’s Note: You can totally adjust the amount with the same general ratios of green beans and water: one can green beans with water and one can drained. If you are doing only one can of beans, drain about half of the water, etc. Add the amount of dried onions, salt and pepper you like to taste.
*Author’s Note: You can totally adjust the amount with the same general ratios of green beans and water: one can green beans with water and one can drained. If you are doing only one can of beans, drain about half of the water, etc. Add the amount of dried onions, salt and pepper you like to taste.
Recipe formatted with the Cook'n Recipe Software from DVO Enterprises.
Sources:
- www.needpix.com
- www.commons.wikimedia.org
- www.pixnio.com
- www.spoonuniversity.com
 Mary Richardson
Weekly Newsletter Contributor since 2014
Email the author! mary@dvo.com