How to Separate Your Recipes Into Useful Groups
Let’s face it, we don’t always like to read long articles, thick books, or dense recipes. If reading it will cost us more time than we have, we always put it down. This is a tragedy when it means that we never get to try that recipe that just might change our lives.
However, did you know that the solution may be as simple as making the recipe look better? For example, if you’re making a pizza, it might be wise to separate the dough, sauce and toppings into distinct groups.
There are many little changes you can make to the way your recipes are written that will make the entire experience easier and faster, and therefore, more fun. If you can learn to do this, then you’ll save time in the kitchen and might finally try that complicated braised lamb shank recipe you’ve been eyeing.
One of the best tips for making your recipe more readable is to separate your ingredients into groups. Let’s see if I can explain my point… Which listing of ingredients is easier to understand at a glance?
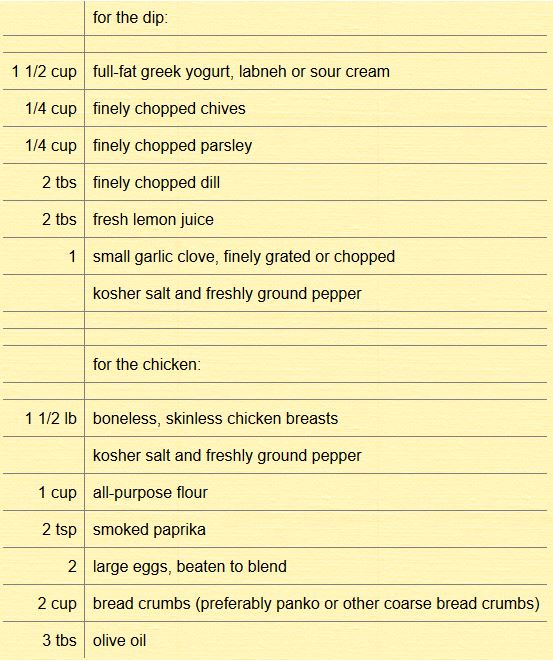
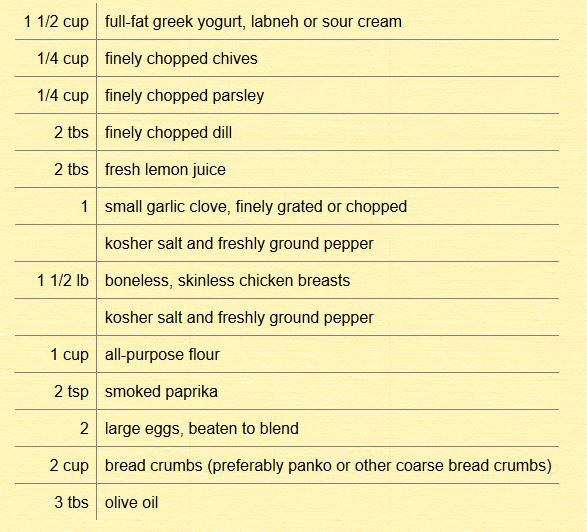
If I did my job right, the picture on the left is a lot easier to read. Its ingredients are clearly separated and marked as either “for the dip” or “for the chicken.” Meanwhile, the photo on the right is an eye-sore of ingredients smashed together. Frankly, I would never cook the recipe on the right.
To separate and label your ingredients like the photo above, here are the steps
One. Figure out what will be your groups of ingredients. Click the top ingredient in one of the groups.
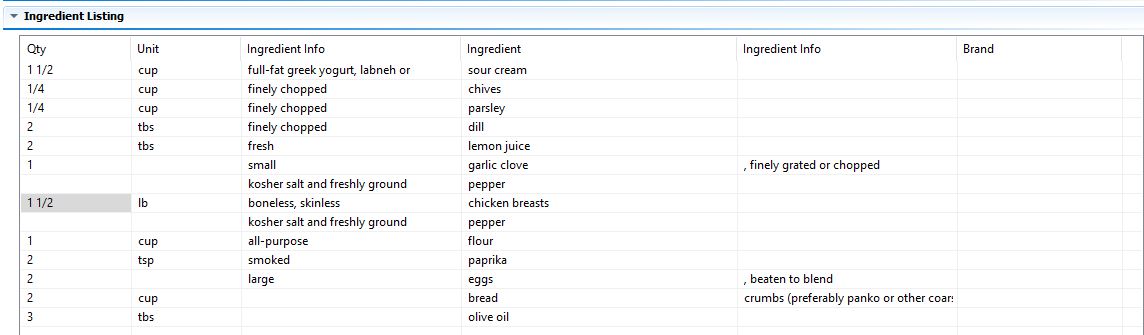
In this picture, I’ve selected the “1 1/2 lbs boneless, skinless chicken breasts” as the top of one ingredient group.
Two. Click the green plus sign (I’ve pointed to it with an arrow in the picture). This will add a space above the ingredient you clicked.
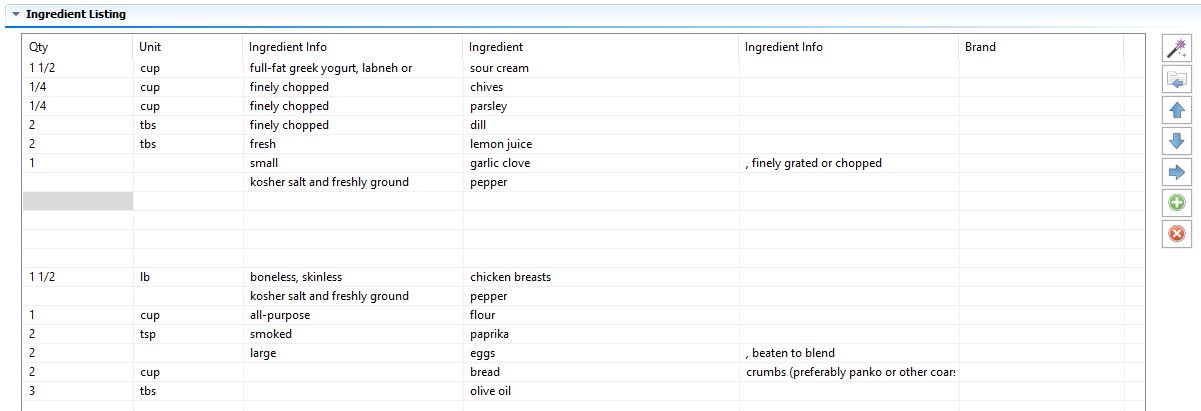
In my recipes, I’ve added 4 spaces because I like to make the separation of ingredients obvious.
Third. Select the new blank row you created. In the “Ingredient Info” field, type the name of the category.

By now, you’ll have a nicely separated and labeled group of ingredients. Just follow the same steps for all the other groups.
If you have any other skills you want to learn or questions about the Cook’n program, feel free to reach out to me and make a request. I’ll be waiting for your email!
 Matthew Christensen
Weekly Newsletter Contributor since 2014
Email the author! matthew@dvo.com