Creative Ways to Use Your Panini Press
When I got a panini press for my Birthday, I was over-joyed, a metallic jaws of death created to crimp sandwiches. Due to its massive size and limited purpose, I was certain it would find no place in either my kitchen or my regular cooking regimen. With some trial and error and a lot of food blog trolling, I have now amassed a collection of dishes that makes the appliance nearly indispensable. Beyond what can be smashed between two slices of bread, panini presses are a great tool for quick and delicious meals and snacks. In the old day I just took my 2 cast iron pans and a brick and called that my best Grilled Cheese press. I had to turn to the internet to find out to do this with this machine and 2 pieces of bread.
Who would know people call these 2 pieces of bead with something between the so many different names. From Barros Jarpa, Barros Luco, Bauru, BLT, Croque-monsieur, Cuban, Dagwood, Ham and Cheese, Jibarito, Melt, Monte Cristo, Muffuletta, Panini, Patty melt, Pebete, Reuben, Tramezzino, Wrap, and Zapiekanka. Now I'm really crazy.
Now for a little bitty history; During the 1980s, the term paninaro was used in Italy to denote a youngsters' culture typical of teenagers supposed to eat and meet in sandwich bars such as Milan's Al Panino and then in the first US-style fast food restaurants opened in Italy. Although the first U.S. reference to panini dates to 1956, and a precursor appeared in a 16th-century Italian cookbook, the sandwiches became trendy in Milanese bars, called paninoteche, in the 1970s and 1980s.
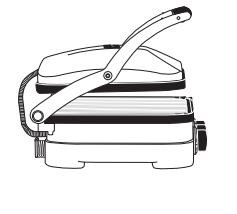
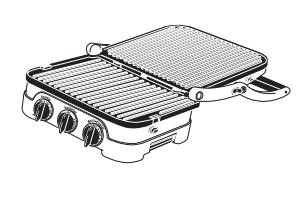
This ultimate kitchen tool, offers you five separate cooking options. Simply flip the reversible cooking plates and adjust the hinge to use as a contact grill, panini press, full grill, full griddle, or half grill/half griddle. I also got plates for making waffles; we will talk about that later. I'm going to break this up into sections. First what the Panini press and beyond just grilled cheese, next the Grill'n and bak'n on the Panini, and lastly Gridl'n & Waffl'n, (no pun on Cook'n) yes with the Panini it is now an all-in-one tool.
The basic start with 2 pieces of bread, some kind of cheese, and or meat, veggie and some oil or butter.
Step 1
Choose your bread.
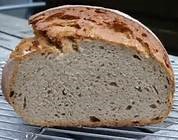
A panini can be made with just any kind of bread I love sourdough, but most use Italian, ciabatta, focaccia, or any kind you like best would my choice.
If you are using a roll of bread, slice your bread into 3/4-inch-thick slices. You can also cut your bread length-wise.
· Keep round tops turned in. If you try to grill round-topped bread, like baguettes, you'll find it can be a real challenge to keep them from rolling over and spilling out the contents of your panini. To solve this problem, turn round-topped bread inside out so that the flat surfaces make contact with the grill.
Step 2
Spread or spray olive oil on the inside of your bread.
Use a spray, brush or butter knife to distribute a small around of olive oil over the inside surface of your bread. You want to achieve a thin coating
here, so make sure not to glob a lot of olive oil onto the bread.
· If you use too much oil, your bread will get soggy!
Step 3
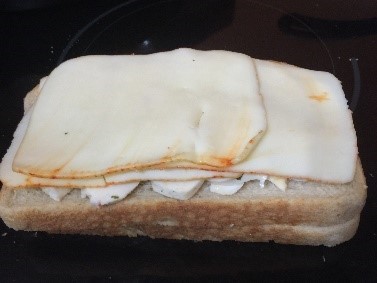
Add your favorite cheese
.
Put one slice of cheese on each piece of bread, against the olive oil. Adding a piece of cheese to each side of the sandwich helps it stick together better while cooking. You can use grated cheese too.
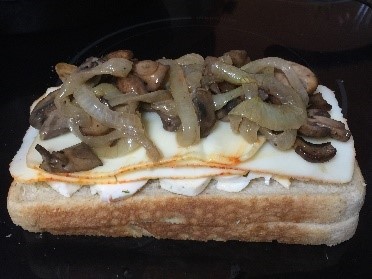
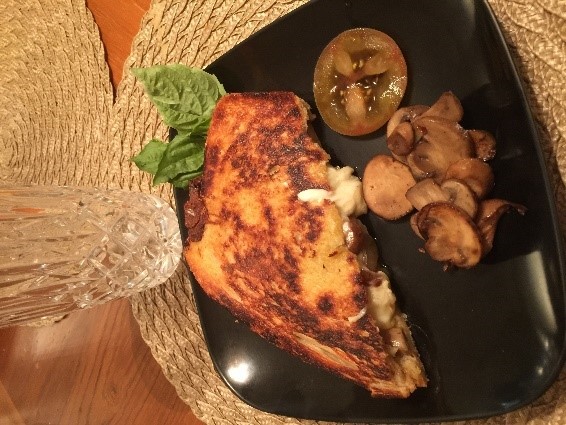
If you prefer, you can put cheese just on one side I used TradeJoes Marinated Fresh Mozzarella Cheese a second layer of Munster cheese

Step 4
Add your filling
.
You can get as creative as you want with your panini. Make it vegetarian panini with sliced mushrooms, sliced onions and tomatoes, zucchini and/or use a
combination of sliced meats or shredded meat.
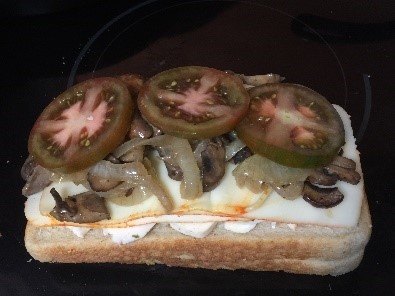
You can increase the amount of filling if you prefer a thicker panini. I found these brown tomatoes at Traders Joes and wanted to give them a try
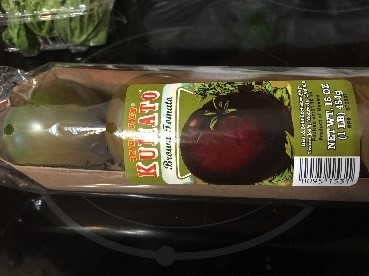
then the Kumato tomatoes
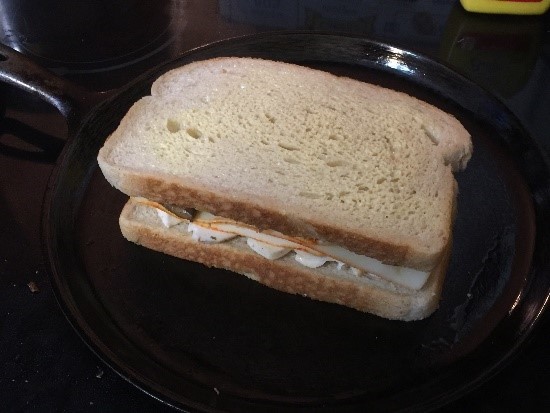
Add the top bread and butter on the outer side
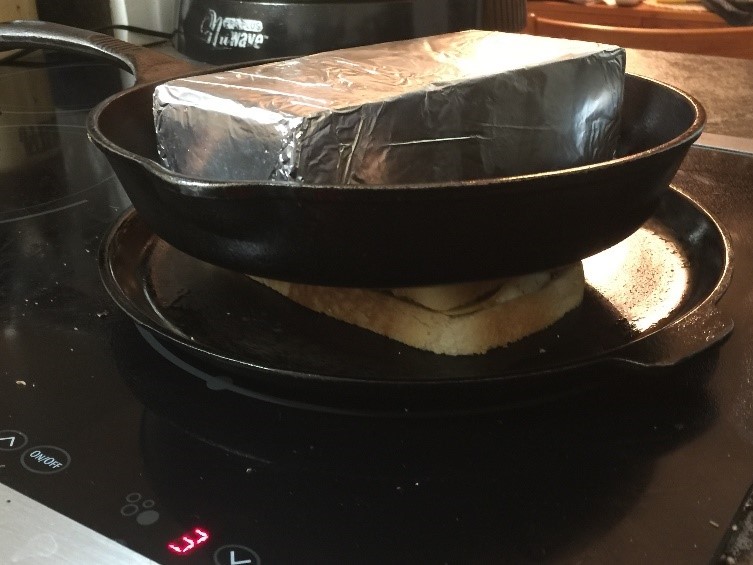
Step 5 Fixing it the old way or the new way.
Back in the old days I just heated up 2 cast iron pans to 375° and I got brick from Home depo for $.45 covered with Reynolds Wrap Heavy-Duty Aluminum Foil then 4 to 8 minutes check it then plate it and eat it.
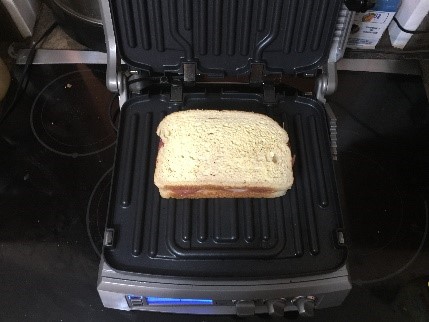
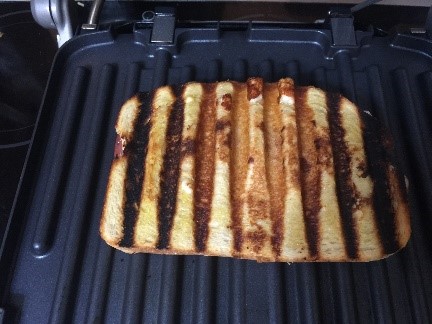
Panini Press
Using the panini press to grill sandwiches, breads and quesadillas.
The word "panini" is Italian for grilled sandwiches. Panini can include any combination of ingredients such as vegetables, meat and cheese layered between two pieces of fresh-baked bread. The sandwich is then pressed between two grill or griddle plates to toast the bread and warm the sandwich. Experiment to make a variety of savory or sweet sandwiches for any meal. We recommend using fresh-baked bread to produce the best tasting panini. Popular breads used for panini are focaccia (a flat bread frequently baked with rosemary, salt and onion on top), michetta (a small round roll with a crisp crust), ciabatta (are ctangular bread with a slightly domed crust) and thick slices of classic Italian bread. We recommend the grill side of the plates because traditional - style panini sandwiches have grill marks on the bread. However, depending upon the type of sandwich you are preparing, you may wish to use the griddle side of the plates or any combination of the two. The griddler functions as a panini press in the same manner that it functions as a Contact Grill. The Panini press was designed with a unique handle and hinge that allow the cover to adjust to the thickness of the sandwich you are preparing, and to rest there evenly. Light pressure can be applied to the handle to press and heat the sandwich to your liking. When cooking two or more panini, it is important that the thickness of the sandwiches is consistent so the cover will close evenly on the panini.
Full Griddle
Use the Panini press as a Full Griddle to cook pancakes, eggs, French toast, hash browns and breakfast meats. When you use the Panini press as a Full Griddle, open the cover so it lies flat, creating a double, flat cooking surface.
In this position, the foods you are preparing will have to be turned over for cooking. When using this cooking function, the griddle side of the plates should be used. Cooking on the Full Griddle is a wonderful way to prepare breakfast for two or for a large family. The large surface area allows you to cook a variety of different foods at the same time, or large amounts of your favorite food.
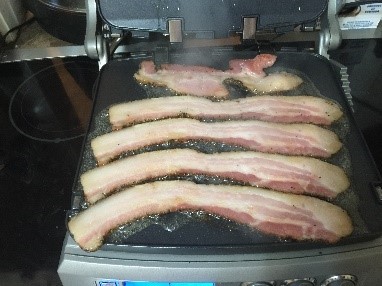
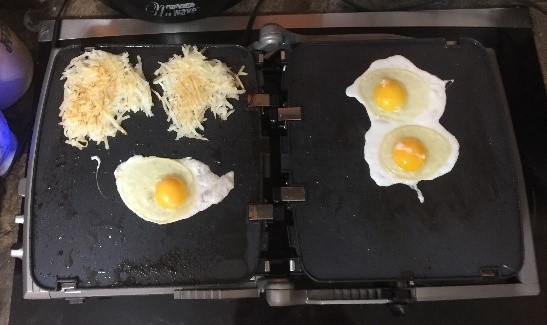
Time for Breakfast for Two this ultimate kitchen tool, offering you a quick easy way fix bacon, eggs and hash browns in around 15 minutes. Just place your bacon on a cold surface set it to 450° close the lid and about 6 minutes later your bacon is done.
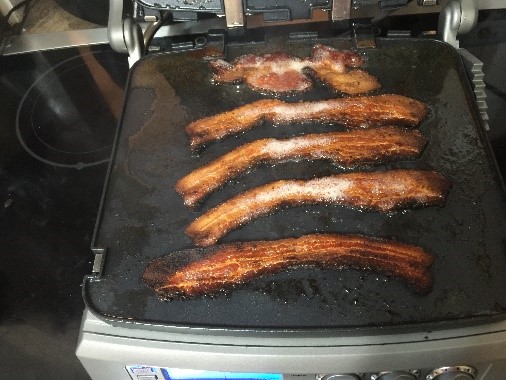
The move the top lid to full open add your hash brown to start cooking then need to cook for 5 min and turn down to 350° add your eggs and 2 to 3 minutes.
Full Grill
Use the Panini press as a Full Grill to cook burgers, steak, poultry (we do not recommend cooking bone-in chicken, since it does not cook evenly on a Full Grill), fish and vegetables.
Full Grill refers to using the Panini press with the cover lying flat, creating a double, flat cooking surface. In this position, the foods you are grilling will have to be turned over for cooking. When the Panini press is used as a Full Grill, the grill side of the plates should be used. Cooking on the Full Grill is the most versatile method of using the Griddler. With the Full Grill, you have double the surface area (200 sq. inches) for grilling. You have the option of cooking different types of foods on separate plates without combining their flavors, or cooking large amounts of the same type of food. The Full Grill also accommodates different cuts of meat with varying thicknesses, allowing you to cook each piece to your liking.
Half Grill/Half Griddle
Use the Panini press as a Half Grill/Half Griddle in order to create full meals like bacon and eggs or steak and potatoes at the same time.
When using the Panini press as a Half Grill/ Half Griddle, simply place the unit in the flat position and insert one plate with the grill side facing up, and another plate with the griddle side facing up. This cooking option allows you to use either the grill/panini temperature or the griddle temperature selector.
Contact Grill
Use the Panini press as a Contact Grill to cook burgers, boneless pieces of meat and thin cuts of meat and vegetables. The Contact Grill function works best when you want to cook something in a short amount of time or when you are looking for a healthy method of grilling. When cooked on the contact grill, food When cooking more than one food item in the Contact Grill, it is important that the thickness of food items is consistent so the cover will close evenly on the food.
will cook quickly because you are grilling both sides of the food at the same time. The ribs on the grill side of the plates, combined with the grease spout at the rear of the plate, allow the grease to drip
from the meat and drain off the plates. When the Panini press is used as a Contact Grill, the grill side of the plates is recommended. Rest the cover evenly on top of the food until it has reached the desired cooked temperature. The Panini press was designed with a unique handle and hinge that allow the cover to adjust to the thickness of the food. You can easily grill anything from a thinly sliced potato to a thick sirloin steak with even results.
There you have it! I hope you will consider investing in a Panni Press or using the one you already have. Enjoy!
- https://www.dvo.com/link/0119_174352678.html
- https://www.dvo.com/link/0119_174449403.html
- https://www.dvo.com/link/0119_174520905.html
- https://www.dvo.com/link/0119_174540370.html
 Dave Smith
Featured Guest