A Timely Idea for Those Weenie Roasts to Come!
We must meet Rebecca one day. She’s a recipe developer, cookbook author, and creator of the wonderful site, Foodie with Family (www.foodiewithfamily.com). She has so much fun messing around in the kitchen. One of her adventures I’d like to pass along is making your own marshmallows.
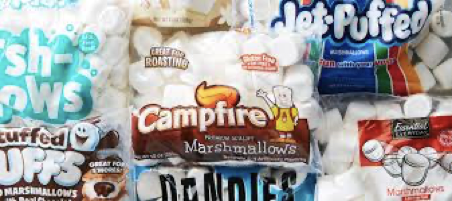
The idea of making my own came to me when we couldn’t find any of the large ones in our grocery store this past weekend. We had a weenie roast and of course, wanted s’mores. DANG…no marshmallows to be found.
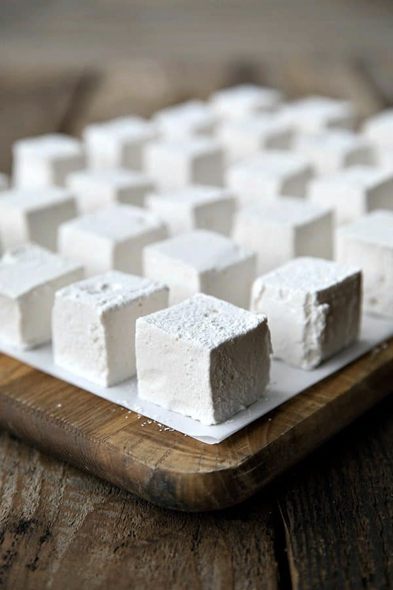
Well, the idea is timely, because there are only more weenie roasts to come. First, though, I wondered, how are homemade any different from the store-bought kind? Homemade marshmallows are plush, chewy, and sweet. They’re not starchy-tasteless and cardboardy like store bought versions. They contain healthy amounts of collagen supporting gelatin. And, you can add even more health factor by substituting mineral-rich honey for the corn syrup.
What’s especially nice is their flavor. It’s more intense. And speaking of flavor, the sky’s the limit with this. Peppermint, almond, chocolate, lemon, and so on…don’t hesitate to get creative and daring. How about dusting them in coffee for mocha mallows? Or maybe orange-flavored mallows dipped in chocolate? On my.
Another great thing about making marshmallows is there’s no need for special equipment. You just need a very protective oven mitt and a hand mixer. A stand mixer fitted with a whisk attachment is best, but the hand mixer will work just fine.
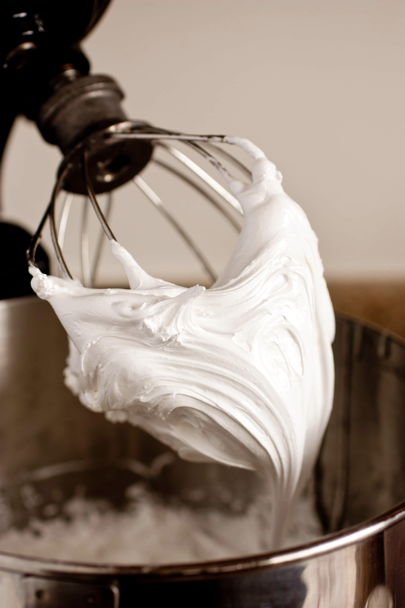
The reasoning around using a stand mixer is sound because basically you’re whipping air into boiling hot candy syrup for some time. In other words, there’s going to be steam. And holding your hand over that with a hand-mixer is going to become uncomfortable long before the minimum 10 minutes of beating time is done. This is where the stand mixer is worth its weight in gold.
In total, here’s the list of gear for marshmallow-making:
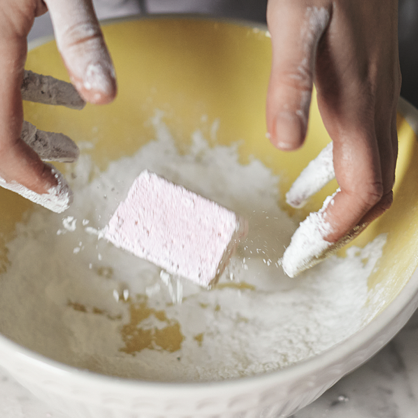
Once made, toss the cut marshmallows with a little extra powdered sugar. This keeps them from sticking together. Then place them in an airtight container and store at room temperature. They should keep quite well for up to 3 weeks at room temperature.
Now before I share Rebecca’s recipe, I’ll end with her homemade marshmallow tips:
3 envelopes Knox unflavored gelatin
1/2 cup cold water
2 cups sugar
2/3 cup light corn syrup
1/4 cup water
1/2 teaspoon salt
1 tablespoon vanilla extract or combination of other flavor extracts
confectioners' sugar
Directions:
Add Recipe to Cook'n
The idea of making my own came to me when we couldn’t find any of the large ones in our grocery store this past weekend. We had a weenie roast and of course, wanted s’mores. DANG…no marshmallows to be found.
Well, the idea is timely, because there are only more weenie roasts to come. First, though, I wondered, how are homemade any different from the store-bought kind? Homemade marshmallows are plush, chewy, and sweet. They’re not starchy-tasteless and cardboardy like store bought versions. They contain healthy amounts of collagen supporting gelatin. And, you can add even more health factor by substituting mineral-rich honey for the corn syrup.
What’s especially nice is their flavor. It’s more intense. And speaking of flavor, the sky’s the limit with this. Peppermint, almond, chocolate, lemon, and so on…don’t hesitate to get creative and daring. How about dusting them in coffee for mocha mallows? Or maybe orange-flavored mallows dipped in chocolate? On my.
Another great thing about making marshmallows is there’s no need for special equipment. You just need a very protective oven mitt and a hand mixer. A stand mixer fitted with a whisk attachment is best, but the hand mixer will work just fine.
The reasoning around using a stand mixer is sound because basically you’re whipping air into boiling hot candy syrup for some time. In other words, there’s going to be steam. And holding your hand over that with a hand-mixer is going to become uncomfortable long before the minimum 10 minutes of beating time is done. This is where the stand mixer is worth its weight in gold.
In total, here’s the list of gear for marshmallow-making:
- 2 quart saucepan
- Whisk
- heatproof spatula
- stand mixer with whisk attachment
- square cake pan
- plastic wrap
- non-stick cooking spray (see my article on cooking sprays, please)
Once made, toss the cut marshmallows with a little extra powdered sugar. This keeps them from sticking together. Then place them in an airtight container and store at room temperature. They should keep quite well for up to 3 weeks at room temperature.
Now before I share Rebecca’s recipe, I’ll end with her homemade marshmallow tips:
- Stir together the sugar, water, and corn syrup in your saucepan ONLY until the sugar is dissolved. Once it reaches that point, don’t stir it again until it has come to a boil and boiled hard for 1 minute. If you do stir again, you risk crystallizing your sugar which leaves little crunchy bits in your marshmallows. This isn’t the end of the world, but it doesn’t make as smooth an end product.
- Don’t be tempted to double the recipe unless you have a stand mixer much larger than the average. The mixture expands hugely while it is whipped and while it cools. (There is no mess quite like the one you get if you overestimate the potential capacity of your mixer bowl when making marshmallows.)
- Remember not to add your extract until the very END of the process. Remember, too, that the rule is to have 1 tablespoon total of extracts. Even when changing up the flavor from vanilla, do maintain at least 2 teaspoons of vanilla extract to go with 1 teaspoon or less of any other extract.
- Be sure to generously oil your hands before working with the whipped marshmallows unless you really dig feeling sticky.
- Don’t rush them. Marshmallows need to rest to set up. Your patience will be rewarded.
- When it comes time to cut them, it’s hard to be too generous when dusting your cutting surface with powdered sugar. They are sticky! Likewise, keep dusting your knife with powdered sugar. (A long carving knife or a large chef’s knife are the best tools for cutting marshmallows.)
Rebecca's Homemade Marshmallows
Ingredients:
3 envelopes Knox unflavored gelatin
1/2 cup cold water
2 cups sugar
2/3 cup light corn syrup
1/4 cup water
1/2 teaspoon salt
1 tablespoon vanilla extract or combination of other flavor extracts
confectioners' sugar
Directions:
1. Line 9 x 9-inch or 8 x 8-inch pan with plastic wrap; lightly oil it using your fingers or non-stick cooking spray. Set aside.
2. In the bowl of an electric mixer, sprinkle gelatin over 1/2 cup cold water. Soak for about 10 minutes.
3. Meanwhile, combine sugar, corn syrup and 1/4 cup water in a small saucepan, whisking only until the sugar is dissolved.
4. Bring the mixture to a rapid boil. As soon as it is boiling, set the timer and allow to boil hard for 1 minute without stirring.
5. Carefully pour the boiling syrup into soaked gelatin and turn on the mixer, using the whisk attachment, starting on low and moving up to high speed.
6. Add the salt and beat for between 10 and 12 minutes, or until fluffy and mostly cooled to almost room temperature.
7. After it reaches that stage, add in the extract and beat to incorporate.
8. Grease your hands and a rubber or silicone scraper with neutral oil and transfer marshmallow into the prepared pan. Use your greased hands to press the marshmallow into the pan evenly.
9. Take another piece of lightly oiled plastic wrap and gently press on top of the marshmallow, creating a seal. Let mixture sit for a few hours, or overnight, until cooled and firmly set.
10. Sprinkle a cutting surface very generously with confectioner's sugar.
11. Remove marshmallow from pan and lay on top of the sugar.
12. Dust the top generously with sugar as well.
13. Use a large, sharp knife to cut into squares.
14. Separate pieces and toss to coat all surfaces with the sugar.
15. Store in an airtight container.
Recipe formatted with the Cook'n Recipe Software from DVO Enterprises.
Sources:
- www.foodiewithfamily.com
- www.epicurious.com
- www.cookingclassy.com
- www.thehappyfoodie.com
 Alice Osborne
Weekly Newsletter Contributor since 2006
Email the author! alice@dvo.com